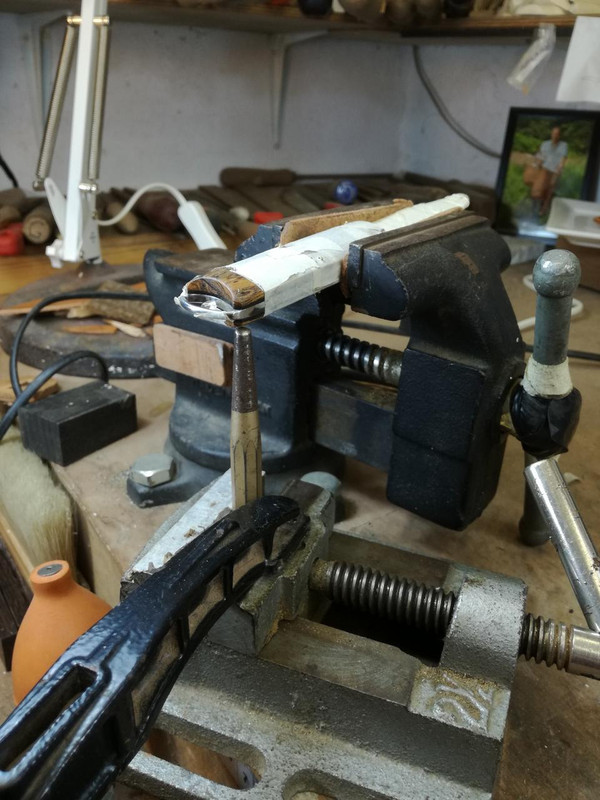
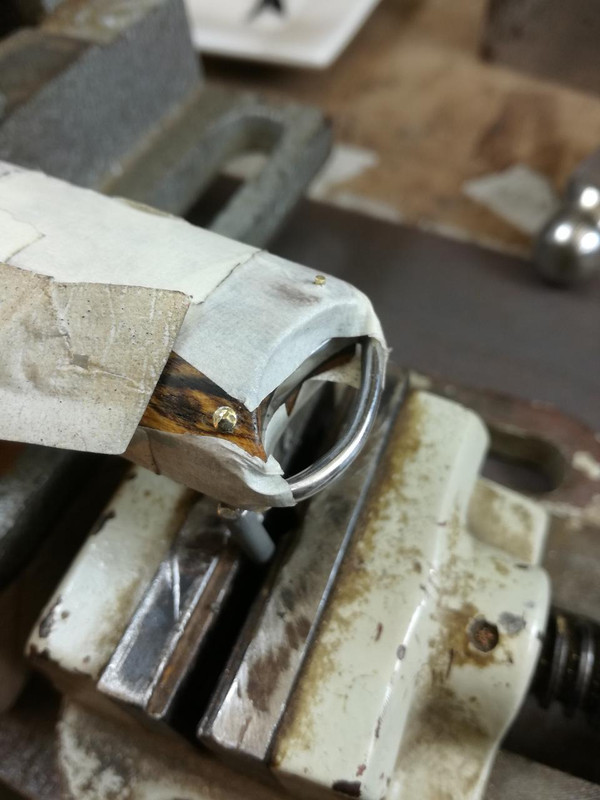
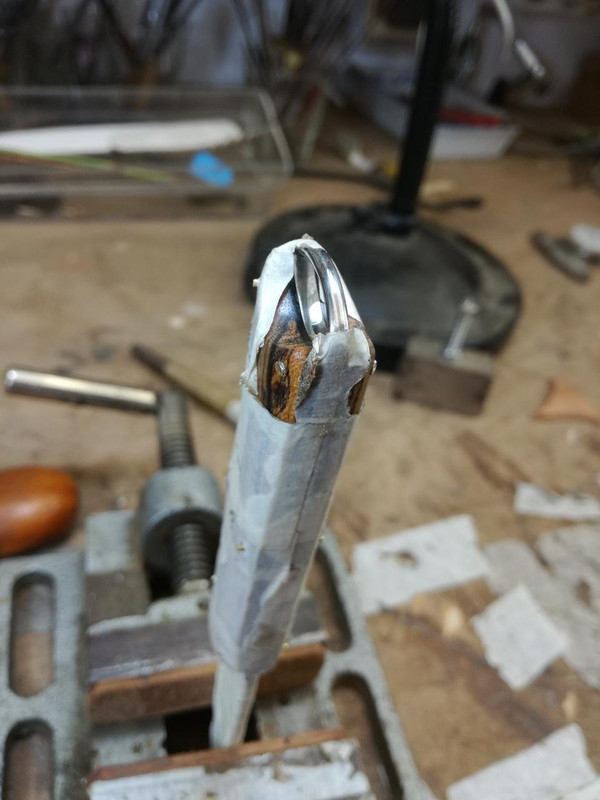
Damascus belduque WIP

Well, it seems You just choose the wrong pin material....brass and stainless steel are not the best choices, as you experienced....bronze tends also to be brittle, depends on the alloy
...in fact stainless would be a incongruous choice, but that is IMHOo_O...the pins should be able to take some patina
Copper( not anealed) works great but do not fit the colors of the whole knife....
Very easy to work is silver and mild steel....mild steel or better said a simple nail...I use nails often because they flow easy and they
are tough in holding the scales and blend in the right material color(well, for most of my knives)....and nails can be found literally everywhere.

Some knives gave me lots of struggle and I often have to do things again, because thats what hand crafts all about....doing the best You can
and bringing yourself to a higher level....step by step
Do not give up!:):thumbsup:
 
Great thread! Thank you for sharing your work, I really like the design, and it's been enlightening to see the struggles you have going through it!
Thanks man! I think is a great thing to share this struggles, that shows we are in constant learning.
I wonder would it help if you cut pins on angle , as in this drawing ?
s8Xg38I.png
Thank you very much for the advice!
Believe it or not, i tried it yesterday before seen your message. It didn't work so well.
But, for your knowledge, I'm getting better on it. I starting to feel more confident and getting better results.
 
Well, it seems You just choose the wrong pin material....brass and stainless steel are not the best choices, as you experienced....bronze tends also to be brittle, depends on the alloy
...in fact stainless would be a incongruous choice, but that is IMHOo_O...the pins should be able to take some patina
Copper( not anealed) works great but do not fit the colors of the whole knife....
Very easy to work is silver and mild steel....mild steel or better said a simple nail...I use nails often because they flow easy and they
are tough in holding the scales and blend in the right material color(well, for most of my knives)....and nails can be found literally everywhere.

Some knives gave me lots of struggle and I often have to do things again, because thats what hand crafts all about....doing the best You can
and bringing yourself to a higher level....step by step
Do not give up!:):thumbsup:
Thanks again for sharing your experiences.
I chose brass because is what i got, and what i think is going to match better my design. I do not attempt to leave it shiny, I'm going to aged it with "perma blue". I've done it before and I like it a lot.
I'm triying to buy some copper wire, but because of covid-19 the stores are closed...
I thought about using nails, even iron wire, but it looks like "cheap" to me, and as you said, I think it will not match with my design.
Maybe i can find some cooper wire online. We'll see...
Give up? I don't know what is that. ;)
 
Don't forget that Nickel Silver (aka German Silver; Argentan etc.) is always a great option for peened pins if you're ever wanting more of a "silver" color in your pins instead of brass or copper. I think it's also called "Alpaca" in Spanish. You may already know of it, but I thought I'd mention it just in case.

~Paul
My Youtube Channel
... (Some older vids of some of the older knives I made)
Of course, no. I have been searching for nickel silver wire since January. It's not that easy to find here, maybe I should look it up at an art store, or something like that. I will ask other artisans here.
Thanks for the advice.
 
Hi everyone!
I'm waiting for the copper wire to come, but in the meantime I started with the sheath. I'm going to make a wooden sheath with copper accessories.
First thing i do is cutting the pre-form with a manual jig saw.
QKsG5Is.jpg

Using the belt grinder, i define the shape.
dCqjNkk.jpg

Then I split it with a handsaw.
gc4MlzG.jpg

I make a groove all around to guide the handsaw.
VYcPj8y.jpg

qJOVGxn.jpg

The following step is to flatten the faces with a jointer (?), I don't know how do you call it. And after that, I use the belt grinder to final touch.
0IPGzMU.jpg

I forged the copper parts for the sheath.
sQXmSIV.jpg

I will start with the hook (?)
First thing i do is to square the faces in the belt grinder.
Then i define the guide lines and drill some holes. I broke two drills doing that... Copper is soft, but it heat up really quickly, and then it "grabs" the drill bits. The solution was to lubricate with wd-40.
8zToyhW.jpg

I cut the excess material with the saw.
z9baGq8.jpg

Starting the shaping.
5qxtabH.jpg

Then i cut and shape this kind of rivets with files.
u7llN80.jpg

I use a mill in the drill press to flatter the surface and define the rivets.
You can see a video of me "milling" on my instagram. I do not recommend to do that, is dangerous.
UYh358l.jpg

Next step is sculping the final shape with files, the belt grinder, and sand paper.
SxDufGT.jpg

Here is the final result.
ScqwBvK.jpg

And here is the hook aged with Perma Blue (actually is another brand), and hand polished.
tT4mIAJ.jpg

E52ydJk.jpg

The idea is to sandblast it, then aged it and do a light polish. I'll do the same with the curb.

I need to know if you think I should put some soft material
 
On those peened pinns it can be done with anealed stainless.
I've done it on irregular surface by aiming more precise. Have a setup with a tapered punch as an anvil and have a tapered punch for the other side as well. That way you can aim the force of the hammer tabs very precice and hammer the mushroom head down where the handle material is lower.

IMG-20180929-122752.jpg


IMG-20180929-113306.jpg


Peened brass pinns, front pin is peened, the one in the back isn't yet.

IMG-20180929-121409.jpg
Thanks for the advice!
I copied the tooling from Nick Wheeler for peening pins.
doWbWnI.jpg

This picture is from last year. I think I should made another anvil due the angle of the belduque's scales. And maybe will be a good idea to fix the block of the anvil to the base by using bolts, it has move more than once making a mess...

Best regards.
 
WIP news:
Copper wire arrived, I asked for 2,5mm diameter and it came of 3mm diameter...
I sent it back.
Conclution: I lost a week...

Besides that, I made some progress with the sheath, but I'm making something special with it, so I don't want to spoil it. You will have some news soon.
 
WIP news:
Copper wire arrived, I asked for 2,5mm diameter and it came of 3mm diameter...
I sent it back.
Conclution: I lost a week...

Besides that, I made some progress with the sheath, but I'm making something special with it, so I don't want to spoil it. You will have some news soon.
Don't you know of some electric motor repair shop ? Thay have lot of copper wire in all dimension ...I bet they will give it free to you....
 
Last edited:
Don't you know of some electric motor repair shop ? Thay have lot of copper wire in all dimension ...I bet they will give it free to you....
Good morning.
Yes, I know some, but I thought they wouldn't have the wire thickness I was requiring. Maybe I was wrong, I don't know, now it's too late.
Nevertheless, I'm very busy finishing the sheath/scabbard, so i'm not too hurry for getting the wire.
Also, copper roofing nails.
I didn't know, it would have been a great alternative. :(
 
Making a grove all around where the holes are.Good evening.
This scabbard is taking me a lot of time. And as if that were not enough, I always fine something to make my life miserable... You'll see.
I start making a groove where the blade should fit.
PBtYhco.jpg

Then I use a chisel to remove the wood.
cQrzabZ.jpg

hBuBY0w.jpg

tTQs1t4.jpg

This is when I start to make things complicated, with all these holes.
2Wiiaec.jpg

I start forming the copper curb.
ZW66Tma.jpg

Shaped with the belt grinder
8NNOXB3.jpg

I made two holes to vinculate the curb to the scabbard. The idea is to put two dommed pins and glue it up with epoxi
wZmNv87.jpg

I 'll use some really old linen (?) for a better fit of the blade, thanks to my mother in law.
QOQherd.jpg

I glued it up.
etAafpX.jpg

Cut the linen excess with a cutter (no picture of that)
zd9iGGN.jpg

Making the groove for the blade in the curb. I make several holes, cut with a jeweler's saw, and use a different files to make it flat.
48MtzOi.jpg

fn6zuu1.jpg

iUMV6YF.jpg
 
Using a rotary file (?) I sculp it to make a perfect fit with the bolsters.
a8II5yB.jpg

Then I use some files
PkHnzeo.jpg

maIDOpE.jpg

And sand paper.
ZyIv9t4.jpg

I sculpt the scabbard in the belt grinder and then I mark the shape in the curb.
lBfmFT1.jpg

yqhTedd.jpg

I make the marks for the holes of the hook. I want it to be aligned with the blade's fuller.
jq2bxGY.jpg

Drilling the holes
N9Rgysg.jpg

I make room to rivet the hook
GqEHBAy.jpg

Here is the scabbard hand sanded and polished. The hook is sand blasted, aged and lightly polished
luEdUzU.jpg

Making a grove all around where the holes are. What is that for? In a few days you will see.
lux4piV.jpg

N4y1Mek.jpg

QTerFHv.jpg

nGDlXB5.jpg

That's all by now. I hope to glue up the scabbard and rivet the hook tomorrow.

Best regards.
 
Hi friends, good morning.
I'm sorry for the delay. I've almost finished, it is taking too much time.
I glued the hook and rivet it. Nothing fancy, just a good fit.
OxFzPLz.jpg

g3zknhz.jpg

I glued the sides and squeeze it on the vise and clamps.
deNvzSo.jpg

Ib1pKuK.jpg

On the other hand, I apply some epoxi on the scales and clamp it.
HHLM00E.jpg

qg7mySC.jpg

Fb1CJDR.jpg

Cutting the pins at the same lenght using a steel plate.
BhhGfOB.jpg

Using files I round them all.
r49x7oL.jpg

Pinning them wasn't easy, I think that I leave them too long...
I fought a lot to pin them the same size, but it hasn't work.
lZgdvps.jpg

I buff them trying to reduce it, i'm not really satisfied with the result.
B8O4LuU.jpg

rNTqybc.jpg

svhqbNA.jpg
 
Next step.
RMywUWC.jpg

What am I doing here? Yes, I'm sewing with copper wire. I got this crazy idea from when I decided to make a wooden scabbard.
UVF8bxQ.jpg

It is not an easy job at all. It is hard to stretch the wire to rest tight on the groves. I had to force it with a screwdriver and a gripper. The risk of braking the wire is high (i made a test before and broke it twice), so you must to be very pacient and not to stretch it too hard.
VSOZVPZ.jpg

For fixing the sewing, I rivet pin peened on the tip. I should have filled the hole with epoxi first, then drill a new hole and then pin rivet, because it hasn't move as i wanted.
LuAuGYK.jpg

Been not satisfied with that pin, I decided to cut the tip and make a new one with copper.
enlaU2K.jpg

Here is the piece of copper I've used.
ryTNXy8.jpg

I flatten with sand paper the tip and drilled some holes to put pins and make a guide for the tip.
72DNgAr.jpg

The tip pre-fitted to the scabbard.
GuS7k6n.jpg

I spent a lot of time shaping it on the belt grinder. This is what it've got.
VZdG5hM.jpg

I've sand blasted the tip, aged it with perma blue, hand polished it and glued to the scabbard. This is the last picture of the process to date.
9m8YZhI.jpg

I leave you two more as a spoiler of the finished job. The curb (?) is not fixed yet in these pictures, and the brass pins will be replaced by copper ones.
CIhcZxj.jpg

68BrxtF.jpg

Best regards.
 
Pablo,
I really like where you are going with this build. Your concepts are really unique. I am looking forward to seeing this completed.
Regards, Steve
 
Pablo,
I really like where you are going with this build. Your concepts are really unique. I am looking forward to seeing this completed.
Regards, Steve
Thank you!!
I think my concepts are getting me under :confused:. Lately, when I've tried a solution or an idea, an issue emerged. The good thing is I'm learning a lot in the process.
I pretend to finish between today and tomorrow, so stick around ;).
 
Back
Top