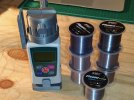
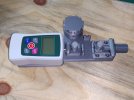
Edge Tester - 3D

Yes, it does slightly snug the test media. That's the point I was trying to make. You can see it happen when you tension it properly.

That's what I thought. My 3D printed one does it too, so I was assuming the aluminum one would do the same.

It is for this reason that I did a lot of testing with slack line compared to slightly tight line and found the most consistency by far with slightly slack line.

Even if you were to use a calibrated weight of 100g to slightly tension the line, the final action of tightening the screw significantly changes the tension in the line. If you wanted to really make sure you get consistent results with a tightened line, then the screw would have to be modified and replaced with a clamp-type screw to make sure the rotational force does not put ANY additional stress on the line.

The much more consistent and predictable way would thus be a slightly slack line, and making sure it stays slightly slack after tightening the final screw.

Because I can load aftermarket line into my 3D printed holder, my test media is so cheap that I can do thousands of tests for almost no money at all. I've definitely found a lot more consistent results with slightly slack line. I've tried the 100g weight, I've tried other weights, and I've even experimented a combination of a 100g weight and tightening the screw with a small torque wrench to make sure I have the same torque on the screw every time. Doesn't matter what I do with line tightening, I still find much more consistent results with a slightly slack line.
 
That's what I thought. My 3D printed one does it too, so I was assuming the aluminum one would do the same.

It is for this reason that I did a lot of testing with slack line compared to slightly tight line and found the most consistency by far with slightly slack line.

Even if you were to use a calibrated weight of 100g to slightly tighten the line, the final action of tightening the screw significantly changes the stress in the line. If you wanted to really make sure you get consistent results with a tightened line, then the screw would have to be modified and replaced with a clamp-type screw to make sure the rotational force does not put ANY additional stress on the line.

The much more consistent and predictable way would thus be a slightly slack line, and making sure it stays slightly slack after tightening the final screw.

Because I can load aftermarket line into my 3D printed holder, my test media is so cheap that I can do thousands of tests for almost no money at all. I've definitely found a lot more consistent results with slightly slack line. I've tried the 100g weight, I've tried other weights, and I've even experimented a combination of a 100g weight and tightening the screw with a small torque wrench to make sure I have the same torque on the screw every time. Doesn't matter what I do with line tightening, I still find much more consistent results with a slightly slack line.

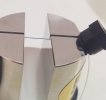
It's not going to snug it that much, not a 100g - maybe 5 or 10g. It is designed to snug it a little if I remember right..
 
It's not going to snug it that much, not a 100g - maybe 5 or 10g. It is designed to snug it a little if I remember right..
If you calculate a slight rotational force combined with a very short distance between 2 set screws holding a thin line, it's actually a lot more than you realize. You can easily go well beyond another 100g, depending on how much the screw is tightened.

There are just too many variables with a tightened line, in my opinion, and in what I've found with thousands of test cuts I've tried by now.

That's why I would say the only real repeatable consistent results will have to be with no slack in the line.

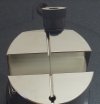
That's not how it works. And it's not a screw, it's a nut. Sorry if I called it a screw. The only thing that tensions the filament is just the friction between the nut and washers, and it isn't much. Buy one and check it out.
 
That's not how it works. And it's not a screw, it's a nut. Sorry if I called it a screw. The only thing that tensions the filament is just the friction between the nut and washers, and it isn't much. Buy one and check it out.
Ah, ok. How do you keep the bottom washer from rotating when you tighten the nut? Does the washer on the bottom not rotate a tiny bit when it starts gripping on the nut and then in turn gripping and rotating the line a little bit? If so, the smallest rotation after this point would tighten the line enough for inconsistent tightening.

If the bottom washer (just above the test line) is a square washer inside a square recess, then it's guaranteed not to tighten the line. If its a round washer, then all bets are off when it comes to knowing how much it tightens the line after it grabs it during rotation.

If it works like a vice clamp and not a rotating nut or washer, then this won't be a problem.

I guess you haven't studied the photos of it very closely. There are two washers, one that contacts the filament and one between it and the nut.
 
I guess they must have changed the design, and perhaps tried to get around this problem with a second washer? You did mention that the line still stretches/tightens a bit when you tighten the nut though, so this would mean it still happens.

I can only see a threaded thumb screw nut and one round washer in the detailed pics I have. Perhaps they figured out it's not consistent and changed the design. In the pics below (same as my 3D design), the round washer will rotate slightly while it grips the line. I just added a second washer to mine and I can still see slight rotation of the bottom washer after it grips the line. It does seem to be a lot less with 2 washers though, especially if the edged sides of the washers face each other. With the smooth sides of the washers facing each other, I get a lot more rotation at the bottom where it grips the line.

I may experiment with changing the my design a bit to try and make more of a vice-type clamping mechanism for the line anyhow.


2.jpg

1.jpg
 
Last edited:
If I have some tension on the fiber, even less than 100g, then mine doesn't change the tension when I snug, read snug, the nut down. It takes VERY little torque from the nuts to hold the fiber in place, don't overdo it. I put a mark on the washer with a sharpie to confirm the washer does not move when clamping the fiber. Mine has a ball bearing washer between the nut and washer so maybe that is a newer feature. As I said earlier I can load any line small enough to fit in my holder just fine, say anything under 1.1mm. I too like to find fault and ways to improve just about anything and the only thing I would change with my holder is the cap on the bottom, but that would increase the price so we know what problems that would create. Well, I would also anodize vs nickel plate but that is just my personal preference.
 
I guess they must have changed the design, and perhaps tried to get around this problem with a second washer? You did mention that the line still stretches/tightens a bit when you tighten the nut though, so this would mean it still happens.

I can only see a threaded thumb screw nut and one round washer in the detailed pics I have. Perhaps they figured out it's not consistent and changed the design. In the pics below (same as my 3D design), the round washer will rotate slightly while it grips the line. I just added a second washer to mine and I can still see slight rotation of the bottom washer after it grips the line. It does seem to be a lot less with 2 washers though, especially if the edged sides of the washers face each other. With the smooth sides of the washers facing each other, I get a lot more rotation at the bottom where it grips the line.

I may experiment with changing the my design a bit to try and make more of a vice-type clamping mechanism for the line anyhow.


View attachment 1659284

View attachment 1659283

That looks like an older model.
 
If I have some tension on the fiber, even less than 100g, then mine doesn't change the tension when I snug, read snug, the nut down. It takes VERY little torque from the nuts to hold the fiber in place, don't overdo it. I put a mark on the washer with a sharpie to confirm the washer does not move when clamping the fiber. Mine has a ball bearing washer between the nut and washer so maybe that is a newer feature. As I said earlier I can load any line small enough to fit in my holder just fine, say anything under 1.1mm. I too like to find fault and ways to improve just about anything and the only thing I would change with my holder is the cap on the bottom, but that would increase the price so we know what problems that would create. Well, I would also anodize vs nickel plate but that is just my personal preference.

Adding 100g weight to the filament makes it tighter than it should be and skews the measurements. Probably a trick people use to make their blades appear sharper than what they really are, IMHO. I guess I wasted my money on my PT50A because I cannot take anybody's measurements seriously anymore...
 
I thought I would share my method of sharpness testing. I created this long before I ever even heard of the BESS so I don’t think I can be accused anything.

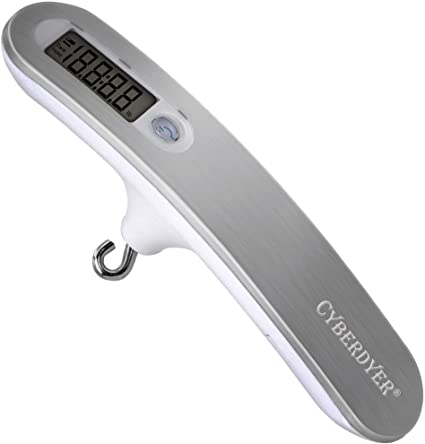
I have 1000 feet of three strand Kevlar. I had bought it for a project but I didn’t need most of it so this became my test media. I simply tie it into a little loop about 2 inches in diameter. And I hang it off of an archery scale that has a peak value so I don’t even have to look at the read out. The scale has plenty of accuracy and sampling rate.

I slipped the loop over my knife at a point where I have marked with masking tape to get consistent results. I set the scale to grams. Then I pull up on the archery scale while keeping the knife stationary. It seems like pulling fast or slow does not change the result and I get extremely consistent results with each knife.

I think if I can find a conversion factor I can convert this to BESS data. That is what reading this thread has been helpful for. It seems to be a linear scale based on force so I’m gonna test those razor blades and see what number turns my grams into the accurate BESS number.

This whole set up cost me less than $20 and so I thought I would share it. Even if it’s not compatible with other measures it’s very consistent with itself.

 
Last edited:
Adding 100g weight to the filament makes it tighter than it should be and skews the measurements.
That is what the Edge On Up makers specify. It is not what users are randomly coming up with.
 
That is what the Edge On Up makers specify. It is not what users are randomly coming up with.

Must be a new thing because that isn't what they said when I bought mine. I really don't understand why people make such a big deal out of it. It's really quite simple: just lightly pull the test media until it is straight and not sagging. Then lock it down. Simple. Even a fifth grader can do it.
 
I like your idea, but why waste expensive (?) stuff when any media will do? You are comparing apples to apples, using any media will yield comparable results, right? I think using Kevlar is overkill. I am playing devil's advocate here, don't get me wrong. But to that end, isn't testing just one tiny spot on the blade liable to skew your results because you might be on top of a piece of carbide sticking up? Like, if you dragged the blade for an inch or two at l you would be "sampling" a more diverse area of the blade.
Maybe I am completely mistaken, I don't mean to belittle your experiment and I am interested in what you think about this and your results too.
 
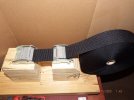
I don't even use my PT50A anymore. It's in the box underneath my bench. I test my edges on my 2" HD Poly/Nylon Webbing Strap. The strap also removes any burr. A dull edge will not cut the strap. Then I carve up some printer paper.

Strap Holder-8a.jpg
 
I thought I would share my method of sharpness testing. I created this long before I ever even heard of the BESS so I don’t think I can be accused anything.

I have 1000 feet of three strand Kevlar. I had bought it for a project but I didn’t need most of it so this became my test media. I simply tie it into a little loop about 2 inches in diameter. And I hang it off of an archery scale that has a peak value so I don’t even have to look at the read out. The scale has plenty of accuracy and sampling rate.

I slipped the loop over my knife at a point where I have marked with masking tape to get consistent results. I set the scale to grams. Then I pull up on the archery scale while keeping the knife stationary. It seems like pulling fast or slow does not change the result and I get extremely consistent results with each knife.

I think if I can find a conversion factor I can convert this to BESS data. That is what reading this thread has been helpful for. It seems to be a linear scale based on force so I’m gonna test those razor blades and see what number turns my grams into the accurate BESS number.

This whole set up cost me less than $20 and so I thought I would share it. Even if it’s not compatible with other measures it’s very consistent with itself.

Can you post the comparison numbers when you work them out. I can buy one of those here for less than $20. Would love to set your system up if i knew how to compare the numbers. :thumbsup: :)
 
I've changed the design to work with a VERY accurate force meter that saves peak values. Trialing lots of different line types and thicknesses bit 0.2 fluorocarbon works well!

IMG_20220525_195453.jpg
IMG_20220525_231237.jpg

Another alternative design with small vise to pre-adjust tension:
IMG_20220524_121054.jpg
 
I like your idea, but why waste expensive (?) stuff when any media will do? You are comparing apples to apples, using any media will yield comparable results, right? I think using Kevlar is overkill. I am playing devil's advocate here, don't get me wrong. But to that end, isn't testing just one tiny spot on the blade liable to skew your results because you might be on top of a piece of carbide sticking up? Like, if you dragged the blade for an inch or two at l you would be "sampling" a more diverse area of the blade.
Maybe I am completely mistaken, I don't mean to belittle your experiment and I am interested in what you think about this and your results too.

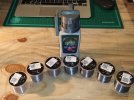
Oh the Kevlar is not expensive. I dare say it’s actually cheaper than fishing line. 1000 foot reel cost me $20. It’s easy to tie into a loop which fishing line is not. This saves me the trouble of having to make a jig to mount the line in.

As far as testing a certain spot along the blade, that would be the same problem that the Edge Up tester has isn’t it? I just usually test a few points along the blade. The middle and a point closer to the tip and one farther toward the choil. So far my results have been consistent all along the blade.

This is the same scale I use for my homemade trigger pull gauge. Those things cost up to $100 and get a far less consistent results than my little homemade set up. I bent a coat hanger wire and put heat shrink wrap on the end. To protect the trigger. This gives me a two for one set up.

The real test will be coming up with the number that converts my razor blade result to a BESS result. The problem is I have to have blades with known BESS results to test that against. I don’t know anyone local with an Edge Up. Is there something you can buy with a known BESS number In addition to a razor blade? Preferably something in the 100 to 300 range?

If the scale is linear then it will be easy. As in (grams of force) multiplied by X equals BESS. But since the BESS number supposedly describes the apex radius in nanometers, the relationship of force to BESS might be on a curve rather than linear and the result might require a more complicated equation.

Isn’t somebody here using an Arduino? I would think they would know the math needed to convert grams of force into the BESS number.
 
Can you post the comparison numbers when you work them out. I can buy one of those here for less than $20. Would love to set your system up if i knew how to compare the numbers. :thumbsup: :)
I think I answered your question in my previous post. It depends if the relationship of force to the BESS result is linear or on a curve. It’s still math and it’s obviously what the Edge Up scale does. It converts weight, which is just another way of saying the force of the cutting blade, into a BESS number using a known test medium. It’s just a matter of finding out what the equation is, and then adjusting it for whatever test medium you happen to be using.

Anyone with a scale and a piece of string and figure out the force required to cut something with a given blade. But you need either blades of a known BESS number to calculate a conversion, or you need to know the mathematical relationship between applied cutting force and BESS.
 
I would think they would know the math needed to convert grams of force into the BESS number.

The Edge on up BESS number is actually already grams of force, based on cutting approximately a 0.2mm fluorocarbon fishing line.

If you get yourself some 0.2 fluorocarbon line, that could be your direct comparison.
 
Back
Top