Folder WIP

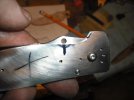
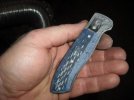
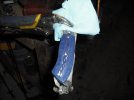
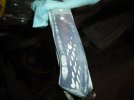
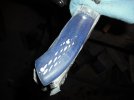
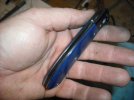
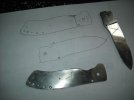
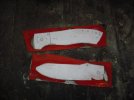
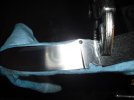
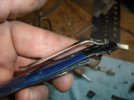
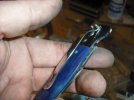
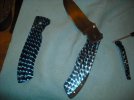
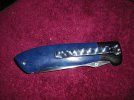
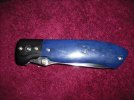
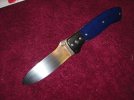
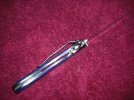
Alright, everything pretty much functions like a knife, it's time to start finishing it up. I start by cutting the thumb bob cut out on the liner opposite the lock bar. This lets the thumb bob clear the liner and give your thumb better purchase on the lock to disengage it. I do this without the handle or bolster on, I will grind it out after finishing the handle to keep from getting too thin on the corners. Next put the liners together without the blade. I put a piece of mycarta in where the blade would go to space it out. Go to the belt grinder and finish the edges. I then rough in the contours.

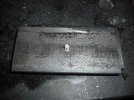
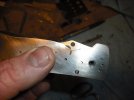
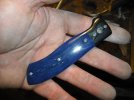
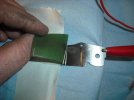
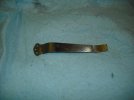
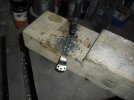
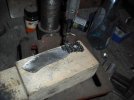
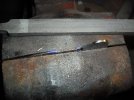
Here's a simple jig I made to cut the alignment pins to length. I haven't found pins in the length I need so I have to trim them. This is basicly two pieces of 1084 with a hole drilled and reamed in it. Just grind flush and your there.
 

Attachments

  • DSCF00332.jpg
    DSCF00332.jpg
    36.4 KB · Views: 45
  • DSCF00342.jpg
    DSCF00342.jpg
    71.8 KB · Views: 45
  • DSCF00392.jpg
    DSCF00392.jpg
    32.4 KB · Views: 44
  • DSCF00402.jpg
    DSCF00402.jpg
    38.6 KB · Views: 48
  • DSCF00412.jpg
    DSCF00412.jpg
    48.7 KB · Views: 60
Time for hand finishing. I really envy people that can come straight off the grinder with a nice finish. Me I have to resort to sandpaper and elbow grease.

This is my high tech holder. Take the liners apart. I use a folded up paper towel and vise grips to hole the liner and handle down. Shoe shine and work back and forth, ect. with sandpaper. Be careful not to take too much off the edges and corners. I like to blend everything together, but I try not to take too much off. I work through paper sizes, work one end of the handle at a time, swap ends and work the other end, back and forth till I get it where I want it. A light buff and it looks pretty good. Buffing will also show any remaining scratches. Also while I've got the handles on the liners and the liners separated I use the small wheel on my horizontal edge grinder to cut the handle and bolster to match the cut out for the thumb bob. I use a fine grit belt to finish it and light sand it and buff. I do this after finishing the handles, it give a crisp transition where if I'd put it in before hand finishing it would have blended in and possibly made the liner proud at the corners.
 

Attachments

  • DSCF00432.jpg
    DSCF00432.jpg
    36.9 KB · Views: 42
  • DSCF00442.jpg
    DSCF00442.jpg
    38.5 KB · Views: 42
  • DSCF00462.jpg
    DSCF00462.jpg
    36.4 KB · Views: 45
  • DSCF00472.jpg
    DSCF00472.jpg
    54.8 KB · Views: 74
  • DSCF00572.jpg
    DSCF00572.jpg
    43.9 KB · Views: 61
Last edited:
Now that I've got a decent working folder and like the design it's time to make the pattern. Funny how that works out. I use the blade and liner and a fine point mechanical pencil and trace them out. I cut them out and use white glue to attach the pattern to pieces of scrap sheet metal I've got. When the glue dries I'll drill all the holes and cut the profile out on the band saw. Then I've got a chance of repeating this design.

I finish the blade up, again with my high tech clamp, vise grips and a piece of mycarta to hold it down with a piece of paper towel under the blade to prevent scratches. I take it up to 1000 grit finish then etch my logo. I use the Personalizer, it's the lower powered one. I etch for 2 minuets then mark for 2 minuets. It gives me a black etch that is as deep as most stamps and won't rub off. Different etchers will perform differently.

Clean the blade with windex and lightly hand rub the blade with 1000 grit again to remove any cloudiness. Clean the blade and dry.
 

Attachments

  • DSCF00602.jpg
    DSCF00602.jpg
    30.6 KB · Views: 35
  • DSCF00612.jpg
    DSCF00612.jpg
    44.9 KB · Views: 38
  • DSCF00672.jpg
    DSCF00672.jpg
    38.3 KB · Views: 42
  • DSCF00673.jpg
    DSCF00673.jpg
    44.1 KB · Views: 37
Time to make the pocket clip. I use an old stainless clip I got from a somewhere as a pattern. I think it was one I order years ago when I was first experimenting with folders.

I use a small brazing tip on my torch and a couple pair of cheap pliers that I ground the teeth out of the jaws to heat and bend the clip to shape. Here's a test fit that shows it needs some more bending. And a final test fit, that's about what I'm looking for. I use the horizontal edge grinder and small wheels and different belts to work it down and get it smoothed up.

Then I jewel the flats. I use a jeweling tool I got from Brownell's. It uses wire brushes bound with heat shrink tubing and a spring loaded bit. Works pretty slick and makes the job a lot easier. First few times I jeweled anything I used eraser and cutting compound, this does a nicer job a lot faster.
 

Attachments

  • DSCF00692.jpg
    DSCF00692.jpg
    42.9 KB · Views: 54
  • DSCF00752.jpg
    DSCF00752.jpg
    38.8 KB · Views: 40
  • DSCF00772.jpg
    DSCF00772.jpg
    45.8 KB · Views: 46
  • DSCF00802.jpg
    DSCF00802.jpg
    49 KB · Views: 47
  • DSCF00822.jpg
    DSCF00822.jpg
    60.1 KB · Views: 40
I mark where I want the serration's for the lock bar. I usually put them rite where the cut out for the thumb bob goes. If your wondering why there appears to be jeweling it's because I was getting ahead of myself and had to stop and back up. I use a checkering file and cut them in.

Time to jewel the liners. After I finish the liners I use 600 grit paper to dress the edges, it looks better anodized than polished ti and wears a little better. I use WD 40 to clean the cutting compound off the liners and pocket clip, then clean and scrub with dawn and water, dry and clean with acetone. Any oil or finger prints will block the colors when anodizing.

And a shot of my high tech red neck anodizer. Looks crude but works well. I've got a test piece of ti that I use to check my colors.
 

Attachments

  • DSCF00832.jpg
    DSCF00832.jpg
    55.8 KB · Views: 40
  • DSCF00852.jpg
    DSCF00852.jpg
    42.4 KB · Views: 42
  • DSCF00853.jpg
    DSCF00853.jpg
    87.4 KB · Views: 41
  • DSCF00892.jpg
    DSCF00892.jpg
    49.6 KB · Views: 55
  • DSCF00902.jpg
    DSCF00902.jpg
    72.4 KB · Views: 45
Last edited:
Here's the liners and pocket clip anodized and cleaned up.

Here's a trick on the thumb bob. It had a less than perfect finish. I cut the head off a long screw and used the battery drill to hold and spin the bob. Spin it against sand paper and when buffing. Just make sure your going the rite way with the drill other wise you'll never find the thumb bob.

Time to put everything together. I use blue medium strength thread locker on all the screws. During assembly I put one drop of turbine oil on the pivot, no more. The flat that keeps the pivot from rotating will hold the oil.
 

Attachments

  • DSCF00912.jpg
    DSCF00912.jpg
    48.2 KB · Views: 39
  • DSCF00932.jpg
    DSCF00932.jpg
    29.3 KB · Views: 43
  • DSCF00952.jpg
    DSCF00952.jpg
    51.3 KB · Views: 61
Here's the finished product. It's resting comfortably in my pocket. This is going to be my EDC for the next little while, should give me ample opportunity to test my heat treat recipe. The bone turned out very nice, I was expecting to see some mottling, but it was blue through and through.
 

Attachments

  • DSCF0099.jpg
    DSCF0099.jpg
    98.4 KB · Views: 83
  • DSCF0100.jpg
    DSCF0100.jpg
    98.4 KB · Views: 91
  • DSCF0104.jpg
    DSCF0104.jpg
    74.1 KB · Views: 103
  • DSCF0107.jpg
    DSCF0107.jpg
    101.2 KB · Views: 83
  • DSCF0108.jpg
    DSCF0108.jpg
    100.6 KB · Views: 70
that looks really nice man wish i could do that well on my folding project. i guess if i take my time :)
 
Back
Top