Free 2 x 72 belt grinder plans - 2020 version

Joined
Feb 4, 2013
Messages
229
Hello,

I have been designing and building my own version of a 2x72" belt grinder for a number of years and I made some modifications over the years to where they are now. Recently, a talented CAD user (who was building a grinder off my plans) was courteous enough to model the grinder and each part within a CAD platform and print the plans to PDF.

Since I have posted my initial plans on this forum and a few other forums in 2018, I have been emailing these out to at least a couple people each week. I wanted to share the updated plans with you all and if you check out the plans link below you will see my updated plans including the CAD models.

I also included a link to a build along where I show how to make one of these (which does necessarily not require a mill or really much more than a typical woodworking shop's tool set).


Make one!


Thanks


Brad


Build along link ->

https://www.bladeforums.com/threads/2x72-grinder-build-2018.1577263/


Pdf of plans and parts list->

https://f001.backblazeb2.com/file/dc...inder+2020.pdf
 
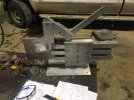
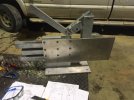
I got a start on mine! I have 3 short days into it so far and it’s coming along nicely. It won’t be as pretty as Brads, but should function well. For tools I have a mini mill and chop saw with carbide blade. The tutorial has been a huge help and easy to follow. 0586C671-A3C6-4126-BE65-8DC7CA9C1C0C.jpeg B0C2878F-1FBA-46B4-99A8-52C296476E24.jpeg
Thanks B bjansen
 
I got a start on mine! I have 3 short days into it so far and it’s coming along nicely. It won’t be as pretty as Brads, but should function well. For tools I have a mini mill and chop saw with carbide blade. The tutorial has been a huge help and easy to follow.
That looks great! How did you get the recess for the motor machined so cleanly?
 
I used 2 ply 1/4” sheets there, so cut a hole in one. Had a 4’x4’ sheet left over from another project.
 
Nice work! Another way to get that motor face clearance is to simply drill a 4.5” hole all the way through the .500 sheet. It will work just as good.
 
Thanks guys! I have a quite a way to go yet, still have to make a platen, a work rest, get VFD and 220 wired in my shop.
 
I used 2 ply 1/4” sheets there, so cut a hole in one. Had a 4’x4’ sheet left over from another project.
Clever! I thought you had some type of cutter that would give you a near mirror finish with no tool marks on a mini mill!
 
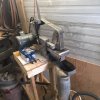
Got it running!!!
I’m very happy with the way it works. Tracking works great and belt runs straight. I only have a
1 hp motor, but it seems to be enough ($50 g sale find). I went with a cheap Chinese VFD so I wrapped it in a piece of furnace filter. Overall I put about 30 hours into it, including the platen and rest.

Thanks for sharing Brad!!!7F7AF67A-6A54-4EB7-90A6-9896D1C152BD.jpegB452E9DC-57C5-41E3-9AE6-C7DD71799F6C.jpeg
 
Thanks guys!
I this build was easier than I expected, my only regret is not doing it sooner. I’m going keep my eyes open for a 2 hp motor and upgrade later. I have the nylon wheels from OBM, they are tracking good, so I’m not in a rush to upgrade them right now. Ground on it for about 8 hours this weekend and loving it!
 
Solid looking machine, Im waffling between building my own or buying one. May I ask your estimate of cost for materials to build that machine minus your motor and VFD?
 
In the photo it looks like the VFD is wrapped in plastic? Is the wrapping breathable or airtight?
You are best to mount the VFD in a plastic storage box around the size of a shoe box. That will give it plenty of air space to vent the heat. Some folks put a small pancake fan in the box. It does not really need a vent slot as long as the air in it is moving and can transfer the heat to the plastic and thus outside the box. We don't run our grinders long enough at a time to really have a heat issue with the VFDs.
 
I am interested in the CAD generated PDF files.
thanks
Will
The "PDF file" has a link to the PDF file with hand drawings and dimensions of all the parts.

Stacy, Agreed the photo looks wrapped in plastic. A MUCH better option than wrapped in plastic is a filter placed over each air inlet.
 
Back
Top