- Joined
- Oct 24, 2007
- Messages
- 2,655
very nice Nathan!
The BladeForums.com 2024 Traditional Knife is available! Price is $250 ea (shipped within CONUS).
Order here: https://www.bladeforums.com/help/2024-traditional/
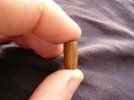
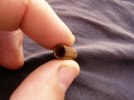
PJ, the ironwood bead is a great idea. I'm going to have to do some searching to find some as I don't have a lathe to turn down my own. I'll also have to pick up some leather tooling sometime as well. I've always stayed away from heavily carved and tooled sheaths, as I think simple and understated is appealing (I'm a firm believer in Occam's razor for most things), but maybe a basket weave stamp pattern would work well for this sheath.
The clips for these sheaths were bought at my local Tandy store. The guy that runs the store orders them from an independent supplier and uses them in holsters. They're a bit more expensive than the standard, and they're not typically stocked by most Tandy stores. This clip is similar, but not the same one.
Thanks again for the comments everyone!
--nathan
")