-
The BladeForums.com 2024 Traditional Knife is available! Price is $250 ea (shipped within CONUS).
Order here: https://www.bladeforums.com/help/2024-traditional/
You are using an out of date browser. It may not display this or other websites correctly.
You should upgrade or use an alternative browser.
You should upgrade or use an alternative browser.
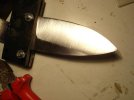
grinding blades
- Thread starter gary lane
- Start date
- Joined
- Jul 14, 2004
- Messages
- 2,623
I just start my plunge closer then i want it to end,when im finishing with a 50 grit belt i push my plunge back as i'm moving toward the tang..,get it as close as you can with a rough belt then follow with progressing grits.i had a hard time sculpting the plunge starting at the plunge.i find it much easier to push it back.
- Joined
- Dec 2, 1999
- Messages
- 9,910
I just start my plunge closer then i want it to end,when im finishing with a 50 grit belt i push my plunge back as i'm moving toward the tang..,get it as close as you can with a rough belt then follow with progressing grits.i had a hard time sculpting the plunge starting at the plunge.i find it much easier to push it back.
I do it this way also. Sometimes I still use my file guide and move it back a step at a time. Gator belts and cratex wheels on the dremel for clean up followed by hand sanding. This allows easier clean up because it is a sweeping plunge.
- Joined
- Jun 2, 2007
- Messages
- 1,354
and it helps to have a belt that runs true and with no wobble ! (which i have seem to get a lot of in this batch of belts!)
- Joined
- May 21, 2007
- Messages
- 530
One trick that I have found is to take a scotch brite belt and place an 80-400 grit belt (depends on where you are in the process, pre HT, Post Ht or finishing) on top of the scotch belt Then mount the sandwiched belts on the grinder this help tremendoulsy in keeping the plunge cuts smooth and even as it is not so aggressive and without the belt bump allows for a great grind. When pushing back towards the ricasso the blade grinds will be smoother and tends not to jump out of the grind pocket. Hope this helps. This is a trick taught to me by a very skilled knifemaker.
- Joined
- Nov 2, 2007
- Messages
- 84
I can't quite get the picture of this in my mind. How it works. Can you send an email attachment with a picture of this on your blade?
- Joined
- Dec 13, 2006
- Messages
- 2,415
If you belt wanders too much grind short of where your tape is and then file the plunge prior to HT. After HT be real carefull to not let the belt slip up the plunge and round it. If you have ground to about a dime thickness it wont take much to finishe the edge and keep a nice plunge. I have noticed that the best plundges are on thicker blades, just a little easier to protect a deep plunge than a shallow.
- Joined
- Nov 29, 2005
- Messages
- 475
Grind carefully :]
..I use the method where you start it further out than you want it then work it back a bit (Or else it'll work itself back anyway, it seems). I also have a sanding bar I made myself where one edge is a radius that finishes plunges nicely.
..I use the method where you start it further out than you want it then work it back a bit (Or else it'll work itself back anyway, it seems). I also have a sanding bar I made myself where one edge is a radius that finishes plunges nicely.
- Joined
- Oct 6, 2008
- Messages
- 4,076
Great thread, and great answers. Thanks all!
Bill DeShivs
Knifemaker / Craftsman / Service Provider
- Joined
- Jun 6, 2000
- Messages
- 12,956
A simple jig made from angle iron works fine. Use 2 pieces in a "T" shape about 2" long. Drill them on either end and insert bolts. Clamp your blade in and tighten nuts on the bolts. You can't grind past it, and it's easy to put back in the same position after heat treating. If you weld the bolts or nuts to the angle iron it makes it easier to use.
These work like a file guide, but are cheap and easy. I fone ever gets ground up you can just make another. Jigs like this don't have to be hardened. You can even weld a handle on it.
These work like a file guide, but are cheap and easy. I fone ever gets ground up you can just make another. Jigs like this don't have to be hardened. You can even weld a handle on it.
- Joined
- Oct 30, 2002
- Messages
- 3,974
Agreed, I made a grinding stop out of 440C, and it's not hardened. But it has lasted me for quite few blades so far. You can always just touch up the flat edge on the grinder. It works well just to give you stop/start for your grind. However, it won't work well for files. Those need to be hardened.
--nathan
--nathan
- Joined
- Jul 28, 2006
- Messages
- 3,953
I use a chainsaw file and a hardened steel file guide to grind my plunges in, then I go to a 220 j-flex to finish them out.
- Joined
- Nov 11, 2008
- Messages
- 18
Can ya show a picture of how your basic jig looks? how do you adjust for different grind angles ect? Newbie question...sorry!
- Joined
- Jun 28, 2007
- Messages
- 3,215
I'd be very interested in that as well.
Bill DeShivs
Knifemaker / Craftsman / Service Provider
- Joined
- Jun 6, 2000
- Messages
- 12,956
I can't post attachments. Take 2 pieces of angle iron. Place them together like a "T." Drill 2 holes-one at either end on one of the flats. Run a bolt through each hole. Tighten a nut down on the bolts to hold the iron together. Tack weld or braze the nut to the angle iron. Loosen the bolts, slide your steel in, tighten, and start grinding.
You can do this with flat metal bar, also.
You can do this with flat metal bar, also.