How To Hamons

To be fair, I've been happy with all my previous heat treating there including some unusual requests like a Damascus pommel tempered back into the 40s of hardness. This is my first batch of W2 with them and first time shooting for a hamon. If I have time today I'll take it to 400 grit and try to etch again.
 
To be fair, I've been happy with all my previous heat treating there including some unusual requests like a Damascus pommel tempered back into the 40s of hardness. This is my first batch of W2 with them and first time shooting for a hamon. If I have time today I'll take it to 400 grit and try to etch again.
F7F6CAE2-885A-46CA-8C85-2696B0CB6EF5.jpeg8982FC7D-A92D-4C9F-9481-6227FE395B18.jpeg
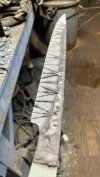
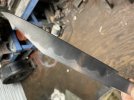
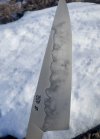
Here are two examples. The first photo is 120 grit with a quick etch to see the pattern and the second is an example of my typical clay layout, obviously the hamon looks nicer as you take it up in grit but you should be able to see it even at a low grit and often without having to etch, etching it at low grits just helps it show up on camera.
 
So a couple things, you should be able to see the hamon at 120-220 grit on the grinder, so makers will often make one or two clean up passes after quenching to see what kind of activity they got before tempering in case they want to redo the heat treat, personally I like to get W2 blades in the temper as soon as possible so I prefer to check after tempering. I mostly use .100” stock and will make 9.5” chef knives and 12” carving knives and I grind them 80% before heat treating leaving the edge between .040-.060 and bringing the grind all the way to the spine unless I want a bevel line like on a yanagiba. Like others have said the more you grind after heat treating the less activity you may have, I’ve done blades that I ground entirely post heat treat and you still get a hamon but not nearly as active. Here is an example, the first blade I did more grinding post heat treating and it’s a fairly simple line, the second blade was closer to finish and has a lot more activity both clayed the same but geometry plays a important role in hamon development. You can heat treat W2 in a forge but you have to learn to hold the temp by passing the knife in and out of the forge. That’s how I started and would hold the blade at temp for 5 minutes then quench, the down side is it’s much harder to make minor corrections like you can in a oven if I want my hamon line to go down closer to the edge and get more activity I can lower my austenizing temp 5-10 degrees, or I want it to go up closer to my clay I do the opposite or let it soak longer. Warps in my opinion are part of it since you are purposely putting stress into the structure of the steel, I use a carbide hammer and straight as I finish grind after the blade is fully tempered.
View attachment 1718898View attachment 1718899
I have seen you mention before that you use a carbide hammer for warps. I might sound silly asking this but where did you get your carbide hammer for doing so? Are there any tricks to getting warps out with it? I'm asking because I could use one 😅.
 
I have seen you mention before that you use a carbide hammer for warps. I might sound silly asking this but where did you get your carbide hammer for doing so? Are there any tricks to getting warps out with it? I'm asking because I could use one 😅.
I got mine from Jarod Todd, unfortunately his website no longer has them available so I’m unsure if he is still making them. They are simple to make I just liked the ones he made and wanted to support another craftsman. You can make one by putting a hole in a small hammer face and inserting a carbide rod then shaping it with diamond abrasives, I like a round tip but traditionally they would be like a chisel with a straight edge. The round divots are more pleasing aesthetically if they end up in the final piece but 99% of the time they grind out in one or two passes with a 120 grit belt. My procedure is to temper the blade twice before doing any straightening then once I’m ready to start grinding I’ll go to the anvil and check for warps and straighten as needed, at this stage I’m looking for the edge to be perfectly centered and straight and the rest of the blade about 90% straight, then I’ll start my finish grinds starting with either a 36 or 50 grit belt depending on the size of the knife, if I grind perfectly even on both sides the blade will stay straight but occasionally I’ll have a slight warp that needs removed where one side maybe moved more than the other so I’ll go back to the anvil after the first coarse belt and do my final straightening. At that point I go up to a 120 belt to remove the coarse scratches and the straightening marks. From there I take the blade up to what ever grit I choose to end on, for W2 that’s normally between 400-600. You want to use the hammer to work the inside of the warp/bow so think of the blade like a banana, I would use the hammer on the middle of the curve with the two ends facing up and the middle facing down on the anvil and you can often see or feel the two ends flattening down to meet the anvil as the material is stretched in the middle. I have some blades to straighten today that I may take a video showing parts of the process and will post it here if I do.
 
Update: Brad confirmed it was a mix-up with the order and it got processed for uniform heat treat. Glad I'm not going crazy. I did take one side to 400 grit yesterday and etch and it all responded the same.
They want to make it right, so I will send it back for annealing and another shot at it.
Joshua Fisher Joshua Fisher thanks for your kind offer, I expect I'll touch base with you in any case, if not for this, then for a seax I have in progress.
Glad they are going to make it right, feel free to reach out anytime if you have a blade you’d like heat treated for a hamon. Not planning on heat treating as a business and wouldn’t charge anything for it just like to help another maker if possible.
 
Glad they are going to make it right, feel free to reach out anytime if you have a blade you’d like heat treated for a hamon. Not planning on heat treating as a business and wouldn’t charge anything for it just like to help another maker if possible.
Appreciate it, PM sent.
 
Update: I got the Bowie back again from Peters' and this time I could see evidence of a hamon even through the saran wrap packaging.
The blade was an unfamiliar light gray color which Brad tells me is from cleaning up with sand blasting (to remove clay and other residues).
The blade is perfectly straight and I look forward to finishing the grind and etching.
In the mean time I sent Joshua Fisher Joshua Fisher a seax for him to work his hamon magic on, so I had better get my etching tank ready.
5RyJZay.jpg
 
Well, this is the Bowie after some polishing and etching. The grind is finished and the blade is sharp.
I had the soft middle portion darker, but went too far with the etching and the entire blade was too dark for how I imagine this project.
I sanded it down starting back at 600 and working up to 1500 before doing 5 or 6 short etching cycles with light polishing between.
I left the swedge dark which makes a nice contrast.
I'm putting it aside for now to work on the handle pieces.
3wzfdoU.jpg
 
View attachment 1727007View attachment 1727008
Here are two examples. The first photo is 120 grit with a quick etch to see the pattern and the second is an example of my typical clay layout, obviously the hamon looks nicer as you take it up in grit but you should be able to see it even at a low grit and often without having to etch, etching it at low grits just helps it show up on camera.
on the 2nd pic, why would you want the clay running down to the edge of the blade? Won't those points be softer?
 
Richard:
After etching the blade do selective polishing of the ha (bright and hard steel) areas. Use a paste polish like Flitz and a soft, clean cloth. It will give a great contrast to the dark Ji (softer and darker steel)

HSC, the ashi lines don't carry the hamon to the edge, but they cause a clustering along the hamon that makes unique peak features and clouds.
 
on the 2nd pic, why would you want the clay running down to the edge of the blade? Won't those points be softer?
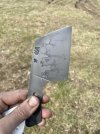
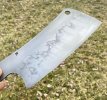
I’ve never had it affect hardness at the edge, I use hardness chisels for checking hardness which I know is a relative test but they work great for testing hardness at the very edge and the blades I clay in this way always end up consistent down the entire edge. Like Stacy said the lines help develop the pattern beyond just a straight line, I find it gives much more random and organic hamons. The first picture is Richard’s blade, can can see the faint shadows of the lines even at a low grit test etch we opted for bring the clay up at the base of the blade to make sure the tang was stronger and didn’t act as a stress riser in the quench. The photos after are some examples of finished blades I’ve done that were clayed the same way, where the lines cluster you get peaks in the hamon but you also get shadows and clouds around the lines. I polish lengthwise to 400 grit then start a series of 5 etching cycles, between each cycle I scrub the blade with 3000 grit paper then 5000 and after the final cycle I use white diamond automotive polish. Each cycle is done in ferric for 30 seconds or less. I consider this to be a darker hamon opposed to the high polished hamons that the ashi is white instead of black. This is also what I prefer for working blades as the etched surface seems to resist rusting and oxidation more than just a bare blade.
EE5A9E27-D48C-41C6-958F-38913D9DBA8F.jpeg16E0F59D-F138-4D9D-9D7B-90E32607F833.jpeg428593D0-7C2D-4850-89BD-75730A19E52B.jpegD329A398-1479-4120-868A-D88C08B45783.jpeg
 
Excellent photo of what ashi lines can create. None of those clouds would be there without the thin ashi clay lines.
 
I took another crack at etching the Bowie, following Joshua's polishing procedure.
I was doing great until I did the White Diamond metal polish on the last cycle.
It completely muddied everything and looked much worse than the last few cycles.
I scrubbed a bit with trizact 3000 and did 2 more cycles without the metal polish (just the trizact 5000).
The contrast is very clear. I might mess with it a little more...
SblkJ1n.jpg
 
When "developing" the hamon in the last polishes, use selective polishing. Use polishes that give a darker color to the ji (above the hamon) and ones that leave a crisp white and non-shiny look to the ha (edge area below the hamon). Also, various etchants are used to give the silver/frost or matte look. 100:1 nitric acid works well. as do lemon juice, vinegar, and very dilute FC. Each gives a different look.

Polish with a folded gun cleaning pad or similar cloth piece and your fingertip. I use the round makeup removal pads that come in tubes of 100. I fold it into a triangle and can polish right along the hamon. In tight places, I use a sharpened popsicle stick on the pad to accent the hamon details.

Most togishi use a variety of oxide polishes to attain the look they want. Everey steel type and each individual blade will be a bit different, so you may have to try two or three before you get what you want.
A good kit includes rouge (red oxide), chromium oxide (green oxide), magnetite powder (black oxide), yellow oxide (hydrated iron oxide), cerium oxide (pink oxide), tin oxide (white rouge), fine alumina powders (alumina A and B), and various very fine silicon carbide abrasives (valve polishing and lapidary compounds) are the most common. Diamond pastes are wonderful, but more expensive.
Choji oil (clove oil) or plain mineral oil is a good carrier. The good starter kit can be put together for around $50-100 and will last for many. many swords/knives.
EDM and die polishing sticks up to extremely fine grit can be found at industrial supply places.. These can work like hazuya and jizuya stones. Cratex sticks can be used, too.
 
I got the seax back from Joshua Fisher Joshua Fisher , and finished the grind to sharp.
On the Bowie I did previously I had polished to 2000 grit and I had very different behavior than Joshua reports.
I found that the 3000 and 5000 3M pads remove the etch rather easily which lends itself to the selective polishing suggested by Stacy, but not to general scrubbing of the whole blade.
Also, when I tried the white diamond metal polish it completely smudged everything.
This time, driven by laziness and curiosity, I polished to only 600 grit. I used the same W2 steel and same acid bath.
Now I could scrub the entire blade with the pads without losing everything, and I finished with the metal polish and it didn't smudge at all.
I'm quite happy with the hamon on this one. Depending on the lighting you see ashi poking down like diffuse light through clouds.
f9nZutW.jpg
 
Back
Top