- Joined
- Dec 28, 2013
- Messages
- 118
Well, I've decided to give this whole WIP thing a try.
First, let me say that this is just how I make these.
I'm open to questions and suggestions, but if you're looking for traditional methods this may not be the place.
This first post is just part of the (my) process, and before I thought of snapping pictures
of each step I never thought about how many steps there are in building something like this.
Also, sorry if some of the pictures are blurry. They looked better on the phone.
This might get long, so let's get started.
I'm using copper for the handle. The copper starts life as pipe (14g thick (no idea what industry size pipe that would translate to)).

I cut and split it before annealing it.

After annealing and quenching.

Open and flatten (I use a rawhide mallet, and the copper doesn't need to be super flat when you're done).
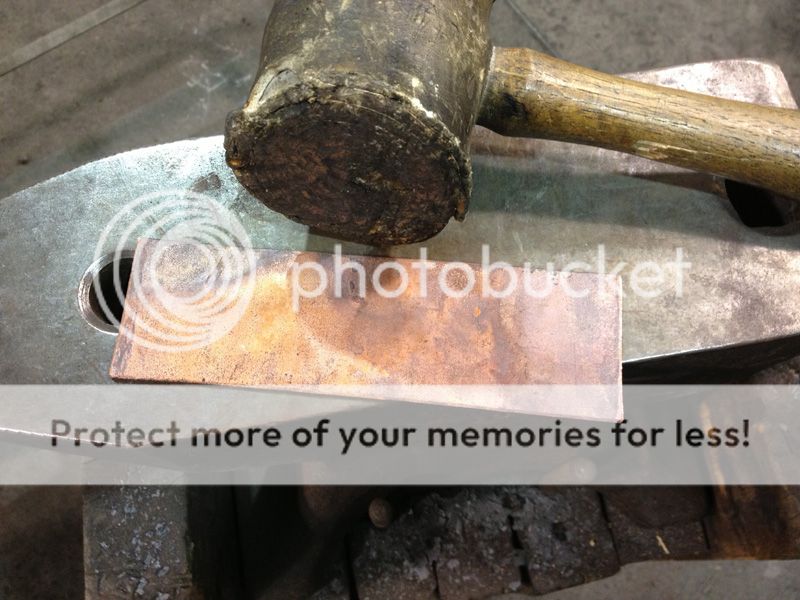
Flattened and wire brushed. This is the texture hammer I'm going to use on this particular handle.

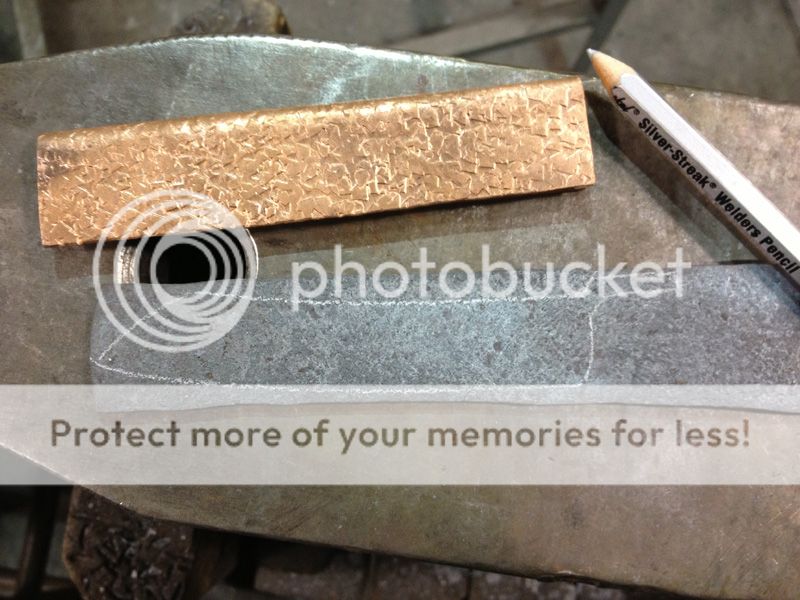
Textured.

Cut to a little over length.

Back to the fire to anneal (important for the next little bit).

I use dividers to scribe a center line. You can measure the width and half that or just guess. I just guess.
Even if you are off by a little just use the middle of the two off lines. The piece is oversize anyway because it's going to be cut to shape later.

Put the piece in the vise so the center line sticks just above the jaws.
Hammer it over 90ish degrees with the rawhide mallet.

Continue folding/closing the piece until you get something like this.

This part is important. To get a good channel you need a nice flat piece of something.
I am using a piece of 1/8" mild steel plate with the edges knocked off.
It's also important to know about the thickness of the blade you want because that will
determine the thickness of the plate you use to squeeze in between the copper.

Put the copper in the vise (oh yah, smooth jaws are ideal so you don't ruin the texture) and place your plate inside the copper.
Tighten the vise until it stops. You want it tight but there's no need to over do it.

Take it out of the vise and hammer/flatten it more on the anvil with the rawhide mallet.

You should get a pretty consistent channel.

Now we're going to move on to the blade for a bit.
I'm using some twist damascus I had forged out.
I forged it out to just under an 1/8" (so that it fits in the channel of the handle)
and textured it lightly with a different texturing hammer.

Draw the blade you want. This can take some trial and error, but I'm using a pattern that I've worked before.
Cut out the blade.
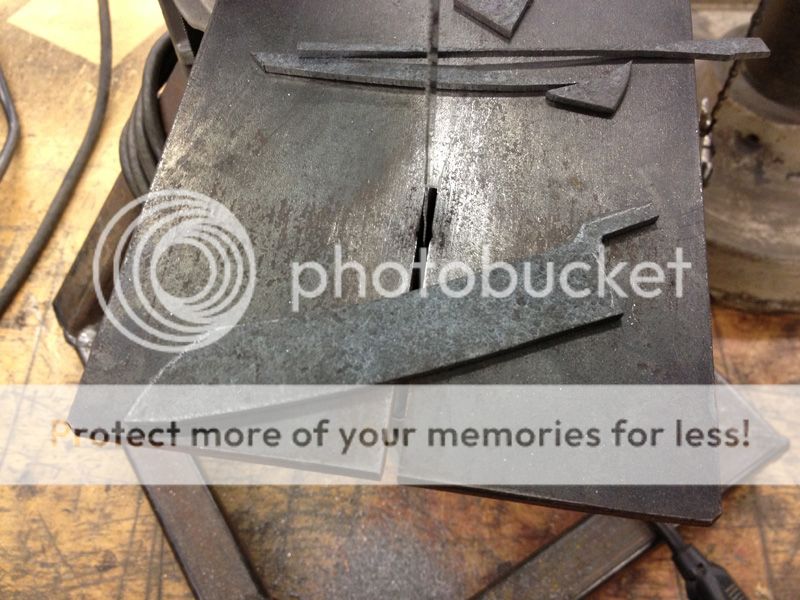
Blade is profiled and the handle is drawn on my copper.

I cut off the channel in the back where the pivot area goes and the flicker (or whatever it's called) butts up against when open.

Another view.

Cut off the excess copper from the handle. I don't cut it exact because I want room to play later.

Make sure the blade fits and the flicker lies where you want it.
I had to heat it up and bend it a little to get what I wanted.

Figure out where the pivot goes. Again, this takes some figuring sometimes.

Center punch for the pivot hole. I put a sacrificial piece of 1/8" plate in the channel to keep it from collapsing.

I use the same sacrificial plate when drilling. I just drill through one side of the copper at this point.
I'm using 1/8" stainless pins for the pivot.

Once I drill through one side of the copper I put the blade in where I want it in the open position and clamp it together.

I drill through the hole in the copper and just touch off on the blade so I have a reference point.
I take the blade out of the handle and drill it separately on a flat surface.
Then I drill through the first hole in the handle all the way through.

Put your pin stock in and check your pivot.

This is as far as I've gotten with this one. Hopefully in the next little bit I can get the knife done, and then I'll finish this thread.
Hope you're enjoying it so far. It's been pretty interesting breaking this process down.
-Shelby
First, let me say that this is just how I make these.
I'm open to questions and suggestions, but if you're looking for traditional methods this may not be the place.
This first post is just part of the (my) process, and before I thought of snapping pictures
of each step I never thought about how many steps there are in building something like this.
Also, sorry if some of the pictures are blurry. They looked better on the phone.
This might get long, so let's get started.
I'm using copper for the handle. The copper starts life as pipe (14g thick (no idea what industry size pipe that would translate to)).

I cut and split it before annealing it.

After annealing and quenching.

Open and flatten (I use a rawhide mallet, and the copper doesn't need to be super flat when you're done).

Flattened and wire brushed. This is the texture hammer I'm going to use on this particular handle.

Textured.

Cut to a little over length.

Back to the fire to anneal (important for the next little bit).

I use dividers to scribe a center line. You can measure the width and half that or just guess. I just guess.
Even if you are off by a little just use the middle of the two off lines. The piece is oversize anyway because it's going to be cut to shape later.

Put the piece in the vise so the center line sticks just above the jaws.
Hammer it over 90ish degrees with the rawhide mallet.

Continue folding/closing the piece until you get something like this.

This part is important. To get a good channel you need a nice flat piece of something.
I am using a piece of 1/8" mild steel plate with the edges knocked off.
It's also important to know about the thickness of the blade you want because that will
determine the thickness of the plate you use to squeeze in between the copper.

Put the copper in the vise (oh yah, smooth jaws are ideal so you don't ruin the texture) and place your plate inside the copper.
Tighten the vise until it stops. You want it tight but there's no need to over do it.

Take it out of the vise and hammer/flatten it more on the anvil with the rawhide mallet.

You should get a pretty consistent channel.

Now we're going to move on to the blade for a bit.
I'm using some twist damascus I had forged out.
I forged it out to just under an 1/8" (so that it fits in the channel of the handle)
and textured it lightly with a different texturing hammer.

Draw the blade you want. This can take some trial and error, but I'm using a pattern that I've worked before.

Cut out the blade.

Blade is profiled and the handle is drawn on my copper.

I cut off the channel in the back where the pivot area goes and the flicker (or whatever it's called) butts up against when open.

Another view.

Cut off the excess copper from the handle. I don't cut it exact because I want room to play later.

Make sure the blade fits and the flicker lies where you want it.
I had to heat it up and bend it a little to get what I wanted.

Figure out where the pivot goes. Again, this takes some figuring sometimes.

Center punch for the pivot hole. I put a sacrificial piece of 1/8" plate in the channel to keep it from collapsing.

I use the same sacrificial plate when drilling. I just drill through one side of the copper at this point.
I'm using 1/8" stainless pins for the pivot.

Once I drill through one side of the copper I put the blade in where I want it in the open position and clamp it together.

I drill through the hole in the copper and just touch off on the blade so I have a reference point.
I take the blade out of the handle and drill it separately on a flat surface.
Then I drill through the first hole in the handle all the way through.

Put your pin stock in and check your pivot.

This is as far as I've gotten with this one. Hopefully in the next little bit I can get the knife done, and then I'll finish this thread.
Hope you're enjoying it so far. It's been pretty interesting breaking this process down.
-Shelby

")


