More 1084 weirdness

Not really, nothing deep

gXjkjjp.jpg
This is steel HT in foil ?
 
As I said before I've got full respect for JT and his abilities and his desire to find the correct answer. I'm waiting for JT to report results of testing after grinding both sides to remove HT scale. No idea if that's the problem or not, just seems like an easy first step.
 
I would think that testing the middle of a concave hollow would, if anything, yield a slightly high reading.
So does testing with indents too close to each other. The goal is accurate readings. I don't know about the scale on the other side of the knife though.
 
As an aside, how come JT gets a pass on feeling the energy of the quench and martensite transformation, when I would get laughed right out of the forge and into the street for talking about forged grain flow? o_O You guys do realize that racing engine connecting rods are heat treated, and just as carefully as the best piece of cutlery, and that grain flow and forging quality is a serious consideration in engine parts, especially high-performance ones, and it doesn't just go away because they are heat treated. o_O I also believe JT can feel the difference when the steel is quenched, and also that different steel alloys smell differently. A dog could be trained to identify alloys by smell, like a drug dog. Furthermore, Japanese katana makers can HEAR when a blade is ready to heat treat, this is documented fact. o_O
 
As an aside, how come JT gets a pass on feeling the energy of the quench and martensite transformation, when I would get laughed right out of the forge and into the street for talking about forged grain flow? o_O You guys do realize that racing engine connecting rods are heat treated, and just as carefully as the best piece of cutlery, and that grain flow and forging quality is a serious consideration in engine parts, especially high-performance ones, and it doesn't just go away because they are heat treated. o_O I also believe JT can feel the difference when the steel is quenched, and also that different steel alloys smell differently. A dog could be trained to identify alloys by smell, like a drug dog. Furthermore, Japanese katana makers can HEAR when a blade is ready to heat treat, this is documented fact. o_O
After the knives are surface ground on both sides and retested we can debate his ability to feel the difference in the quench.
 
I will surface grind a blade on both sides and re test. I did some quick math and it says my test area is .015 deep at the center. .900 diameter wheel with belt, .230 wide test area has a height of the circular segment of .0149.

I might also do a quick etch after grinding. I’m betting it has soft spots that run completely through it.

So before I ran off to work I did a quick test. For the record I feel that someone (talking about my self) would have to be an absolute moron to think that thy know everything and reject any advise offered from an outside source. I always try and open my mind and be humble before jumping and saying no that’s wrong. The older I get the better I have become at this.

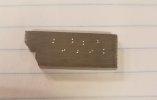
So the quick test I did was testing as close as I could together. Like I said I had never heard the 2.5-3.0x distance so I wanted to try it out. Here are the results of tests, I got them as close as I could using my eyes. And here are the results.

Photo%20Nov%2005%2C%207%2016%2019%20PM.jpg
 
Ok I have an update. I was able to get one on the chuck and prep both sides. For a reference we don’t leave scale on the back side of blades before testing. We use a scraper if it does not pop off in the quench.

I took the top surface down till the test groove and test dimples where removed. I’m guessing it was about .020. But I snapped a few pictures while grinding because the sparks coming off the grinder looked really good. I have had some that sparked like mild steel. Come to find out it was and was sold to him as high carbon on eBay. So I worked my way through the grits up to a norax 5x which is 3000grit. Once I got up to the norax 45 I found that I could start to see patches showing up. I have seen this before on some steel that was sent to me in the past so I’m not Surprised at all. I guessed from the beginning that it was full of soft spots. Here are the pictures

This is the first pass taking off about .005
Photo%20Nov%2006%2C%202%2041%2048%20PM.jpg


The next pass I snagged a close up shot of the sparks.
Photo%20Nov%2006%2C%202%2040%2054%20PM.jpg


The patches and vertical bands are clearly visible in person but harder to catch on camera because it’s so damn shiny. Took it out side to get better lighting.

Photo%20Nov%2006%2C%202%2046%2035%20PM.jpg


Photo%20Nov%2006%2C%202%2044%2023%20PM.jpg


we then took it inside and ran it through the demagnatizer and tested it.

Photo%20Nov%2006%2C%202%2045%2036%20PM.jpg


Photo%20Nov%2006%2C%202%2044%2049%20PM.jpg


Photo%20Nov%2006%2C%202%2051%2010%20PM.jpg


you can see the tests change when going from a dark to a light spot. On the tang where I had ground and tested before I got 37.5 now. Before all this, that spot measured 37rc. So I do not find any fault with my current testing and prep procedures. Here is a picture of the blade before all this grinding.

Photo%20Nov%2006%2C%204%2034%2036%20PM.jpg


here is a quick video showing the final grind and just how polished that surface is.
 
Last edited:
Nicely done. Wonder where the "1084" came from? Have you thought about adding surface grinding as a mandated thing and just charging the extra money?
 
Ok I have an update. I was able to get one on the chuck and prep both sides. For a reference we don’t leave scale on the back side of blades before testing. We use a scraper if it does not pop off in the quench.

I took the top surface down till the test groove and test dimples where removed. I’m guessing it was about .020. But I snapped a few pictures while grinding because the sparks coming off the grinder looked really good. I have had some that sparked like mild steel. Come to find out it was and was sold to him as high carbon on eBay. So I worked my way through the grits up to a norax 5x which is 3000grit. Once I got up to the norax 45 I found that I could start to see patches showing up. I have seen this before on some steel that was sent to me in the past so I’m not Surprised at all. I guessed from the beginning that it was full of soft spots. Here are the pictures

This is the first pass taking off about .005
Photo%20Nov%2006%2C%202%2041%2048%20PM.jpg


The next pass I snagged a close up shot of the sparks.
Photo%20Nov%2006%2C%202%2040%2054%20PM.jpg


The patches and vertical bands are clearly visible in person but harder to catch on camera because it’s so damn shiny. Took it out side to get better lighting.

Photo%20Nov%2006%2C%202%2046%2035%20PM.jpg


Photo%20Nov%2006%2C%202%2044%2023%20PM.jpg


we then took it inside and ran it through the demagnatizer and tested it.

Photo%20Nov%2006%2C%202%2045%2036%20PM.jpg


Photo%20Nov%2006%2C%202%2044%2049%20PM.jpg


Photo%20Nov%2006%2C%202%2051%2010%20PM.jpg


you can see the tests change when going from a dark to a light spot. On the tang where I had ground and tested before I got 37.5 now. Before all this, that spot measured 37rc. So I do not find any fault with my current testing and prep procedures. Here is a picture of the blade before all this grinding.

Photo%20Nov%2006%2C%204%2034%2036%20PM.jpg


here is a quick video showing the final grind and just how polished that surface is.


The only possible logical, scientific explanation is obviously that the batch of steel is cursed.

xTN6lfC.jpg
 
Back
Top