Only Sharp Knives Are Interesting- the Sharpening Thread

Lorien

Nose to the Grindstone
Moderator
Knifemaker / Craftsman / Service Provider
Joined
Dec 5, 2005
Messages
27,860
This thread is for sharing tips and tricks relating to keeping your CPK operating at its best.

Someone had recently asked about keeping a CPM 3V blade, with the Delta heat treatment protocol, maintained while out and about.

In the attached vid, I tried to show how a damaged edge bevel can be brought back to service in ten minutes using one simple and easy to get tool. While the results are generally better with more sharpening implements and more time, the video shows how little it takes to get your Delta 3V edge back to at least 80%, (I made that figure up) when you're out in the boonies and away from your tools.

CPM 3V, with Delta heat treatment, is a rewarding steel for those who like sharpening. It'll support a very keen edge, and isn't so hard as to be frustrating to deal with. To me, it's not dissimilar from relatively simple carbon steels like 1095 or W2.


Share your sharpening tips, tricks and hacks, and ask your questions about sharpening your CPKs here!
 
Diamond for the win. I generally keep it close to 20* give or take. Easy to replicate and easy to maintain.

(Ceramic works well too, imho, but it's both slower and "finer"...so, depends on your goal.)
 
A simple ceramic rod (or quality cbn/diamond rod if you feel rich) and small diamond/cbn loaded strop would be sufficient for field sharpening. But to be honest. I do not see much requirement of field sharpening unless one spend weeks outdoors. A sharp edge should last long enough in the field without the requirement of a touch up. I would still carry a rod and strop to keep the keen sharpness (hair popping sharpness). Not that it is necessary but I like to have extremely sharp knives in my disposal. A rod should be sufficient for most minor damages and strop should be enough to keep the edge's keen sharpness.

I much prefer to give a proper sharpening to my knives at home.

That being said, I have not sharpened a CPK knife yet as they are all staying unused. However, I recently put my Kephart onto the kitchen block to do some cutting to see how it cuts but I must say I am not impressed with the cutting performance. Of course it is not a kitchen knife but so the other knives (which cuts better) on my kitchen knife block. It is factory sharp, which means it is actually quite sharp as CPK knives comes with very good edges on them. So in my opinion the geometry does not really do well for good cutting performance (hence the reason I keep asking CPK for harder and thinner knives). It is a knife with relatively thick spine (for its size), thick grind (20 tho behind the edge) and obtuse apex geometry (20 dps). While I can only change the behind the edge thickness and secondary bevel angles as a user, the former requires incredible amount of time and work without power tools and potentially ruins the consistent stone finish on the blade. Therefore I will concentrate on changing the secondary bevel angles. I will gradually reduce the angle and see how much difference it makes in cutting resistance. I will start with 17dps then reduce to 15dps if necessary. I would reduce even further but I am not sure how it hold up with 60.5 HRC. I think anything below 15 DPS might pushes the limits of 3V and I might start get rolling. Probably I am not an ideal or mainstream user of CPK knives as I prefer to cut through things effortlessly rather than chopping cinder blocks. I am looking forward for my MagnaCut DEK3.

Anyway that is enough rambling from me. I usually sharpen knives with my fixed angle system. I have an extensive range of stones and prefer Chosera stones for steels with chromium or iron carbides and resin bonded CBN and Diamond stones for steels with harder carbides (e.e. vanadium, tungsten, niobium etc..)

Here is couple of pictures from my recent sharpening session where I have sharpened a Spyderco 15V Mule. I am happy with sharpness if the edge cleanly cuts through a free hanging kitchen towel.


factory edge vs hand sharpened 15V edges


Awesome thread Lorien Lorien

I use a hapstone r2 and keep the factory angles

I stop at 400 grit on venev stones , then strop with 6 micron gunny juice (on basswood)

This is my personol favorite edge for D3V!

I can't get a really good pic but here's what that combo looks like

Screenshot_20230615_175339_Gallery.jpg
 
Great video and pics!

This subject touches on two of my passions, sharpening and making my own tools.

Sharpening is therapeutic for me, I started on stones and crock sticks as a kid, then a Spyderco Sharpmaker in the 90's, around 2002 I bought an Edge Pro, before they even had more than one model. I tried a Wicked Edge Mac daddy and didn't like it, then it was KME for the win. I still think it's the best guided system.

I generally only use the big sharpeners for knives that need reprofiled. At a minimum that means having less than a 20 degree edge because I still think the Sharpmaker is the fastest and best system out there for touch ups. The problem is reprofiling a 25 degree edge on a large knife can take hours without power. I use to do it on my 2x72 when I had my shop in Ohio but since moving I needed something A little smaller and cleaner.

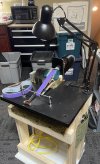
I have posted briefly on my sharpener before but had it handy tonight so I shot some more detailed pictures. For the record, I have never needed to use this for a Carothers, if I ever damaged an edge or really wanted to experiment with taking one thin I will. If you've ever wondered what someone who sleeps 3.5-4 hours a night does with their time, here you go :D

Bonus points to anyone who can spot the 33 year old relic box, organizing the storage room and it's been used it all these years for Christmas decorations...

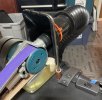
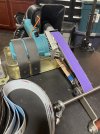
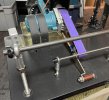
Started the process with my KME which has a brilliant self centering clamp, and a variable speed Makita 1 1/8 x 21 belt grinder. I am still working on shoulder straps so this can be field grade ;)

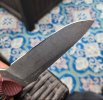
Here's the end result..

IMG_0771.jpg

IMG_0772.jpg

IMG_0773.jpg


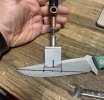
First step is to fine the center plane of the edge and mount the clamp..

IMG_0769.jpg

IMG_0770.jpg


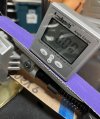
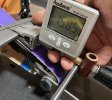
Next I zero my angle cube to the platen, and set the angle for the sharpener to approximately 14.75 degrees (pretend that's what it's set to here) by raising or lowering the tool guide.

IMG_0774.jpg

IMG_0775.jpg

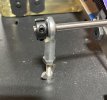
Here's a closer look at the tool guide, I have a smaller one for folders and sub 5" fixed blades and a mack daddy for larger blades.

IMG_0776.jpg

IMG_0777.jpg


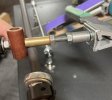
The blade clamp assembly rides along the rod on this piece of Micarta dowel to maintain angle consistency.

IMG_0778.jpg

Depending on the knife I can take the edge to 1500 grit, hard use knives usually stop around 600, EDC 800-1000. After this I deburr by drawing the blade perpendicular on the edge of a piece of oak, this shears all of the burrs off to expose the final edge.

Finally, I put a final 20 DPS cutting edge on using the Sharpmaker grey then white stones. Finally a nice stropping to even out the finish and give it that final hone. This leaves the edge thin for amazing cuts but gives the durability of 20 DPS for daily routine use. Touch-ups are easy down the road unless I get the rare nick, then it's rinse and repeat. The goal is to only ever need to do this once.
 
I also use the Hapstone r2. I usually try to match the factory angles or run the at 20 degrees with an angle cube. I run Venev diamond stones on there and finish with gunny juice on leather. But I do accidentally gouge the leather on occasion. I’ve been happy with that setup after trying out a few others.
 
Another good idea is combining jewelers loop with iphones magnifier. Most practical way to take close up shots and analyse the edge.

I use quadlock magnetic case and belemo magnifier (the best there is in jewelers loops) which has metal casing. I just attach the loop to the phone which makes analysing the edge and taking close up shots very easy. I have tried few other methods and nothing comes as practical as this method.
 
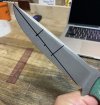
Can you post pics of that knife after you put the new grind on it where you marked on it with the sharpie.

It would look pretty much the same, on thicker grinds the cutting edge would be wider from being thinned out. I am not changing the blade profile, in fact the width of the blade doesn't change much at all since I am only sharpening to a burr.

The markings I put on the blade are just a reference. One is a straight line from the tip to the coil, then a mark at the center of that line, then a couple of perpendicular marks to help with keeping the clamp square visually. From practice you learn to cheat forward or backward from center a bit to optimize the grind for different point profiles. A blade with the point at or below below the center of the blade (Warncliffe, Spear, drop) is usually good centered on the clamp, I will usually move it forward a bit on anything with the point above the center, closer to the spine.
 
I only use my coarse diamond bench stones for serious reprofiling. Outside of that it's a DC4 (ceramic side usually) coupled with a Spyderco fine pocket stone and a strop with white gold compound.

I do not own supersteels after my little dance with working out a chip in 4v (no thanks). I basically end up convexing everything due to wrist-rock. Scandi vex is my favorite grind for the woods.

Hair shaving sharp is sharp enough for me!
 
“Only sharp knives are interesting”
An ode to Colonel Townsend Whelen or perhaps Larry Potterfield.

Anyway, DMT XCoarse/Coatse and Fine/XFine then 6 micron paste on a strop has done everything I’ve ever needed. I also keep a ceramic hone to run kitchen knives over periodically.
 
Okay I have a few to sharpen

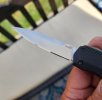
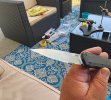
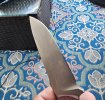
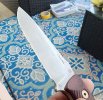
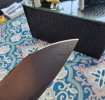
Sitting outside on a beautiful father's day , first is my just recieved livewire (love the knife) with a laughable edge.... I don't think the factory edge could cut a fart...

240/400 venev centaur stones followed by 800 venev Orion and 3 micron on basswood strop

(Best pic I can get with my phone)

Screenshot_20230618_145604_Gallery.jpg
Screenshot_20230618_150626_Gallery.jpg
 
Last edited:
Sorry

1 more thing came to mind that might help some.... my fingertips are fried from my job so I have a hard time feeling burrs

I always keep a micro fiber towel near me when sharpening to wipe off the blade and I also use the less fluffy side to feel for a burr

It works perfectly !

So if you are new to sharpening (and have a hard time feeling of there is aburr formed)try the micro fiber trick by running it on the opposite side of what you are sharpening lightly (the less fluffy side)...... if there is any burr you will feel it snag
 
Great video and pics!

This subject touches on two of my passions, sharpening and making my own tools.

Sharpening is therapeutic for me, I started on stones and crock sticks as a kid, then a Spyderco Sharpmaker in the 90's, around 2002 I bought an Edge Pro, before they even had more than one model. I tried a Wicked Edge Mac daddy and didn't like it, then it was KME for the win. I still think it's the best guided system.

I generally only use the big sharpeners for knives that need reprofiled. At a minimum that means having less than a 20 degree edge because I still think the Sharpmaker is the fastest and best system out there for touch ups. The problem is reprofiling a 25 degree edge on a large knife can take hours without power. I use to do it on my 2x72 when I had my shop in Ohio but since moving I needed something A little smaller and cleaner.

I have posted briefly on my sharpener before but had it handy tonight so I shot some more detailed pictures. For the record, I have never needed to use this for a Carothers, if I ever damaged an edge or really wanted to experiment with taking one thin I will. If you've ever wondered what someone who sleeps 3.5-4 hours a night does with their time, here you go :D

Bonus points to anyone who can spot the 33 year old relic box, organizing the storage room and it's been used it all these years for Christmas decorations...

Started the process with my KME which has a brilliant self centering clamp, and a variable speed Makita 1 1/8 x 21 belt grinder. I am still working on shoulder straps so this can be field grade ;)

Here's the end result..

View attachment 2220454

View attachment 2220433

View attachment 2220434


First step is to fine the center plane of the edge and mount the clamp..

View attachment 2220430

View attachment 2220431


Next I zero my angle cube to the platen, and set the angle for the sharpener to approximately 14.75 degrees (pretend that's what it's set to here) by raising or lowering the tool guide.

View attachment 2220435

View attachment 2220436

Here's a closer look at the tool guide, I have a smaller one for folders and sub 5" fixed blades and a mack daddy for larger blades.

View attachment 2220437

View attachment 2220438


The blade clamp assembly rides along the rod on this piece of Micarta dowel to maintain angle consistency.

View attachment 2220439

Depending on the knife I can take the edge to 1500 grit, hard use knives usually stop around 600, EDC 800-1000. After this I deburr by drawing the blade perpendicular on the edge of a piece of oak, this shears all of the burrs off to expose the final edge.

Finally, I put a final 20 DPS cutting edge on using the Sharpmaker grey then white stones. Finally a nice stropping to even out the finish and give it that final hone. This leaves the edge thin for amazing cuts but gives the durability of 20 DPS for daily routine use. Touch-ups are easy down the road unless I get the rare nick, then it's rinse and repeat. The goal is to only ever need to do this once.

Thanks Chad. This is an excellent post with great photos and a clear step by step explanation of your equipment and sharpening process. 👍

Phil
 
Back
Top