Professor Apelt's Homework Assignent WIP

Joined
Jul 15, 2016
Messages
61
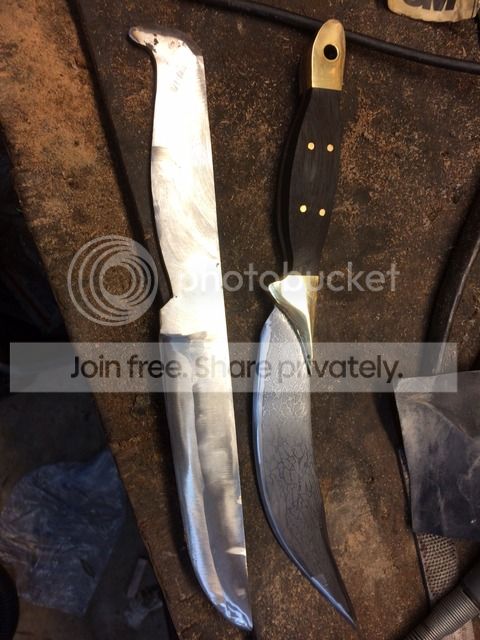
When I made the knife in this thread, Stacy Apelt pointed out some things that would make this knife better. He even showed a diagram. I've accept this assignment and this is my progress so far:

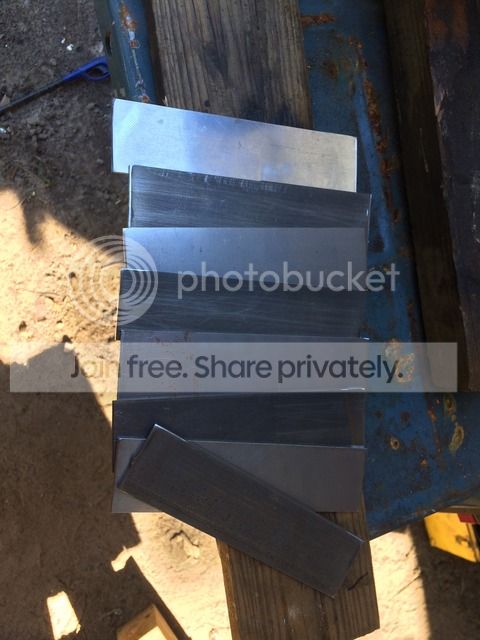
Instead of cable damascus, I decided to do four layers each of 1095 and 15N20:


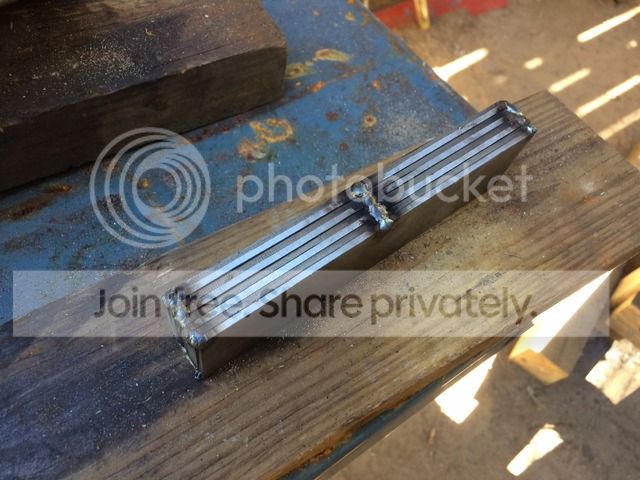
I became engrossed in the heating, fluxing, banging, and twisting and forgot to take pictures. I drew it out and twisted it. I then flattened it back out and folded it lengthwise one time. I then flux welded that solid and drew it out into this shape.


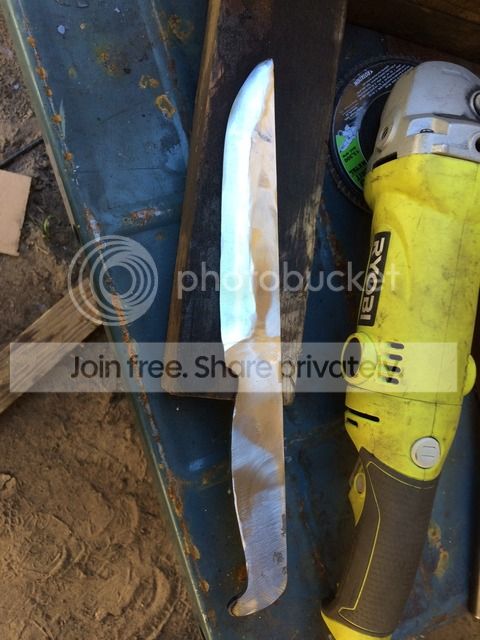
How does it look so far?
 
Very much improved!

I would suggest you round out the finger notch a bit, though. I am sure it is just the first shaping cut as it is now.
 
Thanks!. I thinned the blade out a little and reduced the size of the handle. I sharped the point of the beak of the birds head on the butt bolster.

 
Looking good. I want to offer a suggestion, and please only take it as a suggestion as this is a matter of opinion or preference. I struggled a bit when I first started, shaping handles in an ergonomic way. I think in straight lines, and a lot of my early handles had similar profile as yours. What I found was that a large swell in the center, depth wise, really wasn't conductive to a good normal grip, again, in my opinion. I just sketched this as an example. The top being similar to your design, the middle replacing the swell with a choil, and the bottom moving that choil to the index finger.

35cpti0.jpg
 
I like a less pointed "beak". Just let it round off as a nose.
Look at these knives and you can get the idea:
http://www.bladeforums.com/forums/showthread.php/1426360-Some-new-knives-made-)

Additionally, straight lines are "stiff". A tiny amount of curve to the spine gives a knife "flow". If you dropped the tip 1/8" and dropped the butt a tad from the top, it would make the spine line have a minute curve.
 
a 25 cent coin makes a nice size curve behind the guard. maybe you can trace on on with a marker to see if you like how it looks.
 
Maybe it's just the pics, but it looks like voids, inclusions, cold shunts etc. Try grinding more and see what's there beyond the surface.
 
Is this pre HT? If post HT, how much did you grind after HT? Something doesn't look right in that etch. I've done 10 layer & twist before that had much better pattern. Just wondering if decarb may be throwing you off?
I'm just a beginner in this area, but something seems to be off.
 
This one's crap. Unless someone has a better suggestion, I'm starting over and will not be using layer damascus.
 
From what I can see, it looks like the twist wasn't done right. It looks as if there is maybe only one twist?

You forge the billet out into a square, knock in the corners to a octagon ( some people grind it at this point to get any lips and folds off), and then forge round. A 3/4" to 1" round is good. Bring up to full welding heat and put one end in a vise. Grab the other with a pipe wrench that has an extra handle added to make it easy to twist ... and twist hard. The piece may take several heats at welding heat to get it fully twisted. Once it is a good tight spiral, cool off and grind the lips down to bare metal, then forge out into a bar. Try and avoid getting any "lips" flattened out, as they will surely make a cold shut weld.
 
I obviously did not get it twisted well enough. I'll be starting over. This one will be a throwing knife or something.
 
I decided to try the same damascus again because, hey, why not? I'm carefully following along with Stacy's instructions.

Here I'm setting the welds


Drawing it out and making it square.


Knocking the corners down into an octagon


I had to stop here as I ran out of time.
 
Before you start the next forging session, clean that up on the grinder and look for incomplete welds. Those lines along the surface may indicate places the weld hasn't taken fully.
 
Back
Top