How To Slipjoint tutorials and advice

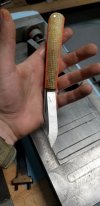
Where'd the nail nicks go? Or are y'all left handers?
At the time those pictures were taken i did not have a method to add nail nicks. I designed my knife so it could be easily pinched open. Sometimes i add an easy open notch if the customer requests it. Since then i have got a mill and have tried milling in the nail nicks. I havent yet hammered down a procedure that I like so it is absent from the tutorial at this time. Here is a pic of one of my milled nail nicks after getting the mill
20190720_203018.jpg
 
I hate doing nail nicks. They really make or break a blade. Honestly, your bevel running right up to the slot would stress me out, I could never do that, it would never be even on both sides. I work out of my garage and don't have space for a mill, can't really justify the cost either for me and what I do. I tried all manner of ways of doing nail nicks using various stones, cut off wheels, and whatnot in the drill press. It always seemed to move on me no matter what I did and I always got a crappy slot. Then I cut a slot all the way through the blade with a thin dremel cut off wheel and filed it nice and even. Now I just use my flex shaft and go nice and slow by hand. I found I can hold it pretty steady with some practice. I can even make a swoop that I can finish out with needle files, though I sort of like the straight slot look.
 
That Red Bone Lanny Clip has a long pull on it and cut with this.

With this set up I can us 1/16" and 1/8" cutting discs and you can get the ends pointed by shaping the edge of the wheel if you like

This Stag Trapper knick was cut with a 1/6" disc.

siS7MUo.jpg


5A7mbiW.jpg
 
I hate doing nail nicks. They really make or break a blade. Honestly, your bevel running right up to the slot would stress me out, I could never do that, it would never be even on both sides. I work out of my garage and don't have space for a mill, can't really justify the cost either for me and what I do. I tried all manner of ways of doing nail nicks using various stones, cut off wheels, and whatnot in the drill press. It always seemed to move on me no matter what I did and I always got a crappy slot. Then I cut a slot all the way through the blade with a thin dremel cut off wheel and filed it nice and even. Now I just use my flex shaft and go nice and slow by hand. I found I can hold it pretty steady with some practice. I can even make a swoop that I can finish out with needle files, though I sort of like the straight slot look.

You could get a cross slide and bolt it to your drill press, then use a dial indicator to measure the depth.

That would give you an easy way to cut a clean knick. I cut my knicks .045" deep.
 
You could get a cross slide and bolt it to your drill press, then use a dial indicator to measure the depth.

That would give you an easy way to cut a clean knick. I cut my knicks .045" deep.

I swear it is the dremel mandrel (the thing that holds the small cut off wheels) slipping in the drill press chuck. I have a dial indicator from when I made one of those slipjoint jigs (what a waste of time!). I should probably upgrade my chuck.
 
I have a dial indicator from when I made one of those slipjoint jigs (what a waste of time!). I should probably upgrade my chuck.

You did not like your rise fall indicator?
 
You did not like your rise fall indicator?

I did not. It is just easier to put calipers and measure from the end of the spring to the pivot pin. Also, there is an issue transferring holes from the jig to the liners. The way I do it for a single blade

1) drill middle hole for spring into the liners, deburr
2) drill hole into piece of hardwood, lay both liners and spring on top and put in middle pin
3) position the blade on the liners so that it is up the spring end nice and tight and at a good angle, then clamp it down
4) drill through the blade pivot hole though both liners and into the wood, deburr
5) put pin in blade pivot hole and position the blade and spring, hold it tight, and draw a pencil line along the outside of the spring
6) remove the blade and rotate the spring to make a gap at the end opposite the blade pivot
7) clamp the spring down, drill through the spring end hole and both liners, deburr

There you got perfectly align holes. This is hard to do with a rise-fall indicator without having the rebuild it all the time, too much hassle.
 
R Randy3000

This is how I do it.

Position the spring and blade on the RI indicator where you want them and lock into place.
Mark the end of the spring with dye chem and draw a line across the top of the blade spine onto the end of the spring.

Clamp spring onto liner
Position blade and line up the top of the spine with the line you made on end of spring and clamp into place.
Drill for pivot hole, put pin it. Drill for rear spring hole
Remove blade
Move end of spring down .20-30" and drill middle hole in spring.

Done.

Now tension is set and holes drilled.


zbXnJiQ.jpg

9y79ec5.jpg

BaucSQE.jpg

dlRvgIB.jpg

cD4pypM.jpg

EWCH9Hk.jpg

1cn9ykR.jpg

 
AVigil AVigil

Interesting way to do it.

I was looking around trying to figure out what a good chuck to get to keep the dremel mandrel from slipping, and I read something about tightening the chuck using all 3 holes. I usually tighten using one key hole. So maybe that is my problem!! Maybe I can turn out a decent nick now.

This way I learned from Luke Swenson video and he learned it from Bill Rupple. It is very easy way to do it and drops right back into the RI indicator

You should always use the 3 holes on a chuck when tightening. It makes a difference in accuracy.
 
I hate doing nail nicks. They really make or break a blade. Honestly, your bevel running right up to the slot would stress me out, I could never do that, it would never be even on both sides. I work out of my garage and don't have space for a mill, can't really justify the cost either for me and what I do. I tried all manner of ways of doing nail nicks using various stones, cut off wheels, and whatnot in the drill press. It always seemed to move on me no matter what I did and I always got a crappy slot. Then I cut a slot all the way through the blade with a thin dremel cut off wheel and filed it nice and even. Now I just use my flex shaft and go nice and slow by hand. I found I can hold it pretty steady with some practice. I can even make a swoop that I can finish out with needle files, though I sort of like the straight slot look.
Make something like this for your dremel and you can cut nail nicks in minute .....
ugf0yPq.jpg

Rka1DwB.jpg
 
For what it's worth, I experimented for a couple hours yesterday trying to figure out why my drill press moves and was giving me crappy nicks. I identified 5 variables

1) tighten chuck using all 3 holes
2) adjusting the motor speed (5 stepped pulley system, use lowest speed for drilling and highest speed for grinding nicks)
3) adjusting the table
4) bit slipping in chuck
5) blade slipping in vise jig

By changing one at a time, using witness marks and the dial indicator a few times, I discovered the issue! When I move the table up or down, and then change to high speed pulley for grinding, the table actually slides down a tad from the vibration. The solution is to run it for a minute or more before cutting the nick. After it settles down and is stable, then I can adjust the blade in the vise and go to cutting. I repeated this experiment 5 times, taking everything apart and moving things around, and it was a reliable system.
 
Back
Top