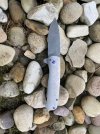
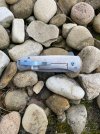
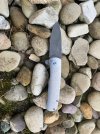
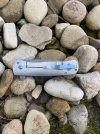
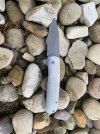
Small Batch run of MagnaCut Frame Locks

So I got the blades in yesterday. Very disappointed, all 7 are warped to some degree. I assembled the knives and the blades aren't centered. Placed them on my granite surface plate and there is some wobble in them. I'm gonna try to clamp them to overcompensate for the warps and re-temper them for 2 hours each and hope that that straightens them. If it doesn't, I may have to resort to heating the spine of the blade and use the 3 pint clamp method in my vice to try and straighten them. If that doesn't work, I don't know... I thought about using my SGA, but when I engage the magnets, it pulls them flat and straight, so I don't think that grinding out the warp on the SGA will work.

Any ideas? Maybe send to another heat treat??
 
Tip:
You need to shim under the warp when you put it on the surface grinder. A quick and simple way to do that perfectly is to put a coat of 5 minute epoxy on the concave side. Let it cure and flatten on a surface plate with 100 grit paper. Place on the magnetic chuck epoxy side down and grind the convex side flat. Flip over and grind the epoxy side flat ... done.
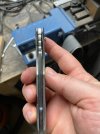

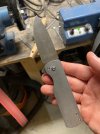
Good idea. Never thought of that. Since I have already milled out my bearing pockets, I only have around .005" of wiggle room on my blade thickness before symmetry becomes an issue. I am gonna try the clamp/temper method first I think. I'd hate to remove too much material and then I'm no long within my tolerances for blade + washer thickness compared to my standoffs. Although I could always use my pivot lapper and remove a few thou off of my stand offs.
 
Just bought a carbide peening hammer from KHDaily Knives. After reading some of the forum posts on this method and talking with Kyle, I think this is my best option right now. Gonna take a few days to get the hammer to me, but looking forward to trying it out. Doesn't hurt that the guru himself, Larrin Thomas suggested this method! Fingers crossed!!!
 
I inspected all the blades more carefully over the weekend and it looks like there is only 3 that are warped. So I had 4 to play around with while I waited for the carbide hammer.

IMG_9146.jpg

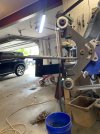
First order of business was the get the edges of the blade up to a 400 grit finish. This was accomplished with the same small wheel as before.

Next, I had to surface grind the flats up to a 400 grit finish. For this I used the Ameribrade SGA.

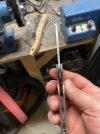
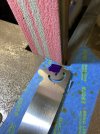
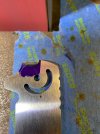
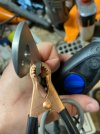
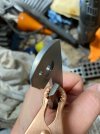
Once the edges and the flats were done, It was time to grind the lockface. You only get one shot at this so definitely take your time! First I put some Dykem on the are of the tang that was to be ground down. Then I assembled the knife and while holding it in the open position, I took a small thin razor blade and marked the front of the lock bar, I also marked the top of the lock bar.

IMG_9144.jpg
IMG_9145.jpg
IMG_9147.jpg
IMG_9148.jpg
IMG_9149.jpg

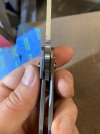
Once that was done, I set my workrest at a 7.5 degree angle and put on a 120grit belt. Going slowly, I approached my scribed line, being sure to cool the blade in water every few seconds. I take more off closer to the spine of the blade so that the lockbar engages only the very bottom portion of the lockface. You will grind, assemble, check lock-up, and then repeat until you get it just right. It is very easy to grind too much and then that blade is toast. I aim for aound a 25-35% lock up initially. After several attempts, we got it!

IMG_9150.jpg
IMG_9151.jpg
IMG_9152.jpg

IMG_9153.jpg
 
Once the lockup was dialed in, I chamfered the sharp edge of the lockface to keep it from digging into the lockbar.

IMG_9161.jpg

Then it was time to grind the bevels. Going slow and dunking between each pass, finally got them done.

IMG_9154.jpg

IMG_9155.jpg

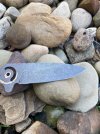
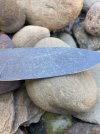
I brought the bevels up to a 400 grit finish, but they were fingerprint magnets. I normally acid etch my high carbon blades and stonewash them to give them some added protection from fingerprints and patina. I didn't know if I could acid etch MagnaCut, so I though I'd try it. I cleaned the blade with acetone and put fingernail polish on the pivot, lockface, and detent track. I put in in my FC mixture and set a timer for 20 min. After 20 min, nothing was really happening. I read somewhere that stainless takes much longer than high carbon steel, so I set the timer for another 20 min. After I check it, nothing much was happening. I set it for one final 20 min cycle and if it didn't work, then oh well. I come back after the last 20 min and the blade looked funny. Like the "shiny" was peeling. I rubbed the blade and the "shiny" rubbed off, revealing a dark blade!. So I wiped it down with my steel wool and put it into my tumbler to see if it would take a stonewash. Looks pretty good to me!

IMG_9160.jpg

IMG_9165.jpg
IMG_9166.jpg

Next, I used my BeBe carbadizer and carbadized the lockbar.

IMG_9157.jpg
IMG_9158.jpg
 
Thanks again for allowing us to watch how you are progressing on this project. I didn"t realize how much went into one of these.
 
Thanks again for allowing us to watch how you are progressing on this project. I didn"t realize how much went into one of these.

Glad you guys are enjoying following along! Def a lot of steps involved to make one of these!
 
Next step was to sharpen up the blade. Everyone has their own methods to do this. I use my Wicked Edge so that I can get consistent angles on both sides. The four that I have been finishing up were sharpened to 18 degrees per side.

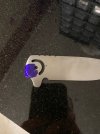
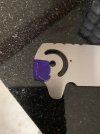
Next step was to anodize the hardware. To do this, I use an anodizing plate that I purchased. It has pre-drilled and tapped holes for all the common screw sizes. So I screwed the hardware to the plate. Scrubbed them down with rubbing alcohol to remove the finger oils. I then anodized the hardware and let it dry.

IMG_9172.jpg

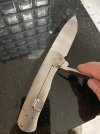
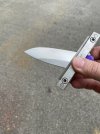
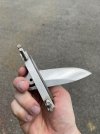
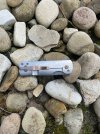
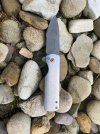
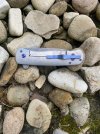
Final step was to assemble the knives. I use blue loctite to make sure the pivot screws, etc... don't loosen over time while flipping the knife.

IMG_9176.jpg
IMG_9177.jpg
IMG_9179.jpg
IMG_9181.jpg
IMG_9182.jpg
IMG_9184.jpg
IMG_9185.jpg
IMG_9187.jpg

This weekend I plan to tackle the 3 blades that were warped, so fingers crossed!
 
Really like how the purple looks, simple design elegant looks. Very well done, please let me know where to send funds.👍🤔
 
Back
Top