The Ashokan pole arm challenge.......

Looks great Will!!!:D
I know this thread has been a bit quiet. Not quite as exciting as last year. Last year we started about two weeks before Ashokan, so that might have something to do with it. I knew I would be last minute, and I know a couple of others will be too.
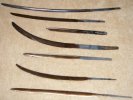
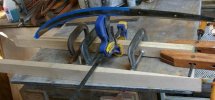
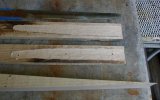
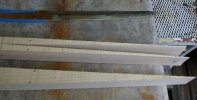
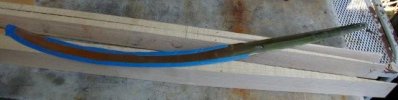
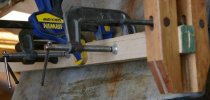
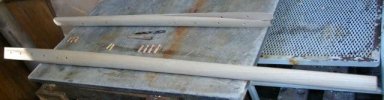
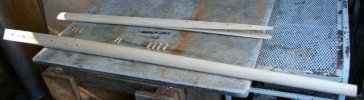
Remember....this is just for fun and pictures will make folks want to make stuff. So if you got something in the works lets see it.:thumbup:
Mace
 
Was'nt sure I'd be able to go! My honey's health has been an issue again, but she insisted she'd be okay. Who am I to argue?? :D She said "GO!!", so my registration went out the other day!!! :cool: Can't wait!!! However I may not have a polearm for the battle! :o
 
It sure has been quiet. I was hoping some one else would do a socket type spear and I could ask them how they did it but no luck so I decided to have a go at it. looking at it now I see I need to straiten it out more but I think it will work. I may make something else to bring with me if I get the time. I am only about 2 hours into it so far.

On a side note I have seen Del Ealys pole arm for the chalenge at least the head and it is much cooler than mine. If you guys dont get cracken us northerners are going to have an unfair advantage when we invade New York :)
 
Unfortunately circumstances came up and I won’t be able to make it to all the fun, food and camaraderie of Ashokan this year. I’m really bumming on this :mad:.

The only positive note about it, is that my new band “The Lightning Brothers” will end up doing our first gig on Sept 21. It will be at the end of a motorcycle run benefiting the ALS (Lou Gehrig’s disease) foundation.
 
Here are the seven pieces I did Sunday. They are dark from the temper. I'll start cleaning them up this weekend. For scale, the katana on top is 38".
Somewhere in the middle is a pole arm blade....hmmmm, which one????
Stacy
 

Attachments

  • swords 001.jpg
    swords 001.jpg
    48.9 KB · Views: 122
When the nakago is finished, it will attach just like any other tsuka...more or less.
Stacy
 
Naginata,hai!
I ripped an 8/4 plank of ash down to 1.5" strips and am hand planing them into oval tapered poles. That is my big project this weekend.
Stacy
 
I will be heading to the local lumber mill to pick up some ash next week. Unfortunatly I am going to have to make mine sectional so I can bring it with me.:)
 
To make a take down unit, try this :
Cut the pole stock 2 feet longer than desired and a rectangle cross-section. Say 2"X1.5"X7' to make a 5.5 foot long 1.5X1" oval pole. Cut it into two piece, 3' and 4'. Take the short piece and make the tsuka from it. Split the wood, inlet the nakago,cut the tapers for the others pole's seat. Set it on the other piece (aligning the grain, and making sure the whole thing is straight) and mark the wedge. Carefully cut the wedge out ,staying just off the line. File/sand to as perfect fit as you can get. Put the two together and tape up the joint, making sure all is straight. Drill three or four 1/4" holes along the spline. Tap in snug fitting doweling and cut off.Put a drop of super glue on the ends. This should hold everything in place enough to shape the pole with planes/routers/files/sanders,etc. Once all is shaped,drill out the dowels,re-drilling the holes for tapered pegs.Tap in nthe mekugi (tapered pegs) cut flush, and sand. Finish the pole with the desired finish/varnish/lacquer. Drill an 1/8" hole through the pole 6" above the "V" and 6" below the wedge on each pole. Re-drill that hole to 1/4" about 2/3 the way through.Stick the end of a piece of paracord ( multi-colored paracord does great here) or other binding in the hole and tap in a short mekugi peg to lock it in the hole. Wrap as desired to cover the spline and bind the joint tightly. When you get to the other hole, put the end in the other hole and secure with a mekugi.To disassemble, tap out all the mekugi. This will make a quite strong pole.
Stacy
 
Last edited:
Here are some photos of the pole in progress. You can see, and understand, the assembly procedure better in the pictures than the explanation above.

The top half piece of wood is split, the nakago is inletted,the tapers are cut and sanded,then the piece is glued to reassemble. The other piece is cut to fit the "V".
I'll post more photos as the rest of the pole develops.
Stacy
 

Attachments

  • NAGINATA 001.jpg
    NAGINATA 001.jpg
    36.3 KB · Views: 91
  • NAGINATA 002.jpg
    NAGINATA 002.jpg
    42.8 KB · Views: 87
  • NAGINATA 003.jpg
    NAGINATA 003.jpg
    33.9 KB · Views: 78
  • NAGINATA 004.jpg
    NAGINATA 004.jpg
    18.2 KB · Views: 81
  • NAGINATA 005.jpg
    NAGINATA 005.jpg
    29.7 KB · Views: 84
Last edited:
Lookin' good! I did a little pounding on mine. Using a Nicholson file for my stock :)
 
I finally started mine tonight, if all goes well it will be a halberd.
So far I have the axe part started, the plan is that I'll do the axe blade, pierce the eye, and run the long blade shaft through the eye, and forge them together. If it works it will be ugly, if it doesn't, it will be uglier :D


-Page
 
OK, got the pole just about done. Started with a 7'X2"X1.5" board. Doing what I posted, I made a take down pole that is as rigid as a solid pole. The pole arm disassembles into :nibu tsuka, Muromachi naginata zukuri ,juuichi mekugi, koshirae (habaki,fuchi sepa, tsuba), san-dan-maki, semegane, to yari-ishizuki.

These pole photos are the last you will see until ashokan. Don't want to give it all away.
Stacy
 

Attachments

  • pole arm1 007.jpg
    pole arm1 007.jpg
    21.7 KB · Views: 67
  • pole arm1 008.jpg
    pole arm1 008.jpg
    23.9 KB · Views: 62
  • pole arm1 010.jpg
    pole arm1 010.jpg
    38.2 KB · Views: 74
Last edited:
Back
Top