Hickory n steel
Gold Member
- Joined
- Feb 11, 2016
- Messages
- 21,355
That could work.You could dilute it down to 6% if your worried about damage to the bone.
I bought some and will test it on the junker I have, if it damages the bone I'll dilute it.
The BladeForums.com 2024 Traditional Knife is available! Price is $250 ea (shipped within CONUS).
Order here: https://www.bladeforums.com/help/2024-traditional/
That could work.You could dilute it down to 6% if your worried about damage to the bone.


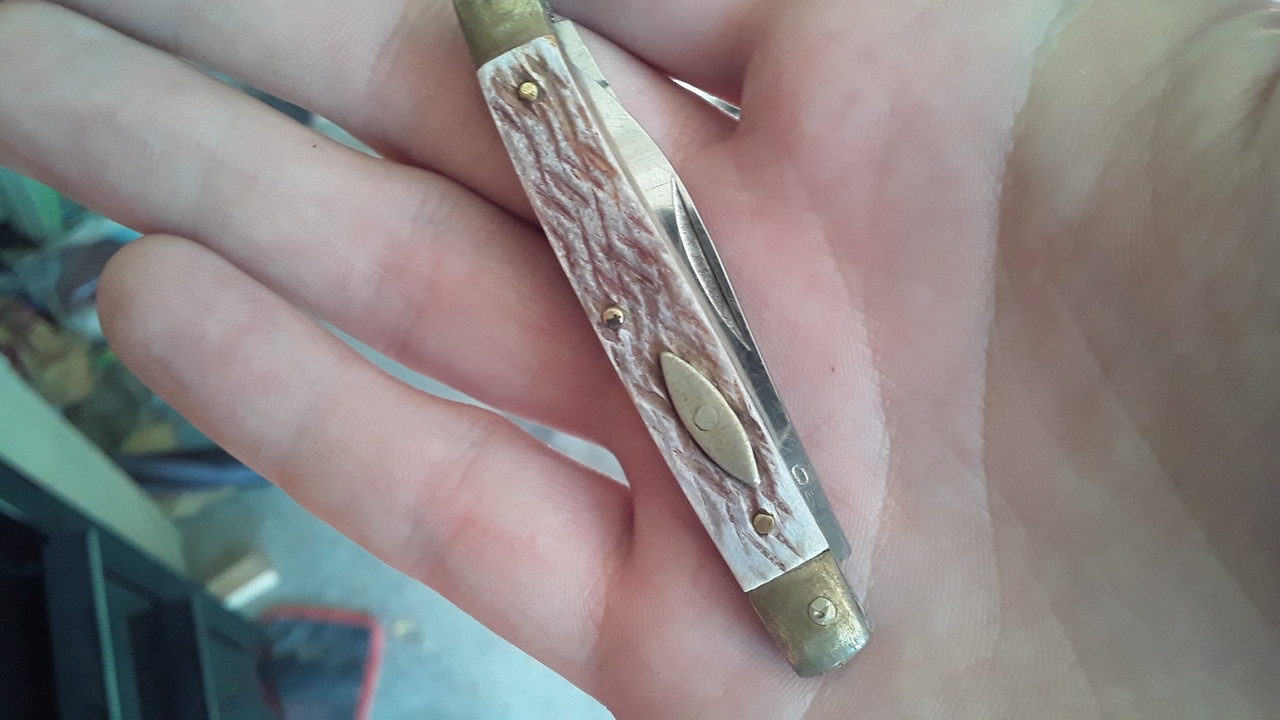
Looks good! I've been following along in hopes of learning a little bit. Will the bone need to be polished again once you get the color you like?I decided to try peroxide on the 08 I dyed yesterday and after about 30 minutes it had lightened up considerably, so I decided to then do another dye bath in just the chocolate brown color.
Now it looks much better, in person it mostly just looks like a very dark black walnut.
It looks pretty good in the right light, but I think if I had bleached the dye out of the bone and gone with just the brown alone this knife would look great.
Yes , the peroxide bleaching leaves a chalky surface and dulls the finish.Looks good! I've been following along in hopes of learning a little bit. Will the bone need to be polished again once you get the color you like?
I just bought what they had at Walmart.What kind of RIT dye did you use ?


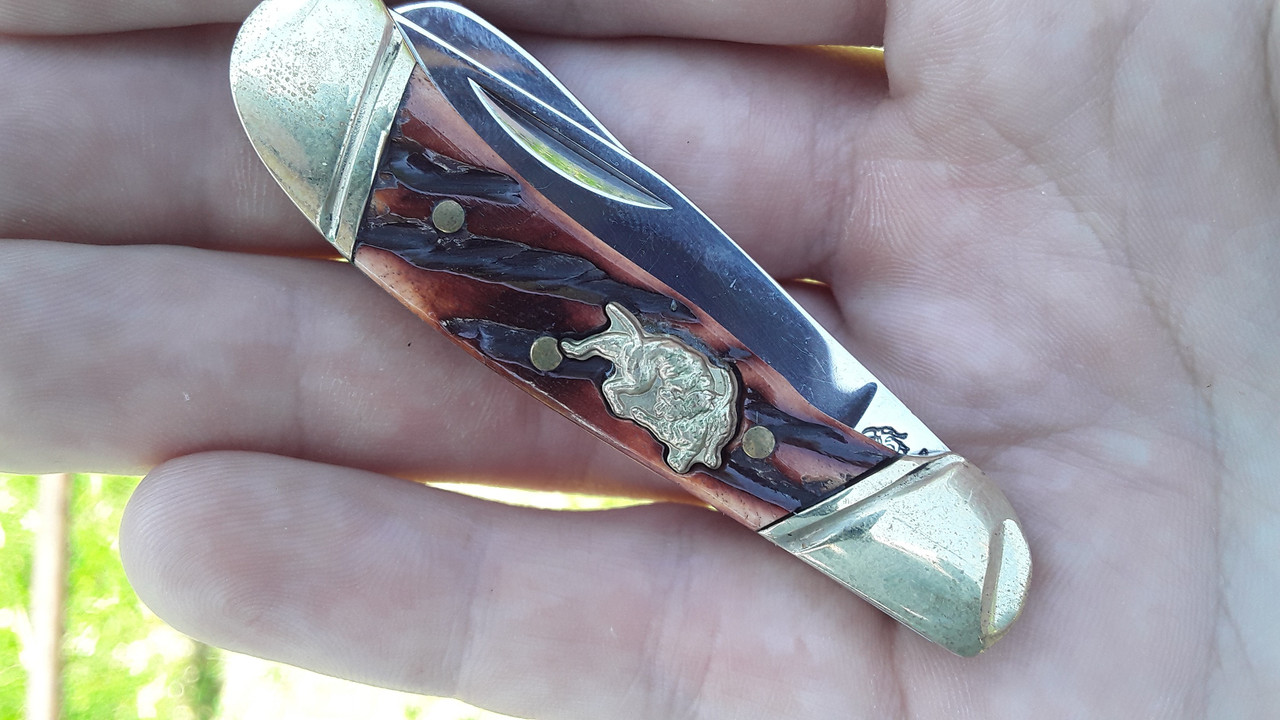
I think it looks really good. I bet the color will pop a little bit after it’s all polished up.Here is the mini coke bottle after I dyed over it with brown and glued the shield back in, the boiling was definitely necessary and I do believe the salt was necessary as well.
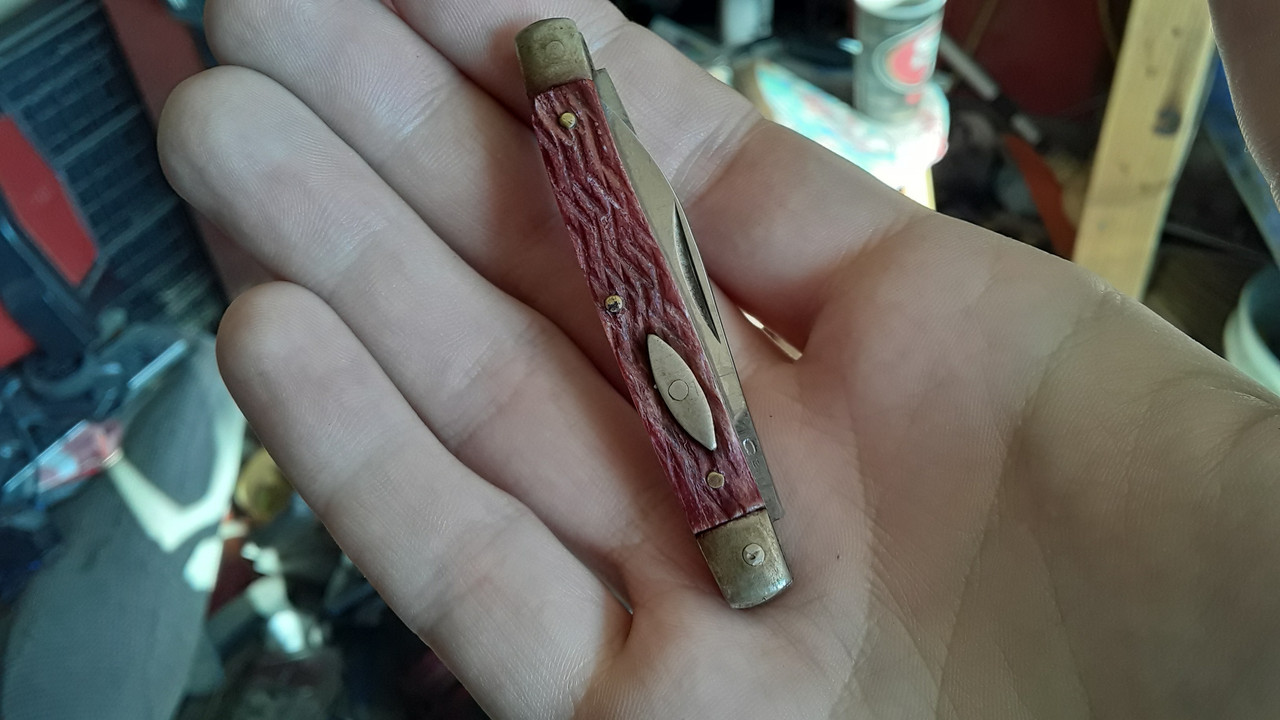
It's not terrible, but it just kind of looks like I went over an ugly faded red with brown.
In person it looks like a dirty very darkened red.


That came out great!Even the 12% peroxide did basically nothing to the grey dye after sitting in it all day, so I decided to give up on bleaching the dye out.
Since that dye isn't coming out I knew that what I was planning wasn't going to work out.
With that in mind I came up with a plan to achieve something decent looking using the dye I already have ( I'll save the stuff I ordered to try on some white smooth bone sometime in the future)
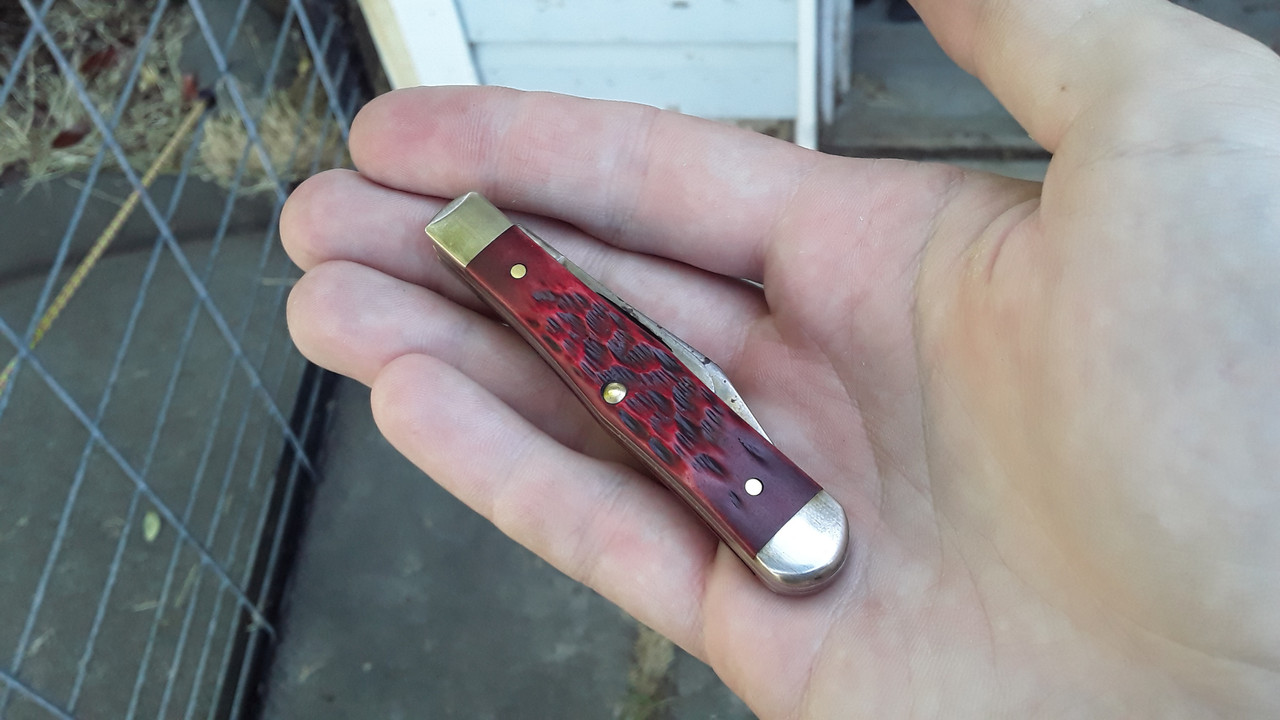
1st I gave it a 10 minute bath in the simmering chocolate brown RIT dye, then polished it aggressively by hand with some green compound on a blue Scott towel, from there I torched it all over with a little butane torch lighter to give it some other tones.
Now a word of warning here, I got the bone a little too hot next to the bolster which caused the bone to peel up a bit.
I put it back in the simmering dye for 5 minutes while I thought about how I'd fix the warp, and to my surprise I got very lucky as the warp was completely gone when I took it out of the dye.
After the last dye cycle and good rinse then WD40 bath and air compressor I gave it a final less agressive hand polishing and then a vigorous buffing with some beeswax on an old wool sock.
I am quite pleased with how it turned out, I wanted a brown of some kind with definition and color variation which I achieved.
Because of the existing dye and because I think it's just an inherent issue with the RIT chocolate brown it's hard not to get subtle purplish tones, but I did the best I could to counter them.
Ideally I wish I could have replicated Case's " vintage bone ".
That looks much better than the gray bone!Even the 12% peroxide did basically nothing to the grey dye after sitting in it all day, so I decided to give up on bleaching the dye out.
Since that dye isn't coming out I knew that what I was planning wasn't going to work out.
With that in mind I came up with a plan to achieve something decent looking using the dye I already have ( I'll save the stuff I ordered to try on some white smooth bone sometime in the future)
1st I gave it a 10 minute bath in the simmering chocolate brown RIT dye, then polished it aggressively by hand with some green compound on a blue Scott towel, from there I torched it all over with a little butane torch lighter to give it some other tones.
Now a word of warning here, I got the bone a little too hot next to the bolster which caused the bone to peel up a bit.
I put it back in the simmering dye for 5 minutes while I thought about how I'd fix the warp, and to my surprise I got very lucky as the warp was completely gone when I took it out of the dye.
After the last dye cycle and good rinse then WD40 bath and air compressor I gave it a final less agressive hand polishing and then a vigorous buffing with some beeswax on an old wool sock.
I am quite pleased with how it turned out, I wanted a brown of some kind with definition and color variation which I achieved.
Because of the existing dye and because I think it's just an inherent issue with the RIT chocolate brown it's hard not to get subtle purplish tones, but I did the best I could to counter them.
Ideally I wish I could have replicated Case's " vintage bone ".
I certainly think so.That looks much better than the gray bone!