What's going on in your shop? Show us whats going on, and talk a bit about your work!

Got a bit more done on the Mountain Man Folder. The backspring and blade are now fitted with perfect rise and fall. There is some trash in the joint in the photo. One more pass on the 400 grit belt, then clean it out and the line will almost disappear. Finishing up the blade and doing scrimshaw next. Notice how I store projects in a multi-compartment box. Nothing gets lost this way. On minis and folders it is super important. HF and other places sell these boxes in many sizes for a buck apiece. They will hold all the parts for a drop point hunter down to a mini.

I also rebuilt a wakizashi that I made many years ago for a collector. It had an accident when someone was looking it ... accidentally dropped it ... and stepped on it ... breaking the tsuka. The owner was heartbroken. I found out and offered to rebuild it at no cost or shipping. Good as new now. Shipping out tomorrow.

mountain man folder 9.jpgmountain man folder 8.jpgmountain man folder 10.jpgmountain man folder 11.jpg20250617_173757.jpgmini wakizashi.jpgmini wakizashi 2.jpg
 
Profiled M398 Blanks ready for drilling and a stack of S90V barstock ready to be turned into future steely goodness!

tSsatex.jpeg
 
The Mountain Man Folder is done except some final polishing of the ebony bolster and scrimshaw. She walks and talks loud. Planning on doing a group of these from smaller than this one to small Bowie size. Other cool stag stuff in the works.

The snake head used as a prop is from a blacksnake that I cast his head in silver back around 1975. Some city workmen on potholes spotted him sitting peacefully by my bushes and were whacking him to death with shovels. I ran out and stopped them, but it was too late. I took the head to the shop and cast it in silver. Anything that will burn can be cast in investment. I have done baby turtles, lizards, seed pods, pine cones, insects, etc.


mountain man folder 12.jpgmountain man folder 13.jpgmountain man folder 14.jpgmountain man folder 15.jpgmountain man folder 16.jpgmountain man folder 17.jpg
 
Here's a few paring knives I made in .062" AEB-L stainless steel with ruby red linen Micarta and Jute Bison colored Micarta handles. They turned out pretty decent. Ive been working a lot with AEB-L this year. It seems to heat treat and temper well and it's a decent, nicely priced stainless steel for just about any knife. (The point on the bison colored one looks blunt but I just checked it and it’s as pointy as the red one so it must be a weird reflection making it look that way).

IMG_8058.jpeg
Jeff
 
Last edited:
Decided to make an attachment for my horizontal bandsaw, so that I can use it as a vertical one, should i need it
I wanted to use the vise of the saw itself, to be able to quickly put it on, or remove it, also this way I don't need to use any tools to do so
iYncyqA.jpeg

Welded some moderately thick walled mild steel tubing together, and put on a 10mm (~3/8") plate on the other end to serve as table. It's a bit thicker and heavier than I would've liked, but it was the only material I had lying around that was about the right size for a usable table.
I also welded a small piece of flat bar to the main tube to act as a stop. It butts up against the vise, and makes sure it goes in roughly the same position each time.
Afterwards I welded together a 10mm flat bar, with a piece of angle iron, to make a fence, and milled the side perpendicular to the bottom
iNj4M0U.jpeg
z7SF4j3.jpeg

It has another piece of flat stock on the underside of the table, connected with a thicker piece, so that it's a "U" shape, and sandwitches the table. The bottom piece has 3 holes drilled and tapped for M10 screws, to effectively pull the bottom of the fence flat to the table.
I also milled the back edge of the table perpendicular to the saw blade, so it can serve as a 90° reference for the fence, while setting it up.

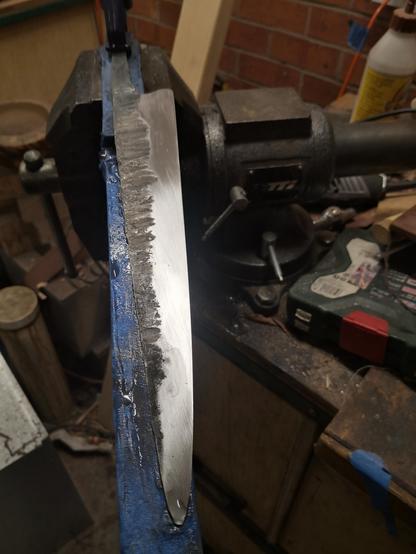
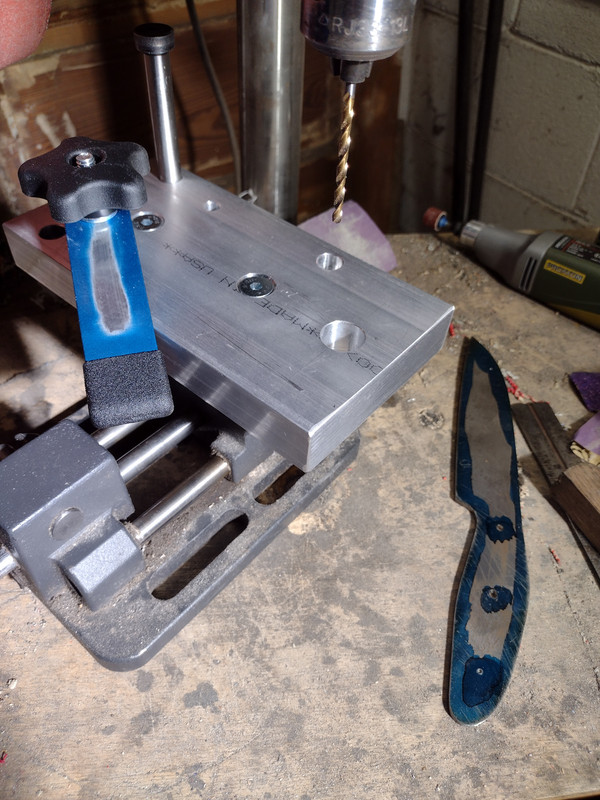
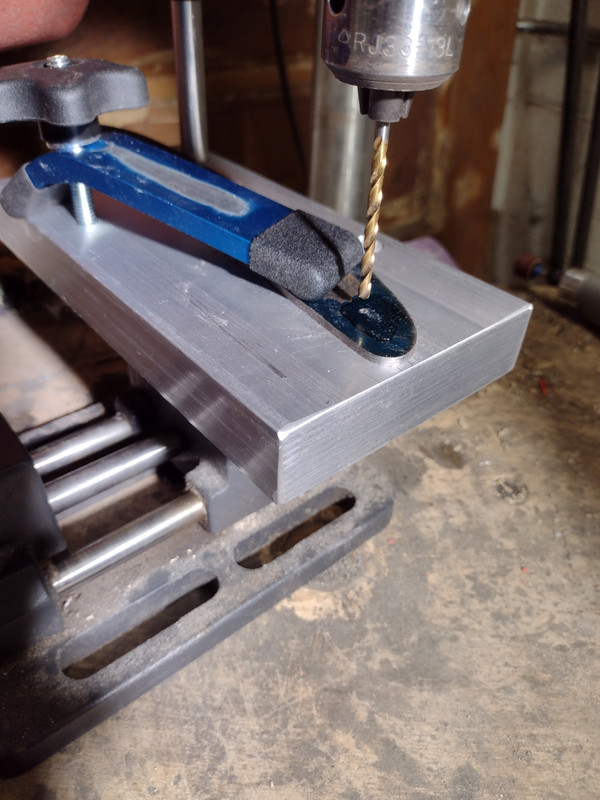
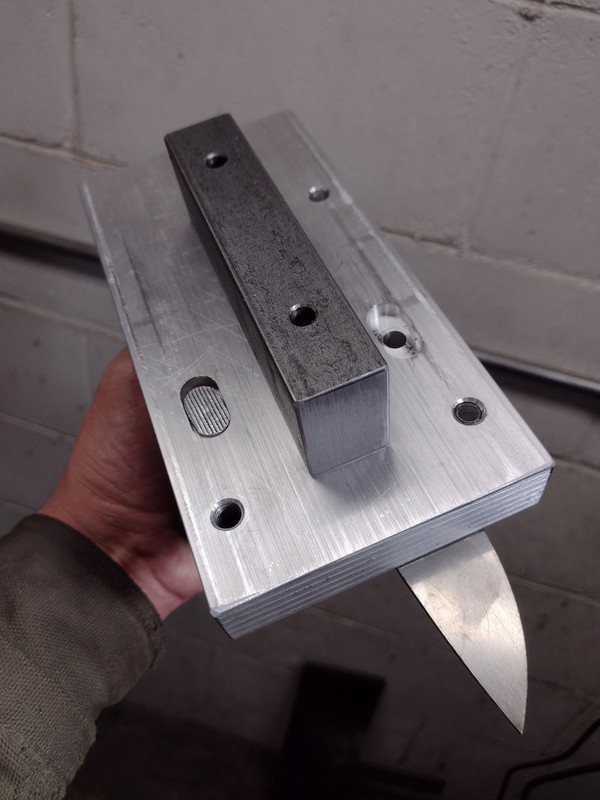
While I was taking the pictures, I also remembered to take some of a paring knife I am currently making. Well, only the handle to be precise, the blade was already hand sanded, and taped over to prevent scratches while I'm making the handle
mezfGlF.jpeg

7UHtBRy.jpeg

V4mc9O0.jpeg
 
Normally I try to drill my holes in steel with parallel sides, clamped in a vise.

That's not always possible.
With the new batch of Procut, I just knew I wanted to try it, not necessarily knowing what I wanted to make.... When I'm free'er with the design I'll often cut profiles first.

I probably should of made one of these years ago, and I'm sure there are other ways ...
I like that I can quickly clamp it in my little vise.


Spent most of my vacation from work in my shop in the heat wave, but I got a bunch done!!

5 Nitro V blades with AmeraGrip handles (2 clip points, 1 4" drop and the other 3" drop points), plus a Magnacut 4" drop point and 3" drop Point, and another reverse tanto in Nitro V (3/32" thick) with ivory micarta handles, natural canvas pins, liners, lanyard tube and spacer and double black G10 guard. 498839490_18055829792582960_799621558278706288_n.jpg503422148_18055829723582960_623156429867862005_n.jpg503474693_18055829720582960_2777658941800114003_n.jpg503499310_18055497314582960_3941536388611909093_n.jpg503606756_18055590377582960_2317595244361444344_n.jpg503609722_18055829705582960_7282270798368242729_n.jpg510472997_18055825229582960_2849928247462026386_n.jpg510965020_18055825220582960_693605397796720167_n.jpg
 
This is my take on a 5" boot knife with a micarta handle. I hand set welds all the welds, it was cut and stacked 2 times. I did all of the drawing out with the rolling mill I made so I got nice straight lines in the end product, wasn't sure what a all rolled billet would look like but I'm happy with this for the type of knife it is.

Steve
 

Attachments

  • Boot Knife.jpeg
    Boot Knife.jpeg
    58.3 KB · Views: 3
Back
Top