What's going on in your shop? Show us whats going on, and talk a bit about your work!

while I'm not really digging the general shape of this sheath, (it's close but not quite there) its function makes me very happy. I'm always looking to create sheaths that have an easy, quiet draw, that also retain the knife well enough that it doesn't rattle around or fall out willy nilly. This one works as perfectly as any sheath I've ever made, and better than most.


Now I can start thinking about how I want to design the carry system...
 
Practicing sweeping plunge lines:

pzhlQhv.jpeg
 
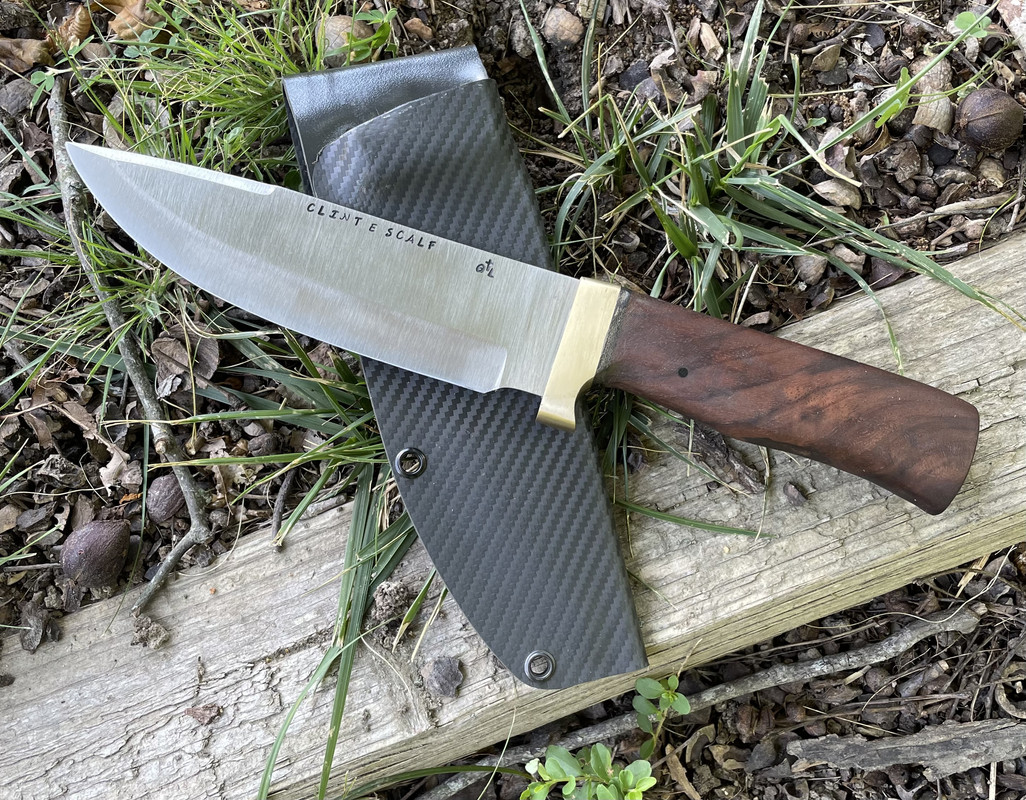
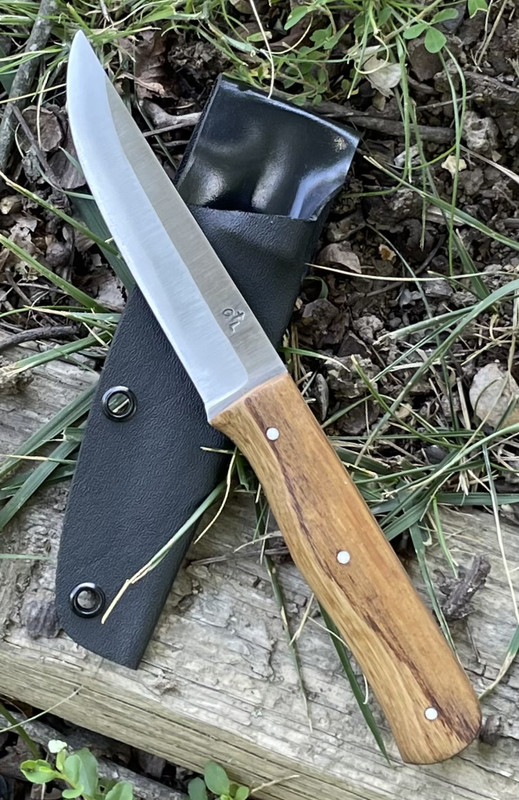
Got these 2 in Nitro V finished up and shipped out on Wednesday! Reverse Tanto has polished/buffed double black G10 guard, natty canvas micarta pins, lanyard tube, spacer and liners and ivory paper micarta handles. 3" clip point is wearing orange Ameragrip and black micarta hardware.

thumbnail_PXL_20250702_180112444.jpgthumbnail_PXL_20250702_180753876~2.jpgthumbnail_PXL_20250702_180800988.jpgthumbnail_PXL_20250702_180842386~2.jpgthumbnail_PXL_20250702_181022817~2.jpgthumbnail_PXL_20250702_181025738~2.jpg

Been using the RD Knives Carbide platen a lot lately, still looks brand new after I scrape the reside from the platen from the wet sanding! Really cleaned up and flattened my grinds out and made my plunges much more consistent, too! I started using cork belts instead of scotchbrite belts as my final finish. Since I started doing lengthwise grit on the ricasso area and vertical on the blade, the scotchbrite tends to scuff up the transition, making it look not as crisp, so the cork belts seem to do better in that area!

Been playing with some spine jimping with the generic foredome type grinder lately, too, finally decided on doing it after the blade was fully done! 2mm carbide burr works pretty well size wise. I need to work on getting a template done up to help with lining up the jimping so it's more evenly spaced since I am just doing it by eye. I tried Cricut stencils, but they fell off easily.

Also been using the 1" scalloped belts in 120 and 240 grit, not just the 2" wide scalloped belts. They put a bit more pressure into a smaller area and work really well to take out the initial 40 and 80 grit sanding scratches from the roughing steps!

I picked up some 3" buffing wheels with 1/4" shank mandrel to use in my generic foredom to buff up the handles. I was using buffing wheels in my drill press, but since I have it set on slow speeds for metal drilling, it doesn't work as well. The generic foredom has a foot speed pedal, so I can control the speed and use the small buffing wheels to shine up the handles nicely and the 3" wheels are pretty controllable by hand. I will probably end up with one of those variable speed 3" bench buffers for handles eventually. The paper micarta looks nice all buffed and shined up and it should work nicely with stabilized woods, too!
 
Congratulations.
Did those two guys help you?
Thank you very much!

While taking the test, no help is allowed. However, once completed, we discussed about my presentation set of knives and their feedback is worth its weight in gold. I forgot to mention, in the picture it's Josh Fisher and Karis Fisher, both are master smiths with the American bladesmith society.
 
This side project has been in my mind for several months (I think I first saw this idea on Aaron Gough's channel). It's a glue up jig for glueing liners to handle scales. A cheap (Walmart) plastic cutting board, a piece of leftover cabinet shelving and some toggle clamps from the local Harbor Freight. I can glue up 3 sets of scales, multiple layers, multiple thicknesses.

6EXncX5.jpeg
Very cool!
That definitely simplifies the process.
Jeff
 
This is a knife I made a year or so ago and never really liked. I completely re-profiled the blade and put new handles on it. I also got better hamon definition this go round because I’ve spent a lot of time working on polishing technique. Still have a lot of learning to do but I really like the way this blade turned out.

IMG_1061.jpegIMG_1062.jpegIMG_1064.jpeg
 
Scarfoot, love the knife! Did you reverse taper the brown liners to match tang so the green material was on the level? Sweet!!
 
Scarfoot, love the knife! Did you reverse taper the brown liners to match tang so the green material was on the level? Sweet!!
Yes I started doing that a while ago. Initially it was just to help me drill the pin holes without shimming the handles. I was initially going to grind the micarta side but I thought tapering the liners might look cool. Now I do it on all my tapered tangs. Needless to say it’s much easier to do with a surface grinder attachment. Only takes a few minutes.
 
feels good messing around at the grinder
gonna be a lotta material to hog off if I want it to be straight
 
Back
Top