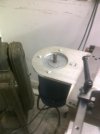
WIP Steel grinder disk machining

Is this similar to what you are describing?

http://www.zorotools.com/g/Mandrel/00024515/

Thanks

No, that isn't a vertical arbor, that is a horizontal buffer arbor or a jack shaft. It is for running buffers or wheels that give force perpendicular to the shaft. You would want a shaft with bearings to allow thrust parallel to the shaft end ( from the end).

Look at this page and find the AR-16R and AR-17R faceting machine arbors. That is the type made to run a disc or lap that will receive a downward force. The AR-110 and AR-120 are smooth shaft, which is what would work for a disc like Nathan's. I would have to check the bearings they use to see if they are heavy enough for a big steel disc, but this is the type of setup you want to do a VS disc right.
http://www.lapidarydiscount.com/Arbors.html

All that said, 95% of all discs are directly mounted on the motor shaft. From an engineering standpoint it isn't perfect, but form a practical home shop point of view it make good sense.
 
Last edited:
About 2 months ago I acquired a disc sand set up with a variable speed. I am using it a lot to take over a lot of the hand sanding on folder parts. I don't have a surface grinder. The motor is a 1735 RPM. I have yet to run this machine over 50% on the indicator. Frank
 
I've always enjoyed your machining threads never knew you were so close by! I'm maybe 15 minutes south of you on Mountain Island Lake :thumbup:
 
I haven't noticed warping after welding. Regardless, the working surface hasn't been cut yet so I'm hoping I don't see problems with that.

I did the welding here myself using a positioner I built. I've been experimenting with my welding parameters. I've settled on a two pass weld at 285 amps on a square wave TIG, 1.5 50-50 pulses per second with 50% background power and 18 CFH argon. :thumbup:

If you ever wanted to do a thread showing off that positioner, I'd love to read it.
Especially what features you consider important and what you would do the same or differently next time.

The ground clamp is also a feature I'd like to see how you approached it.
 
Oh sure, I get busy planning for a silly 'ol wedding and I miss one of the threads of the year...!!!! :eek: :grumpy:


;)


I want one. Actually I want 3, but 1 is more likely. ;) LMAO

And here I wanted to register at MSC and Enco, when I should have registered at Nathan's shop! :D

With TIG work like that, you better change your screen name to Nathan the Machining Welder! :eek: :thumbup: :cool:


Super nice work and awesome thread Nathan!!!
 
If you ever wanted to do a thread showing off that positioner, I'd love to read it.
Especially what features you consider important and what you would do the same or differently next time.

The ground clamp is also a feature I'd like to see how you approached it.

Hey #s,

My rotary positioner is nothing fancy at all. Hardly "post it on the internet" worthy, but here it is:

13.jpg~original


I started with an old geared speed reducer I had sitting around and made an adapter to mount an old junky 8" chuck that was sitting on the shelf. I screwed it down to some lumber to get up off the weld table a little bit and to electrically insulate it from the weld bench.

I clamped onto a stub on the opposite end of the output shaft. At first my plan was to bolt onto the stub and let the ground cable twist rather than mess around with carbon brushes etc. But you'd need to untwist it between welds. So I tried just clamping on the stud and letting it slip in the clamp and it worked just fine. Sometimes simple works. *shrug*

I powered it with a variable speed drill on the input shaft giving me a trigger controlled drive.

You don't want welding current going through bearings and gears etc, so grounding to the casting was a non-starter, which is why I used the solid shaft. I wasn't real keen on current going through the scroll mechanism in the chuck either, but I did it anyways. I never noticed any problems with it, but I'd never do that to a chuck I cared about because of the risk of arcing on a precision surface.
 
Whewwwwwwwwwwwwwww......................

Nathan Carothers " Dastardly Disc Developer"

We're ( Bladeforums members/lurkers/trolls ) all lucky to have people like you, Stacy, and Nick ( and many others now that I think of it ) to learn from and buy cool stuff from.

Thank you for taking the time to share your experience.

Corey "synthesist" Gimbel
 
Last edited:
So have you settled on the final arbor sizes? 5/8 is primary. you talked of 3/4 and there has been talk of 7/8.
 
Very Nice Nathan, I have been holding off on the purchase of a Disc despite the obvious advantages. I think this is a sign I will take one if one is available. Great quality work.
 
Dont let this happen to you. Remember Nathan, only you can put a stop to this senseless wasteful tragedy.

diskgrinder.jpg
 
Dont let this happen to you. Remember Nathan, only you can put a stop to this senseless wasteful tragedy.

View attachment 373895

I'm working on them steadily. I suppose I do need to update the WIP.

The working faces and bore are all precision single point turned, they're awaiting back bevel, final balance and broach.

Pile of flat disks:

flat.jpg~original


Pile of 1 deg tapered disks (and a rear glimpse of the messy shop):

1deg.jpg~original


I'm working on them right now
 
BTW- How big is that facet on the outside edge?

Right now you can see the outside diameter of the disk against rough unturned stock. That rough unturned stock gets removed from the other side as the last machining operation. I'll be cutting it into a bevel on the back of the disk for clearance to wrap work around the disk. The exact width of this area will vary from disk to disk because each disk face was cut as many times as it took to get the finish right.

The bore, the working face and the outside diameter were all cut at the same time in the same setup to prevent runout in use. I held onto the part of the material on the outside of the disk that will ultimately be removed. I considered holding the stub for this part of the operation, but hardened alloy steel is difficult to cut. The cutting forces are high and a great deal of rigidity was necessary to minimize deflection and chatter etc. As it was I couldn't cut it hard enough to break the chip without stalling the spindle (10 HP peak) so I cut lots and lots of long blue curls. We joked about keeping them as Christmas tree garland. (I hope like hell it doesn't somehow show up again this December)
 
No, that isn't a vertical arbor, that is a horizontal buffer arbor or a jack shaft. It is for running buffers or wheels that give force perpendicular to the shaft. You would want a shaft with bearings to allow thrust parallel to the shaft end ( from the end).

Look at this page and find the AR-16R and AR-17R faceting machine arbors. That is the type made to run a disc or lap that will receive a downward force. The AR-110 and AR-120 are smooth shaft, which is what would work for a disc like Nathan's. I would have to check the bearings they use to see if they are heavy enough for a big steel disc, but this is the type of setup you want to do a VS disc right.
http://www.lapidarydiscount.com/Arbors.html

All that said, 95% of all discs are directly mounted on the motor shaft. From an engineering standpoint it isn't perfect, but form a practical home shop point of view it make good sense.

Thanks for the link Stacy. I've been thinking about building a variable speed buffer with 4 different wheels on it. That website had the exact arbor I needed.
 
I picked up a Baldor 8107w bench grinder yesterday (perfect shape and for $100)
Since its a $1000 setup I had to have it but was wondering if I could use it with the disk.
It's a 3/4 shaft 3600rpm
I know zero about this thing but if I can use it with the disk or with a buffing wheel (I was looking for a buffer when I found this ) I'd be ecstatic .....
I plan to do a little research on it but thought I'd try to cheat and see if anyone knows here


As a quick edit I think I will avoid using as a buffer speed seems to high and I think might make a dangerous machine even more deadly
 
Last edited:
consolidated to another post
 
Last edited:
Back
Top