15n20 steel Give-Away

Sweet give away my friend! Thank you for the opportunity!
I just started forging and built a brake drum forge that's powered with a shop vac. Needed a damper for the air flow so I came up with this for free!
0ef81a0bb67a86d5fa508d801f51a995.jpg
ce623762b03d07609ce2e5d780121910.jpg

3/4" MDF box built with a piece of MDF that slides in and out to slow the air once the coals are where I want them!
 
Hey man- thanks for the giveaway! Ill jump in as well!

Safety tip: Buy several Neodymium Magnets (or use some from busted hard drives) and put them inside a sandwich baggies- hang these around your grinder or your buffer/polishing station- every so often just take the baggies down and turn them inside out and toss- you will be surprised how much metal is in the air around you!

Silver Forge Studio
 
Last edited:
Second tip:

Making these little guys was a total joke/experiment that really worked when I needed to "blend" a few contours and lines- sure beats trying to bend a pink pearl eraser into a corner!

Soft Fine/Finish Contour Sanders...
1- get some PVC pipe in the various radius/diameters you want... slice in half lengthwise then cut to 1/2 or 3/4 in lengths.
2- buy some "SCULPEY" clay in various colors (one for each grit you will make)
3- get lapping compound
4- knead the lapping compound into the sculpey till evenly distributed and uniform color
5- Press into the PVC to size and shape
6- BAKE per instructions (the newer sculpeys do not shrink as much as the old so dimensionally its a LOT better than it used to be)
7- MARK the Grit so you know what is what- and have fun!

Thanks for the contest Bro!
 
As of now I got two, the first is a total no brainier, and a lot of guys do it, I unfortunately learned it the hard way.
TAPE THE FINISHED BLADE. Getting a scratch in your 2500 grit finish that you have to go back down to 400 to remove kind of sucks.

And number two, do your sanding/grinding/anything with lots or awkward handling of a blade over a soft surface like a rubber mat, that way when you drop the blade the tip doesn't get trashed by a concrete floor. This one may or may not have saved me a few times...
 
Thanks for doing this JT, it's really cool to see people doing giveaways just because.

One thing that I have found to work very well and has yielded some decent results is to spread a little Mothers "Mag & Aluminum Polish" on your sandpaper when you're doing your final grit. I don't know why but it gives a nice, clean finish and lubricates/cleans the paper as you go. I have noticed that it reduces the number of those pesky spots in the middle of the blade that seem to show up when you think you're done :rolleyes:

Another thing that I discovered, much to my chagrin, is that trying to grind down excess mosaic pin is a bad idea. No matter how much you have to grind off and how aggressive your belt is, the smaller pins seem to heat up fast and the epoxy lets go. Just cut it with a hacksaw and file it flush.

When you start working on the handle, sheath, or putting a blade in storage for a while, Coat the blade in some wax rather than oil. It sticks to the blade and keeps the moisture away like the oil, but it doesn't wipe away as easily. I use White Diamond "Butchers Wax."

Thanks again JT, I really appreciate this.
Tanner
 
Last edited:
Awesome giveaway man, a couple things I've picked up, even though I've only been doing this about a year,
Hand forging damascus isn't as hard as everyone says it is, I forged my first billet last week, 1x4" pieces to start off with of 1080 and 15n20, cleaned them up on my belt sander to get all the faces shiny (including the ends) then stacked the pieces accordingly, welded each corner and along halfway of the long side and then a handle on the end (over do the handle, 1/2" steel moves like play dough at welding heat and can easily fall off if you make sure its really on there) then I let it soak in gasoline while the forge heated up, then I put it in the forge and let it heat to about 1600-1700 degrees and I tapped it together lightly to make sure the steel was nice and snug. Then I put a liberal amount of flux on it and put it back into the forge to get up to welding heat. You know its at welding heat when you pull it out of the fire and the steel is white and smoking. A couple evenly spaced hits across the face of the steel set the welds, then I flipped it and hit it a couple more times on the other side, I brushed off the sides and re fluxed them, then it went back into the fire. I repeated this process while keeping it nice and hot for 6 or 7 heats. after that i took my angle grinder and i ground off the sides to make sure the steel was pure, and it was. basically i then drew it out into a large bar, let it cool, cleaned off all the faces and cut it into 4 pieces, then I re stacked and did it again. the second restocking i cut it into 5 pieces, and bullied it into a useable bar. I took about 10 hours total, and I only had someone striking for me for about 6 heats. in the end i had enough steel to make a small pocket integral and a 5" kitchen utility knife. Sorry for the novel, but I feel that it needed to be said, hand forging damascus is not that hard.
A trick for getting a good fit on integral bolster knives (integrals) is to cover the bottom side of the integral with sharpie and press it hard into the handle material, where the sharpie rubs off is where you need to take off material.
I Hope this helps, thanks for reading and thanks for the awesome giveaway!
 
When hand sanding or draw filing, make sure the edge of you blade is not hanging over the wood you have it c clamped to. If you don't you can get cut.
 
Use a mirror to make sure guard is square to your blade. Hold a small blade on the front of your guard, tight to it, mirror towards the point. Use the reflection to make sure it's square. If it's square, the edge and the reflection of the edge will be a straight line, if not, it will diverge at the mirror face.
 
Very nice GAW JT, thanks for the chance--my quick tip is this. When wanting to sand down, grind a scale where you don't want to get your fingers to close to the spinning disc or speedy belt, take a piece of waste stock, like a scrap piece of 2x4 or whatever, and put a drop or two of super glue on your scale and glue it to the scrap wood. When you've finished sanding your scale to what you want a couple quick strikes with a hammer will break your scale loose easily. This one I got from ERU & Bubble Jig mfg. Fred Rowe.
 
Thanks for the opportunity, J.T. I make a lot of small edc's, and to keep them uniform, I rough cut them on the band saw and then superglue several together with a template and profile grind them as one.

Dick
 
My contribution is that to use your file guide to get your bolster backs and scale fronts nice and square. Clamp them together and you can use your belt grinder to get them all trued up and ready to glue!

That helped me out quite a bit after I tried it the first time.
 
Awesome idea for a giveaway. Your tips and contributions many years back were invaluable to me as I got started.

Quick tip: buy a digital angle cube! You can zero it on your work rest/table and make sure your platen is at true 90 degrees (within a 1/10th of a degree) and it really comes in handy when settings angles for bevels, sharpening, etc...

Stick it to a straight edge, and now you've got a relatively accurate digital level.
 
Another thing I've been doing is when sanding handles to high grits I go to the buffer every other grit. It will reveal what you've missed and you only have to go back one grit that way instead of many. I started this after wet sanding to 3000 only to find several 220 scratches hiding out at the buffer.
 
Awesome GAW idea J.T.

Most of the tips I have are specific to the Craftsman 2x42 I have had for some years. I removed all of the guards/tables and installed a pyroceramic platen liner. The smaller work rest for the flat platen is the only rest I use much.

The tracking adjustment screw can be given more leverage by gluing in its Allen wrench, or by buying and screwing in knob from your local hardware store.

For a convex grind I use the portion of the belt just above the platen, below the tracking wheel. The belt tension knob/handle can be removed to provide better access to this area, especially for larger blades. It is pretty easy to remove/install in seconds. Leaving the platen in place provides more reinforcement for the belt than if you were to remove it for a full-length slack belt.

A few years ago someone here recommended Satco for hand files. They have a list of files in stock that they will email if you request it. I got a bunch of files, deeply discounted, including some very large and specialized ones.
 
JT I'm needing to order some 15N20 regardless if I win the drawing or not. Can you send me an email @ tlghostman@gmail.com please. I can't figure out how to message.


Sent from my iPhone using Tapatalk
 
Thanks for the generosity, JT!

As a newbie, one thing I found easy to do that almost nobody mentions: if you're heat treating and quenching into vegetable oil, you can just use a big stock pot, fill it with your oil, and heat it up 20-40 degrees hotter than desired for quenching on your stove top. By the time you finish austenitizing, it will have cooled close to what you want for the quench. And a big stock pot volume means you'll very likely quench fast enough to beat the TTT nose. Easy peasy. :)
 
Awesome gaw idea. I'm in thanks!

I've shared this before but here it is again:
_____________________

This is how I bevel the front of my scales on a full tang knife. This may be similar to how others do it, but I figured this way out through trial and error. It is also based on the equipment that I have in my shop. This is one way to get it done, and it works for me.

Here's an example of how it looks when finished (not the knife in this WIP)

I start by tracing my tang outline onto the inside of my scales. I do this with the pins press fit, in order to keep everything lined up.


Once the scales are roughed out on my band saw, I put them back on the tang again. Next I draw a line in pencil, where I want the front of my scales to be. I also pencil in the general shape of the front of the scale. This prevents me from getting too close to that front pin.


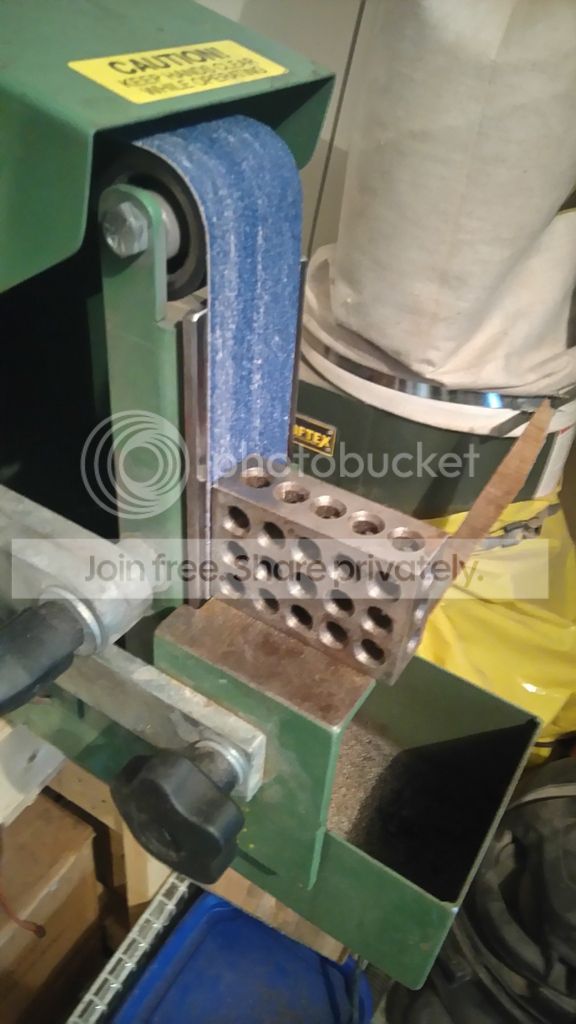
Next I square up my platen with my work rest, using a 1-2-3 block. It's important that everything is square in order to keep the fronts of the scales symmetrical.


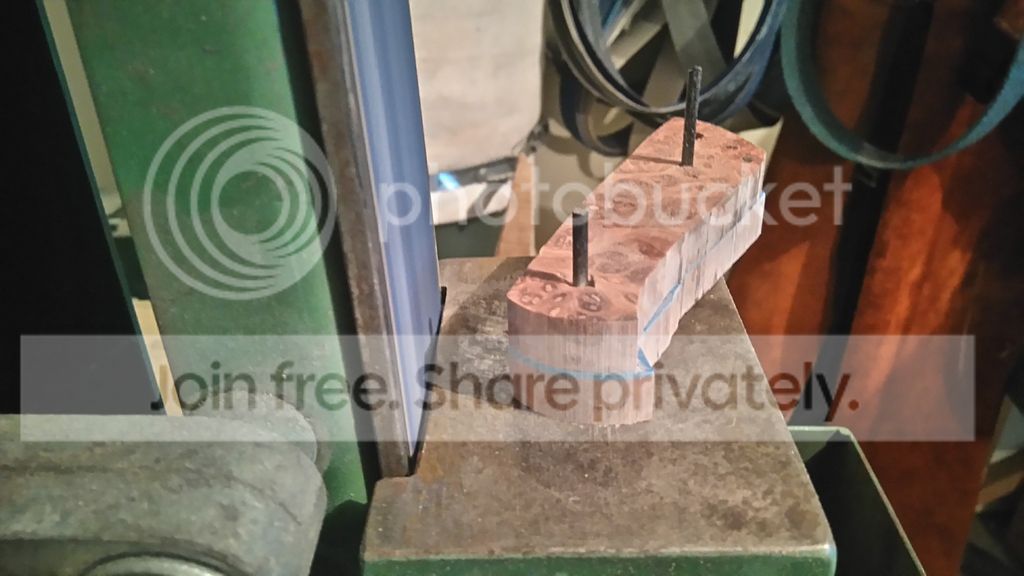
Next, I place the scales together and press fit the pins into them to keep them together. Next I grind to my penciled in line. I like a curve on the front of the scale, but some prefer them to be flat.


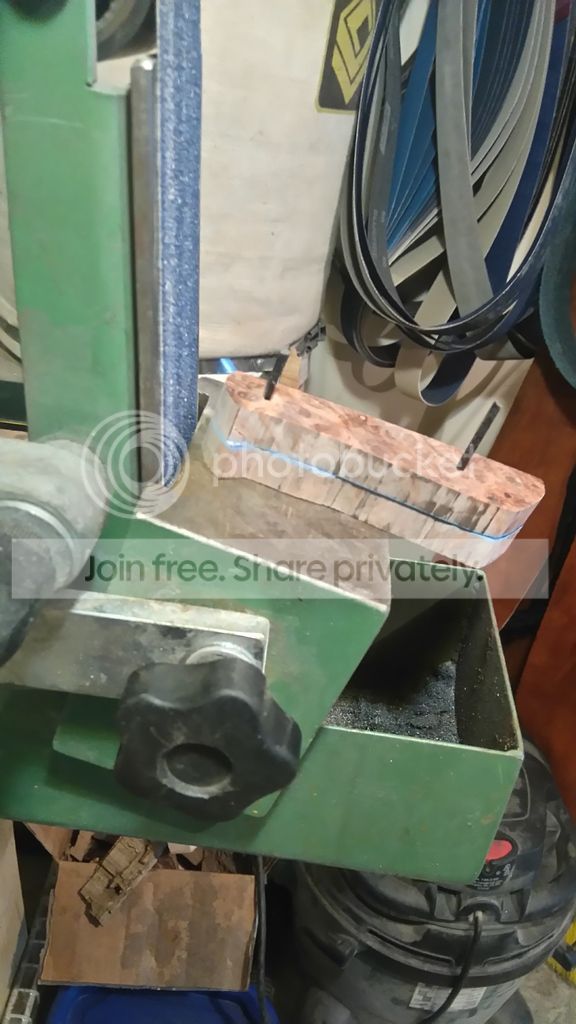
Then I angle my platen to start getting the front of the scale beveled. Don't start with too steep of an angle, or you may grind right up to your front pin. You can always increase the angle, but you can't decrease it :o

Grind the angle on the first scale, slightly over the center line of the scales. This will be corrected when you flip everything over and grind the other side.


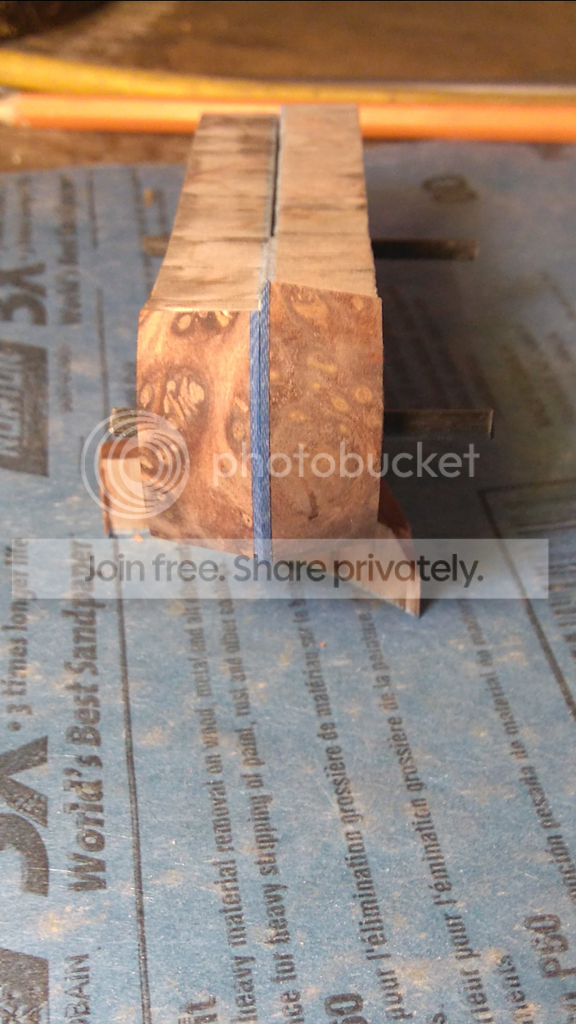
Then flip it over and grind the other side. Move up through the various grits until you're happy with the finish on the front of the scale.


On your final grit, make sure that your center line is perfect. If you want, this can be done with sand paper on a granite plate as well.


Now the scales are ready to be glued to your tang.

I hope this makes sense. If you have any questions, or suggestions on other ways to do this then please feel free to comment.
 
Thanks JT!
Lots of great tips here!
One thing that has helped me is getting drill bits that are one step larger than the pin stock.
So for 1/8" pins get a #30. I like these: Neiko Pro 10220B #30 Double Ended Cobalt M35 Drill Bit Set. These work for both annealed steel and wood.
For 3/16" get #12 size bits.
For 1/4" get Letter F bits.
I use Mobil One oil when hand sanding blades when I get to the 300 to 600 grit stage. It makes for a great satin finish.
 
Thanks for putting this one up, much appreciated!

A simple tool for cleaning up epoxy along the edge of a scale. Made from a length of wood dowel & a piece of 1/4" silicon bronze carriage bolt epoxied & shaped on the drill press. Won't hurt the steel finish on a blade, but the bronze is pretty hard & buffed out to smooth the edge a bit. Coat of danish oil & it's done after sanding the grip. Not elegant, just something functional.

ScraperS_zpsfrkbx5ec.jpg
 
Nice one JT.

To prevent a rash from using rosewood, shower immediately after sanding and use shampoo instead of soap, it will better strip the irritating oils f4om your skin and prevent a rash.
 
Back
Top