Build a linerlock

Gareth Bull

BANNED
Joined
Apr 6, 2012
Messages
107
I thought I’d do a pictorial of a linerlock I’m making, might be useful to some, so here we go:

Here are the basic parts, roughly cut out. They’re all a little oversized so I can grind them all down together for a tight fit.
1-1.jpg


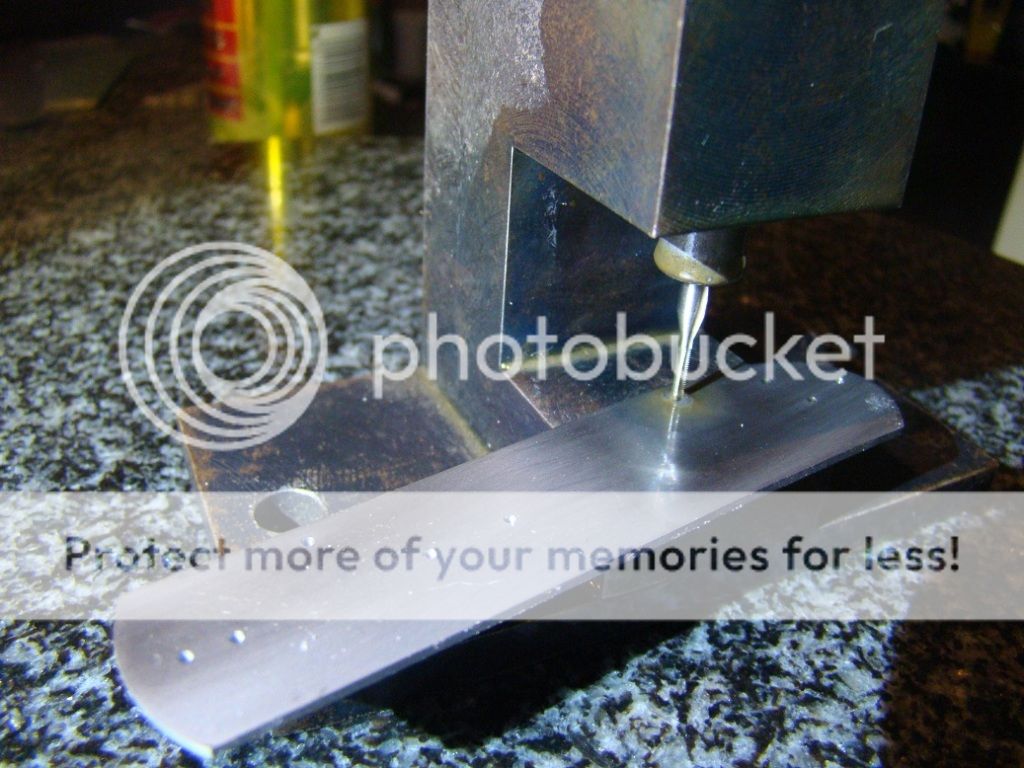
Step 1 is drilling all the holes in one of the liners; I’m using UNF-080 screw so I drill with a 1.25mm drillbit:
2.jpg


Step 2 is transferring those holes into the opposite liner. I clamp them together with a piece of G10 underneath for rigidity and also something for the drill to pop out the titanium into, that way I won’t drill into my clamps.
3.jpg

4.jpg


Step 3 is enlarging the holes in one scale to allow the screws to pass though easily, I used a 1.5mm drillbit here. I also countersunk the holes to accommodate the heads of the screws.
5.jpg


Now you can tap the liner with the smaller holes. This is a brilliant tapping jig that keeps everything absolutely perpendicular and stable, UNF-080 taps break very easily, this tool makes them last for ages. Only tap the holes you need for the next step (pivot and backstrap holes in this case) you'll need to pass a drillbit through the bolster and handle material holes later and if they were tapped you might ruin the threads.
6.jpg

7.jpg


Now that the holes are tapped, I screw the two liners together and sand them down so they match.
8.jpg

9.jpg


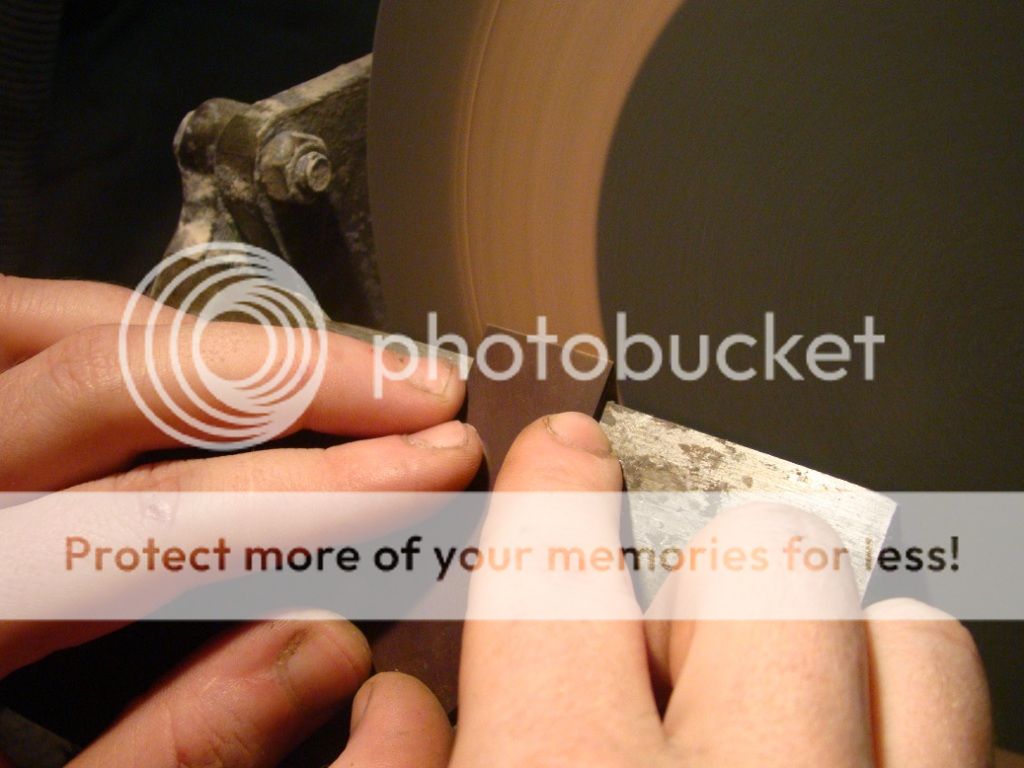
Next I grind a bevel on the titanium bolsters and a matching angle on the micarta. This creates a dovetail which helps keep the handle material down and looks great when you radius the handle later on. I set the rest on my disc sander to 45 degrees and grind the parts to a blade edge. I step the grits up to 600 so the parts fit tightly.
10.jpg

11.jpg


Here are the dovetailed parts; you can see how they’ll fit.
12.jpg
 
Now that the parts are dovetailed, I use a clamp to set where the bolster will end, the metal faces are parallel so both sides will be the same and give a super accurate look. Dead simple to make, took me about half an hour but it’s worth its weight in gold :)
14.jpg

15.jpg


I then clamp one of the bolsters to the liner with the blade edge of the dovetail pressed right up against it.
13.jpg


Drill through the screw holes. I plan to have a hidden pivot pin on this knife so I only drill a short way into the titanium through the pivot hole. Once you drill one side, flip it over and do the other bolster.
16.jpg


Here are the bolsters, you can see the half depth hole in line with the pivot, I’ll size this up later to accommodate the pivot head.
17.jpg


I then tap the bolster screw holes and screw the bolsters onto the liners. You’re now ready to drill the handle material.
18.jpg
 
I push the micarta dovetail into the angle under the bolster and clamp it in place. Make sure the parts are clean, you don’t want some stray grit to cause a gap between the parts. Drill through just like the bolsters.
19.jpg


I then counterbore the holes to fit the screw heads.
20.jpg


Screw the handle material down tightly and check fit. If you’re happy you can flatten the materials down to the same level. I also grind the protruding screws flush with each liner.
21.jpg


I then screw the liners together, grind the screws flush again and attach the bolsters and micarta again. Now it’s all one piece you can grind all the way around the profile to make everything match. If all goes well you should end up with tight a fitting dovetail that’s pretty easy on the eye :)
22.jpg

23.jpg
 
Next I enlarged the hole to accommodate the pivot head, I did this by sharpening a drillbit the same size as the pivot head to a flat angle.
24-1.jpg


Here’s how it fits – you want it to drop just under the surface of the bolster material.
25-1.jpg


Now that there’s space for the pivot, you can radius the handle material. Here’s the rough shape, you can see how the dovetail creates a curved join between the bolster and the micarta.
26-1.jpg


Both sides domed and polished up to 1200 grit.
27-1.jpg


Next I cut the lock. I covered this in how I make my framelocks but I’ll go over it here to be concise.
I drill two holes at locations where I want the long cut to start and end. I like using holes as when you join up the two cuts that free the lock, it just comes out neater. I scribe two lines between the holes as a guide so I can line up the cutting disc. I clamp the lock-side liner in my drill vice and use a Dremmel cut-off wheel (0.8mm thick), spinning at full speed to cut through the titanium.
28-1.jpg

29-1.jpg


Here you can see the long cut, it causes a pretty sharp burr on the opposite side so be careful.
30-1.jpg


Do the short cut the same way.
 
Here I’m drilling the hole that I will later press the ball into. I drill using a 1.5mm drillbit and press fit a 1.6mm ball into the hole, the tight fit keeps the ball in place. You want to drill all the way through, you'll need do do this so you can drill into the blade, through the lock so that the ball detent works correctly.
31-1.jpg


Here are the parts so far.
DSC05120.jpg


Here I’ve stuck the spacer material onto one of the liners (the one with the countersunk holes)
32-1.jpg


Drill through the spacer material
33.jpg


Assemble! Next step is to sand those protruding screws down.
34.jpg


Once they’re flush you can attach the handle materials again and sand everything down. Looking good so far, I want to blast the bolsters later on to contrast the polished micarta.
35.jpg


Spine shot
36.jpg


Here you can see the lock cut, nice and thin :D
37.jpg
 
I sent the blade in to my local engineers for surface grinding - this results in a truly flat piece of steel and also gets it down to the required size. The spacer needs to be the exact same thickness as the two washers plus the blade. In this case my blade is 2.5mm thick, the washers are 0.1mm x 2 so the spacer is 2.7mm thick. If your parts aren't parallel it will affect your action.

So here are the parts:
DSC05656.jpg


Design glued to the blade:
DSC05659.jpg

Now, the areas denoted by the letters are important. You don't want to remove too much material here. You can always grind more off - adding steel is far harder :D
Area A: this is where the stop in will sit in the closed position, take too much steel off here and your blade will touch the spacer - serious no-no.
Area B: this will be your lock face, leave more than you think here, it needs to be angled later so leave some steel to work with
Area C: This is the anvil for the stop pin. Grinding steel off here will move the point up in the open position. Again, leave yourself some breathing room.

Centre punch and drill through what will be your pivot hole. I drilled with a 1.5mm drill, this will fit the screw I'm using to hold the handle together right now. It'll allow you to put the knife together and see if you drilled in the right spot.
DSC05663.jpg


While we've got the knife apart we may as well do a couple more details. Here I'm jimping the lock, it looks cool and helps when disengaging the blade. Clamp the liner in the vice with something to protect it. I used some thin leather so the jaws won't marr the titanium. I did it at an angle to follow the dovetailed bolster - devil's in the details right? For those who haven't seen one - that's a jimping file I'm using, you line it up and go to town - it does all the work and every cut is evenly spaced.
DSC05687.jpg


The result:
DSC05690.jpg
 
Because the blade is so thin, I'm grinding a small notch into the opposite liner that will allow your thumb to get in and access the lock. To do this, tilt the liner to about 45 degrees and grind with a small diameter wheel. I used an old Trizact belt - cuts well and polishes up easily.

Grinding:
DSC05692.jpg


After a quick buff:
DSC05694.jpg


Now to put it all together and check everything, starting to look like a knife!
DSC05666.jpg


You want the spine to stick out a bit, I'll grind this down later so it's all flush.
DSC05673.jpg


View from the lock side. Also a little stock to remove here, you can see the jimping and the cutout for your thumb:
DSC05706.jpg
 
Very clear and concise instructions. I've gotten more out of this tutorial than the last 2 books I've purchased. Thank you!
 
Nice work and tutorial. Thanks. I like your hand tapping fixture, simple but elegant. Where did you get those drill press clamps?
 
Great post and very nice detail. Thank you so much
 
Thanks Gents, glad you're enjoying it.

OzarkMatt -The titanium I'm using here is 0.080".

Salem Straub - I got them from a local guy (I'm in South Africa). I'll PM you the details.
 
Awesome WIP boss... i absolutely love how you put this together. and i am actually convinced to try this because of your post. I love the simple design. Beautiful work.
 
Your process details are fantastic, thank you!
More, please! :D
 
Back
Top