Forged Integral Not-Actually-Really-a-Chopper WIP

I shaped the handle and prepolished it. I blocked the profile out with an 8” and 3” wheel, then hollow ground the sides in with the same two wheels. I left the front of the rear hollow with a defined edge from the 3” wheel. The grip is designed to fit the hand well, with a flare at the end to keep you off of the front page.

I try to build a handle with some style and looks that’s still easy and comfortable to hold on to. It’s easy to make a “blob” handle that’s kind to the hand but has no individuality.

After shaping to 220 on the grinder, I moved to hand sanding with a block. Come to think of it, I meant to post a pic of that block, which works great for me. It’s basically a contoured piece of wood for a handle that fits into the palm, glued to an eraser for a pretty stiff blending type pad. I can sand with it over fasteners and wood/metal joints with out leaving the metal proud of the surrounding material.

I hand sanded to 400, then gave it a quick buff with white rouge. This is good for now, I’ll go over it more later. Here’s some pics:

IMG_5875.JPG


IMG_5876.JPG


View from the top.

IMG_5877.JPG


View from the bottom.

IMG_5878.JPG


The sides. No appreciable glue gaps.

IMG_5879.JPG


IMG_5880.JPG


Cool, I didn't grind into the Corbys too far... here's a shot of one of the corners dead on, still no gaps.

IMG_5881.JPG


The butt, closed up well.

IMG_5882.JPG


The taper and palm swell from the bottom.

IMG_5883.JPG


From the top.

IMG_5884.JPG


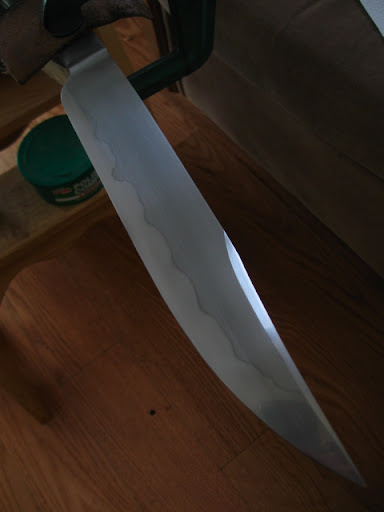
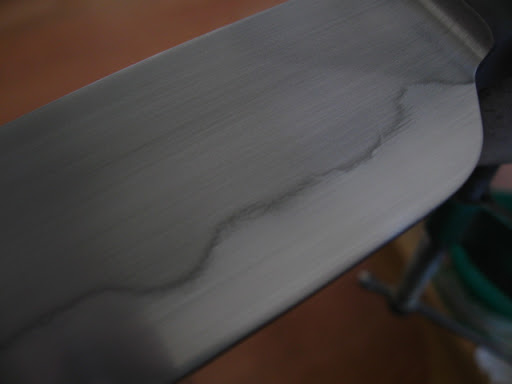
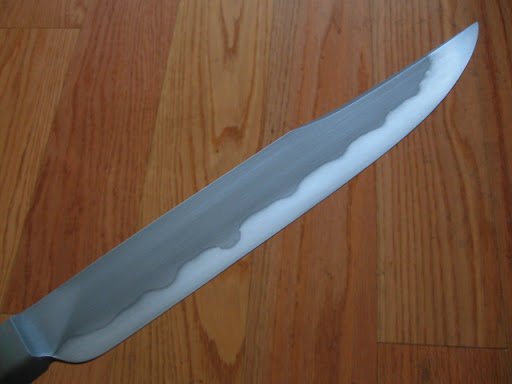
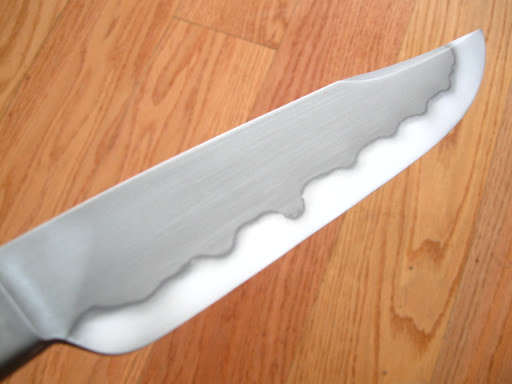
That's it for now. I buffed it already to check for any faceting or bigger scratches. There are a couple spots that I'll go over with 400 again, then it's up to 600, dragging the finish on the steel areas and final buffing the micarta and fasteners. But next, I'm going back to bringing the hamon out. See you all soon.
 
Really like that thin shape and good looking contours. Bet it is nice in the hand.

Looking forward to the finish.

John
 
Thanks Mike. I've seen pics of nice integral work you've done. They can be a booger.

I should mention that Tai Goo, who (generously) complimented my forge work early in this thread, made possibly my favorite integral ever, the topsy-turvy integral. What a great thought, and elegant knife. I want to try one, but it's so distinctively Tai Goo it would feel wrong.
 
very nice... love how that handle turned out too.. :eek:

this has been a great thread to follow Salem..:thumbup:
 
If anyone is wondering, I’m still going to finish this WIP- I’m waiting for some abrasives to come in right now so I can bring that hamon out farther. In the meantime, I celebrated my 5th anniversary of marriage, and forged this rose with thorns for my wife as a gift…


IMG_5885.JPG


It was also my brother’s b-day, so I made a copper and TI tie clip with simple chased hieroglyphics on it, a translation of his daughter’s name. (No pics of that, sorry.) So I’ve been staying busy. I believe I’ll be finishing this knife Wednesday or so. Stay tuned.
 
All right! Back in the saddle again with this knife. I had to put it down for a while, it took a bit for me to get some finer abrasives in. Also, I had to turn out some working knives to sell- keeping food on the table and all.

I got my sandpaper assortment in! One ten pack each of Rhynowet Redline #800, #1000, #1200, #1500, #2000, and #2500. After doing the work below, I can only say that I am impressed as ever by the quality and value of this paper. (No, I don’t work for them.)

IMG_5927.JPG


Some of you may remember a thread started fairly recently by Patrice Lemee- what’s the best way to cut batches of paper into sanding strips? A common answer was “shear-type paper cutter.” Well, I was rooting around in the “random junk” section of a Goodwill store, when I saw this beauty pictured below. $5 and it was mine. Of course the blades needed some help, but hey, I’m a knife maker, right? It now cuts really well, I cut up two sheets of paper at once into a total of 44 inch-wide strips evenly in about 15 sec. It’s awesome.

IMG_5928.JPG


IMG_5929.JPG


I had left off at 600 grit last. I now started in with 800. You all know what that looks like, just like the sanding pics earlier in this thread. A couple shots of keeping the clip and bolster transitions clean and caught up with the blade grit.

IMG_5930.JPG


IMG_5931.JPG


I switch my water out with each finer grit, switch paper towels too, (for blade wiping) so as not to scratch with larger grit by mistake. Every other grit I sand at about 30 degrees, then the next grit in line with the blade. I wipe the slurry of the blade at the same angle I sand, sometimes streaks can look like scratches and drive you nuts.

I inspect the blade often with this mean little LED flashlight that the estimable Ray Rogers left in my truck, then generously told me to keep. This little light picks scratches out really well. This in combination with changing direction as I go keeps me from missing any scratches from a previous grit.

1500 grit.

IMG_5933.JPG


2000 grit.

IMG_5934.JPG


2500 grit.

IMG_5935.JPG


Interestingly, this is the first hamon blade I’ve used the steel backed sanding bar on. It seems to be affecting the way the hamon presents itself when un-etched. Usually, I sand hamon blades with a leather backed sanding bar. This new full hard bar seems to not allow the steel to come into relief at all at the hardness transition. Usually the hamon is quite visible at 600 grit, not etched. The new way, it’s definitely there but still really subtle all the way up to 2500. I still have to “look” for it with the light. That’s my theory, anyway.

It took me about 2-½ hours per side to get this blade from 600 to 2500, clean. It only took about 1 sheet of each grit of paper total, though.

I'm stopping the spine and heel at 1000. Why? Because I'm LAZY, that's why!! (Breaks down in tears.) No actually, They don't need to be as polished as the flats and clip, and will look fine at 1000.

Next, etching and messing around with the hamon.
 
Last edited:
Thanks Jerry. I've not sanded for 6 hours straight in a long time, now I remember why I don't do that. Time to relax with a glass of this excellent bitter that my friend brewed. More tomorrow.
 
Salem, man, you're a big time motivator. Not only is the blade turning out perfectly, that rose is amazing. I'm really enjoying seeing this come together.
 
Excellent WIP. Salem! I'm really enjoying it. Can't wait to see that hamon in its full glory!
 
I do when finishing the last grit. To get the J-hooks and swirls out. I don't worry about it until the end.
 
I cut up two sheets of paper at once into a total of 44 inch-wide strips evenly in about 15 sec.
Would you believe it took me a couple of minutes to figure that one out?:(

Thank again for sharing Salem. I have to try that sandpaper I am hearing so much about.
 
I mixed a fresh batch of ferric chloride yesterday, my old stuff was not acting right anymore and this blade has to come out well. I use anhydrous ferric chloride. I filled my etch tank to determine what the volume was. I came up with 3-½ pints, or 52 oz. At 52 oz water, 52 oz dry ferric chloride would give a 42 Baume mix, or the concentration you get liquid from Radio Shack. That’s too strong for my needs, so I added 9 oz. dry ferric for about a 1/5 ratio ferric/water mix. I let it sit overnight.

Today, I made sure the blade was clean to go, made sure water would sheet over the whole blade, and held it in the ferric tank for about 45 sec. The hamon became immediately obvious. I windexed it, water rinsed, and dried it. I went over the blade evenly with 2500 grit paper on the leather backed stick to get the oxides off and have a closer look at the hamon. Below is a pic after the first etch and 2500 passes.

IMG_5936.JPG


Another etch, and some more 2500. Just trying to establish the hamon right now, detailing will be later.

IMG_5937.JPG


IMG_5938.JPG


IMG_5939.JPG


IMG_5940.JPG


After three etch/sand sequences, I etched again, then took some little cotton squares (makeup type, thanks for the tip, Nick) dipped in water, then dipped in pumice powder and started lightly scrubbing the blade with it. It took oxides off the back and edge alike, but seemed to affect the edge differently due to the hardness. Following this effect, I rubbed the area above the line just enough to keep it looking an even gray satin color, but concentrated mostly on the hardened area below the line. The pumice had a whitening effect, I followed the line and rubbed everything below it to a frosty white look. I re-etched the blade lightly (15-20 sec.) several times, rubbing a bit more each time, trying to refine the dark back/white edge look further. I took the following pictures as I went.

IMG_5942.JPG


IMG_5943.JPG


IMG_5944.JPG


IMG_5947.JPG


IMG_5948.JPG


IMG_5945.JPG


IMG_5946.JPG


I did not find that this hamon had a lot of activity beyond the very definite wavy line, but was able to bring it into hi-def pretty well with the pumice. I’ve heard to use rottenstone for this, when I’m able to get some I’ll try that. The pumice worked well, but seemed a little coarse for the soft area above the line. It worked well for the edge, maybe I’ll try rottenstone on the back and pumice along the line and edge next time.

It’s been a different experience than finishing oil-quenched hamon blades with a “user-type” finish. This is more delicate but rewarding, I lost track of time but it took all morning and I was having fun the whole time. I want to achieve a more translucent finish in the future.

The stuffs used to polish. Yes, I have a workshop but it’s like 10 degrees out today so I’m working in the house.

IMG_5949.JPG


Now I just have to detail the handle a bit more, and it’s done. Next post ought to be the finished knife. I should note, all of this hamon polishing stuff is things I've put together that I heard/read from "The Craft of the Japanese Sword," Don Fogg, Don Hanson, Nick Wheeler, etc. Thanks, guys. It's good to have lofty examples to aspire to.
 
Last edited:
This is turning into a GREAT WIP Salem. That's the best photo exhibition of hamon polishing I've seen yet.
 
It also takes messing with the white balance, colors, and focus on your camera as well as having natural light and playing with the angles while looking at the camera screen to catch the blade right. Of course it's different to hold than it ever will be to look at a picture of.
 
Back
Top