-
The BladeForums.com 2024 Traditional Knife is available! Price is $250 ea (shipped within CONUS).
Order here: https://www.bladeforums.com/help/2024-traditional/
You are using an out of date browser. It may not display this or other websites correctly.
You should upgrade or use an alternative browser.
You should upgrade or use an alternative browser.
Knife modding by committee/GAW
- Thread starter HeathH
- Start date
- Joined
- Dec 3, 2013
- Messages
- 590
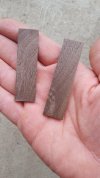
My boys (3 years old) asked if we could go out and use some tools this morning... so I showed them how the miter box works 
Marked liners, so the bolsters are square:

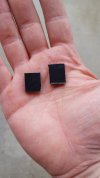
Bolsters roughed out:
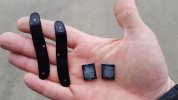
Surfaces roughed up and epoxy applied:
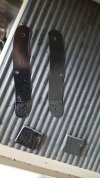
Bolsters lined up, then clamped together so the epoxy can cure:
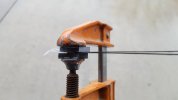
I'm hoping that during nap time I can pin the bolsters in place and get the wood cut and epoxied on. More updates as they happen!
Marked liners, so the bolsters are square:

Bolsters roughed out:

Surfaces roughed up and epoxy applied:


Bolsters lined up, then clamped together so the epoxy can cure:

I'm hoping that during nap time I can pin the bolsters in place and get the wood cut and epoxied on. More updates as they happen!
- Joined
- Dec 3, 2013
- Messages
- 590
More progress... I ended up running errands while the dudes were sleeping, so I hastily epoxied the liners to the covers. I didn't take any pics, but the process was the same as the bolsters. Rough up both surfaces, place, clamp, wait. Here's what I came home to:
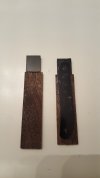
After the epoxy set up, I wanted to pin it up, but I didn't want the visual clutter of extra pins in the outside of the knife, so I went with an internal pin.
I drilled out the spots that I wanted to hold down with a 1/16" drill bit, marked for depth so I didn't go too deep
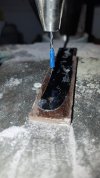
After my holes were drilled, I roughed up the end of the brass rod, put some gorilla glue in my pin holes with a toothpick and set the pins:
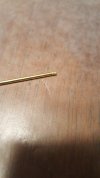
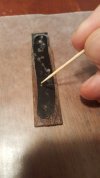
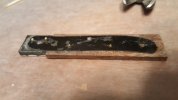
I filed off the tops of the pins and peened them flush, then lightly sanded the inside of the liners to ensure everything was flush and clean off the glue from the inside of the liners. After that, I used my 2.5" sanding drum again to shape the bolsters and covers to the liners. I've got a little bit left over but it'll come off during hafting
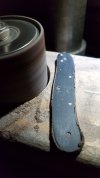
Here's where we stand tonight... starting to look like a knife is maybe gonna happen -
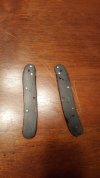
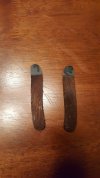
That's it for tonight, thanks for watching!

After the epoxy set up, I wanted to pin it up, but I didn't want the visual clutter of extra pins in the outside of the knife, so I went with an internal pin.
I drilled out the spots that I wanted to hold down with a 1/16" drill bit, marked for depth so I didn't go too deep

After my holes were drilled, I roughed up the end of the brass rod, put some gorilla glue in my pin holes with a toothpick and set the pins:


I filed off the tops of the pins and peened them flush, then lightly sanded the inside of the liners to ensure everything was flush and clean off the glue from the inside of the liners. After that, I used my 2.5" sanding drum again to shape the bolsters and covers to the liners. I've got a little bit left over but it'll come off during hafting

Here's where we stand tonight... starting to look like a knife is maybe gonna happen -


That's it for tonight, thanks for watching!
- Joined
- Dec 3, 2013
- Messages
- 590
HA! Maybe gonna happen? Looks like its gonna be a HIT! Also looks like your having fun, and its making me wanna get back out there and get back on some projects Ive let get dusty in the garage!
Matt
Let's see some pictures!
Sorry, couldn't help myself... the Siren's song of the belt sander and the sweet caress of steel wool pulled me in tonight.....
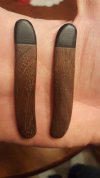
Hickory n steel
Gold Member
- Joined
- Feb 11, 2016
- Messages
- 20,738
Looking great, walnut was definitely a good way to go.
Brass and walnut just goes together in my opinion, probably due to my love of my Sheridan blue streak which is all brass and American walnut.
Brass and walnut just goes together in my opinion, probably due to my love of my Sheridan blue streak which is all brass and American walnut.
- Joined
- Dec 3, 2013
- Messages
- 590
Quick update from tonight... I decided the g10 was too thin for a center liner, so I cut a new one. It actually came out pretty well! Thanks for the encouragement in tackling it! The jewellers saw hasn't made it yet, so this was a pretty slow laborious process

Beyond that, I drilled it out for pins and did a quick and dirty mockup -
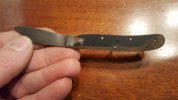
So far so good...
Still good...
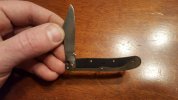
D'oh!
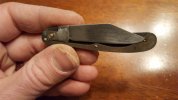
I knew it had rap at the tip, but that's pretty extreme. I was thinking about fixing some brass or something similar in the blade well to shim the kick . Any other suggestions?
When it goes together, I think it's gonna look pretty good though!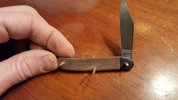

Beyond that, I drilled it out for pins and did a quick and dirty mockup -

So far so good...
Still good...

D'oh!

I knew it had rap at the tip, but that's pretty extreme. I was thinking about fixing some brass or something similar in the blade well to shim the kick . Any other suggestions?
When it goes together, I think it's gonna look pretty good though!

r8shell
Knifemaker / Craftsman / Service Provider
- Joined
- Jan 16, 2010
- Messages
- 25,909
Either that or shorten the blade, I guess.I knew it had rap at the tip, but that's pretty extreme. I was thinking about fixing some brass or something similar in the blade well to shim the kick . Any other suggestions?
When it goes together, I think it's gonna look pretty good though!View attachment 839400
It's going to look great!
- Joined
- Dec 3, 2013
- Messages
- 590
Maybe a little brass or steel (I lean toward steel) catch pin captured between the center liner and outer liner for the blade kick area to engage. AG Russel does something similar on there pen knives I believe.
That's a great idea! The snap is pretty soft on the main blade anyway, I could probably get away with brass but steel sounds better.
- Joined
- Jan 21, 2016
- Messages
- 355
Is the other spring different enough to allow it to close properly? Ide hate to see it lose any of its length, maybe grind the spring itself and a tad of the belly of the blade to clear it? Drill new rear holes and grind the spring the clear entirely? Brass liner turned out great, thats the spirit!!!!
Matt
Matt
- Joined
- Feb 11, 2016
- Messages
- 2,541

