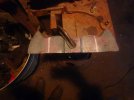
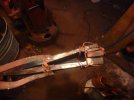
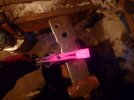
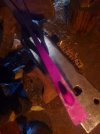
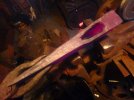
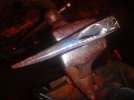
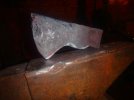
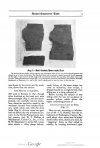
R&D,18th c.American axe

That the poll needs to be welded and plated and Done,before the blade;and once the blade gets welded in one must just keep on going in finishing the head,none of that back-and-forthing.

Good piece of information.

By hand-i,personally,don't.I use a 10 lb-er to close welds,but even choked up on it i've not that great of a control with it.And even that is marginal,insufficient,really.(And,it's taking out my wrist,slowly but surely).

I feel your pain, brother. You need a striker.

They must be getting ready for maple syrop works in the Northeast(and Northwest?)...

I'm not syruping this year. Just haven't had any good weather. It could still happen in March but unlikely. The Puget Sound area warms much sooner than the NE.
 
I'm not syruping this year. Just haven't had any good weather. It could still happen in March but unlikely. The Puget Sound area warms much sooner than the NE.

I see,well,i hope your reserve from last year is holding out,to carry you through these fluxuations.

And yes,decidedly,things would be very different with a striker,many factors would change fairly radically.
(that sleazy twisting out of axis for one,that is a Direct result of one-armedness).

Smiths practically never worked alone.Forges commonly had all kinds of people underfoot,regular helpers,journeymen,multiple apprentices...One-armed smith was(and is)an oddity and a freak....
(in smaller,understaffed joints the customer was expected to act as striker,or if unable to bring one along).
Smithing hammer by definition is not much over a pound(just like carpenter's).
Anything heavier,technically a sledge then,was handled appropriately long,so obviously had to be used from further quarters than up against the anvil...
 
damn that makes me wish i had a fuller, i have a kentucky that sorely needs that procedure done

Phantom,as they say-"careful what you wish for"!:)
If you really do though,once the snow melts in a few weeks and i can access my junk pile in earnest,i've an industrial garage door spring there;as i remember it's just a touch under 1/2" in dia.
(Square_peg,is that what your spring swage is there,about?Good job,btw,and lucky to have a striker!Good on you...).
Anyway,i'd be happy to send you a flat-rate box plumb full of this good stuff,it's coiled compact-like,and you can straighten it and make a swage.

But if i was you i'd look very carefully for any possible welds on that axe.If it's old enough,and then chances are having an overlaid bit,then drawing it out would be pointless of course...

Alternatively,if you're any good at welding,i'd consider fabricating the new bit out of whatever less valuable/less wore out axe at hand,and welding it on...(or even a chunk of vehicle leaf-spring ground to shape).
 
Nothing very interesting to report for yesterday.I'll run through it quick-like in case someone may use any of the info in their own thinking/planning.

Starting stock,10" of 2" wide strap,1/2",A36.
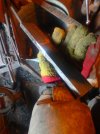
2001.jpg

The end that'll form the blade is pre-bent,exactly 2" of it.
(Again,the idea here is to come up with a set of data that can later be modified;so to make it easier to remember and extrapolate later keeping numbers to even,round ones).
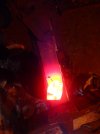
2002.jpg

The reason for that bend is that the thinner and taller any material is the harder it is to bend in that dimension.
Since the Attitude,the angle of an axe blade to the eye/poll is critical,that angle needs to happen at the stage as early as possible,as the stock is closest to the sq.section now,and will only get further away from it into more tall and flat.
So the blade, pre-bent, straightens by peining to form the top of the axe.In reality it possibly need to be bent even more,for it to become straight only at the very end of process,but i'm not smart/skilled enough to anticipate things that far...
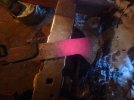
2004.jpg
The other end of pre-form treated equally to keep things symmetrical.
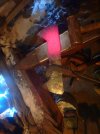
2007.jpg

A quick note:One side of each of these halves of future blade will of course be welded.That side needs to be as Flat as possible.So this time around i remember to work with that side Down to the flat and polished anvil-face.
If i was better at the trade i'd also work Cleaner,i.e. i'd brush crap and scale off that side before it goes down on the anvil(or brush the anvil with water to explode it off with steam).
It'd actually make a difference later in welding.

Anyway,the pre-form has central symmetry,and center is marked.That mark is used for further layout.Here the parts comprising the poll are laid off from that mark each way,1 1/2" from center,with soapstone and punch-marks as well:
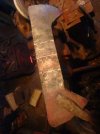
2010.jpg

Each of those marks is fullered to delineate what will be the back of the eye.
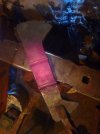
2014.jpg
The mass between that fuller and the blade is peined across the length of stock to displace mass in order to make room for the eye.
That displaced mass is what makes the lugs.Obviously,for a conventional,hour-glass eye the mass needs to be displaced equally top and bottom.
What happens to the top lug in later American axes is a mystery.According to my archaeologist friend it was commonly trimmed,chiseled off.
If that mass was left in place however,or displaced less than bottom,the resulting axe would either have a radically Open configuration(think GB "Swedish carving axe"),or have an eye that'd have the section of an inverse cone,like Kirves et c.
Here we're dealing with axes that are a Transition between the two cultural styles of hafting,and from what i can see so far they varied between these two systems...

Anyway,the peining out of eye-cavity :
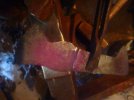
2017.jpg

The forging here as well needs to be done with the inside of eye down to the anvil-face,for better hafting the eye needs to be maximally smooth.
If you look close at that last photo you'll see how my forging wonders off the original fuller towards top of photo.That is bad and wrong,and i can blame it on the ruined edges of my poor old anvil,but in reality it means that i've overworked my time at this task,and must quit before i screw things up further.
Errant blows are NOT acceptable.With proper mensuration,one can maintain equal amounts of mass that go into each half of a symmetrical(hopefully)tool.However,how this mass is Distributed is a different issue,and is up to one's skill and common sense.
(i was taught by my old man to use an axe when i was 5,and the first lesson was that the moment you're too tired to hit Exactly where intended-you take a break Right there).

So i must switch tasks,of which there's an endless multitude anyway...:(...

I wanted to show you guys a picture of my old LG...Normally it is covered with a really ugly guard,as that coil-spring front and center is directly in front of your face when in use.
(the owner of this hammer but last from previous ended up loosing an eye,and a part of his face,et c.,and the next guy to own it built the guard(i did have a spring shrapnelise on me couple years back,and really need to re-order one...).This note is particularly for folks that like to moan about OSHA laws...This is what it was like before OSHA...).
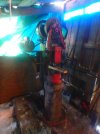
2019.jpg

So yes,it warmed up enough to use the hammer yesterday,just above zero...Throttle still wild,but thankfully worked good enough for me to bang a fat chunk of leaf-spring into required 1/4" or so...Would've been a real bear by hand...

Alas,till i can get some 10xx edge steel we're back to 5160 for now(this spring is old enough to where i'm Reasonably sure that's what it is)....In a week or a bit more,hopefully,that steel should be here.
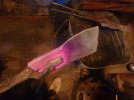
2020.jpg
 
Phantom,as they say-"careful what you wish for"!:)
If you really do though,once the snow melts in a few weeks and i can access my junk pile in earnest,i've an industrial garage door spring there;as i remember it's just a touch under 1/2" in dia.
(Square_peg,is that what your spring swage is there,about?Good job,btw,and lucky to have a striker!Good on you...).
Anyway,i'd be happy to send you a flat-rate box plumb full of this good stuff,it's coiled compact-like,and you can straighten it and make a swage.

But if i was you i'd look very carefully for any possible welds on that axe.If it's old enough,and then chances are having an overlaid bit,then drawing it out would be pointless of course...

Alternatively,if you're any good at welding,i'd consider fabricating the new bit out of whatever less valuable/less wore out axe at hand,and welding it on...(or even a chunk of vehicle leaf-spring ground to shape).
nah you dont have to go through that trouble, i have some coils from a nova... and no real way to undo them,
i'v been thinking about welding some RR track plates onto my bit of track in order to get myself a corner and hardy hole, got any experience with that?

I didnt even think about it's construction, that's a good point, i'll have to take a look, i have no idea how mann made them or how old it is either, thank you for the generous offer though!
 
(Square_peg,is that what your spring swage is there,about?Good job,btw,and lucky to have a striker!Good on you...).

My spring fuller is made from 5/8" rod. My little anvil has a 3/4" hardy and doubled 5/8 rod fills it tight. Not sure what type of steel it is - just junkyard stuff. But it spark tested medium high carbon. Could have been ground rod.
 
i'v been thinking about welding some RR track plates onto my bit of track in order to get myself a corner and hardy hole, got any experience with that?

Man,what i would do about that,i think,is use a piece of as heavy gauge plate as you can get a hold of(3/4" would be nice),make a hardie hole in that,and screw it down to a heavy hardwood stump.As much Mass,and stability,as you can garner.
I'd not try to use track for that,it's essentially light,and jangly...
Ideally,look for a broken loader frame/fork,or equally Heavy piece of solid steel.You can easily fab to that,and it'd serve as a good anvil too.
 
Uff,you guys,i'm having a tough time getting in the forge...Incredible list of chores to get through,and much time lately by bedside of a dying friend,and any amount of running about...:(
Did sneak a few stray hours last night,didn't get very far,just a couple process photos for the heck of it,nothing new.

Pre-form finished and top of it trimmed:

2003.jpg

Then a filler piece added(3/8" thick this time,vs the 1/2",as much as i love those ample polls it's not really what Stohler,Stricker & Co. did).
The usual Frankenstein job to hold it together for welding:

2006.jpg

Welding went reasonably well,i'm fairly happy with this part of the process.After a few initial welding heats i trimmed all the extra crap i left sticking out for to wire it easily,and continued refining the weld by now being able to forge it on all sides:

2016.jpg

2021.jpg

Happy with it,it glows nice and evenly,but didn't have a chance to hard-plate it yet.

As usual i manage to bend and twist the forging while concentrating solely on the weld itself,but will wait to straighten it out till the butt-plate is on.
Again,the idea this time is to methodically move from poll to blade,then finish forging the blade and get out,minimum bouncing,jangling,half-ass blows that vibrate fresh welds apart..

Moose cow is molesting the willows in my yard...Nice job,they'll be bushier come spring,providing ample cover for my outhouse...These` are pretty long-legged animals,you can kinda tell how much snow there is on the ground,the critter is belly-deep...Hard winter for everyone this year...

2038.jpg
(Hairy,if you read this,i know how much you like Iditarod...they just marked their trail,and it's about 100 feet away from the cabin...They start on the 7th,so if you get here quick enough you can have a front-row seat:).
 
(3/8" thick this time,vs the 1/2",as much as i love those ample polls it's not really what Stohler,Stricker & Co. did).
How strictly do you hold to the original production? Have you done a forensic inspection of an original from this S,S&Co.?
 
How strictly do you hold to the original production? Have you done a forensic inspection of an original from this S,S&Co.?

Earnest,good question,and the only answer would have to be:"Not at ALL".

I should've bought an original on ebay and steeled my heart and cut it up...
But then again,this "study" is pretty wishy-washy period wise...And factors could've varied not only with specific period,but regionally,and even with each individual maker...

To be wholly consistent for me would take having a legit,disciplined historian on board...

As it is i just poke around,here and there,gathering what few pieces of a puzzle may fall out(and that i'm capable of recognising).
 
Very short forge-session today,will give a brief run-down.

A piece of file(teeth ground off both sides)Frankenstined on for welding:

2063.jpg

And welded.It was nice to briefly work with something 10xx-ish,goes well with mild and WI both.
No problems there,and i think that it'll make a nice hard-plated poll when hardened.

2066.jpg

Next i needed to straighten out the entire forging that undergoes considerable torture during all this poll work(much of it due to one-armed factor as discussed above).

2076.jpg

Once it's more or less straight i notice a dreadful thing-i've left WAY too much mass forward of the eye...I'm totally shocked to've spaced something like this out,and taking some time to think realise that i've made a mistake in initial calculations,and laid my measurements off of a wrong end of stock!:(

Trial-inserting that stock i forged out of a leaf-spring for edge-steel my impression is reconfirmed-as it stands,there's enough mass there to forge a splitting maul...About 1" thick,that with welding losses will become a fat 3/4",at least...

2079.jpg

Now,too much is always better than not enough...But it's still a let-down,this is what i get for my scattered schedule/mind-space lately...
I'm not sure what i'll do about it yet;try to spread the halfs and reforge them,or settle down to some very lengthy grinding...
But there she be...Other than that,everything is according to plan!:)

2074.jpg
 
Ernest,since you asked.This is the kind of info that i go on(and i'm not always capable of pinning it to any given time period(other than it be by known manufacturer,thus Stohler,Stricker,and few others).

This one here i don't think i have an elevation view for,but here is the plan:

axe.more 003.jpg

(whatever happened there in front of eye...welding trouble?...edge steel not alkl the way to front of eye,but cleft-welded a short way off?...not having real life contact with object makes it hard...:(

But what i try to look at is Proportion.Say the width in front of eye as relates to width at poll.
That's what i try to aim at,but not successfully so far.
This one is pretty thick in front of eye,but then recedes very quickly and elegantly into pretty slender blade...
(it's ineffable to me,am i just dense?)

Another interesting one(also all i seem to have,no side view):

ABuk3P4.jpg

Edge steel pretty definitely all the way to eye.Pretty obvious bad weld on right side,for considerable distance,too(very similar to my last one,am i doing Something right after all?!:)
Convergence of sides of blade pretty obtuse,but this axe is doubtlessly wore down.
Could've started out as keen as one above...(an added challenge,reverse-engineering by worn-down specimens...).

This next one Is Stohler:
stohler-1.jpg

Seems also,steel all the way,very slight open weld on right side...

All,you may note,have very Ample mass in front of eye.No curving down to thinner blade,like many modern axes.None.Gradual slope from center of eye to edge.

And then here's a Stricker,just to mess up a delicately developing theory....Much more "modern" in it's slim blade...(Very clean welding up forward....less so at poll,but still excellent).
But seems like almost a different tool;the mass is distributed in a different manner....


strickerebay2.jpg
 
So,i just can't think of anything to do with that extra mass in front of eye...
I just carve out the steel blade to contour,wire it all together and weld it:

2012.jpg

Here it is after the dust settles(good weld,i think,feels very solid right away...as a matter of fact i hit it before making Sure it's positioned absolutely right,and then can't re-align it...).

2014.jpg

You can see that pronounced hump forward of the eye-that's where that extra heap of mass wants to go as i smash everything down flat...
There Are some old specimens that are humped there somewhat(more like arched all over their top line),but this is definitely loss of control on my part,and i'll just have to trim it off flush,straight across.
(as usual i'd like to do that anyway to take a look at the cross-section of the welds inside).
But first,top view:

2015.jpg

Cuts chalked:

2016.jpg


Tough to photograph reflective freshly-cut surface,but no issues there whatever.
(the steel isert is visibly bulged in photo=a very good sign that means my blows penetrate the laminate,not just smear the outside):

2021.jpg


So back in the fire to continue setting and refining the weld and the taper.
But now that i removed that excess material that used to contain the laminate,i'm beginning to breal the welds when striking close to that cut edge.Mild moves so much easier than 5160,and it's time to look at things before they get out of hand and to think...

2023.jpg

In that last photo it's hard to see the parts beginning to separate.The visible difference is the different rate of oxidation between two types of steel.

But you can see how distorted the sides of eye are now after welding.It is inevitable,as i must strike right at the boundary of edge steel.And just as inevitable is that as i'll drift the eye open and to shape,that i'll be tearing up this fragile fresh laminate.
(as Inuit people say,in Greenlandic dialect:"Ayorama"(it cannot be helped).

Continuing to work at welding heat i do all i can with weld held in the vise,using tongs,to make as much room for the drift:

2029.jpg

But eventually,to get the center of eye,i do have to go to the anvil and smash the drift through this orifice...

2034.jpg

And sho'nuff,on closer examination i did start opening one of the seams...Nothing too obcene,maybe 1/2"(less after grinding to some depth),but still frustrating...But,i think i'm operating at absolute peak of my ability...i guess it's just the extent of my skill,this here must be my ceiling...

2036.jpg

Top,after slight grind:

2044.jpg

Bottom looks the same...(it's Always the right side...even in some of the old ones...Coincidence,or some effect of right-handedness?Some twisting motion with the left,the tong-hand?)....
 
This forging is not small...The pre-form alone was pushing 3 lbs...I must find a way to scale it down a third or better,this weight of forging is aging me fast...:(

But out of last 4 tries this may actually see HT,we'll see what creeps out in grinding and other stages.

View overall(not very representative;my camera is weird,has very short focal length,and if i'm not careful picking the angle the proportions are all out of whack...)

2054.jpg
 
This forging is not small...The pre-form alone was pushing 3 lbs...I must find a way to scale it down a third or better,this weight of forging is aging me fast...:(

But out of last 4 tries this may actually see HT,we'll see what creeps out in grinding and other stages.

View overall(not very representative;my camera is weird,has very short focal length,and if i'm not careful picking the angle the proportions are all out of whack...)

View attachment 1297785
That is so very bad ass! Thank you for taking the time to document and share!
 
View attachment 1297781

And sho'nuff,on closer examination i did start opening one of the seams...Nothing too obcene,maybe 1/2"(less after grinding to some depth),but still frustrating...But,i think i'm operating at absolute peak of my ability...i guess it's just the extent of my skill,this here must be my ceiling...

I doubt you are the only one who had problem with opening of the seams.
vintage-small-primitive-forged-belt_1_ef6d4fc69f36c7bfcca0e5c64ed7f5e2.jpg

vintage-small-primitive-forged-belt_1_ef6d4fc69f36c7bfcca0e5c64ed7f5e2.jpg

https://www.worthpoint.com/worthopedia/vintage-small-primitive-forged-belt-2024781089
I do not know if it make sense from practical stand point.
Maybe start with 1/4 of the inch shorter eye and leave extra meat just in front of it. Make POINTY lugs offset 1/4 of the inch toward the front of the eye so it is easier to see how the the mild steel moves when you use extra force in area where the seam starts (extra pounding should elongate the eye to regular size and make the weld more secure)
 
Last edited:
Absolutely,that front seam(-s) was/is the bane of tool-maker's existence.

Thanks for ideas,and these photos.That first one,can you see those two rivets in front of eye?!
(i noticed them right away because it's been on my mind,mostly for keeping the blade steel aligned during forging,but to help with keeping that seam shut as well:)

Here's another historical example:http://www.antiqueweaponstore.com/French Executioner Axe with Exceptional Provenance, 17th C.htm

Here's what kept occurring to me lately...:
uc1.b4494310-seq_25 (1).jpg

Was i rash,in trying to make that steel fo all the way into the eye as a part of my defining attributes of originals?
Some most definitely do not...(that really slick and pretty Stricker above doesn't...).

But yes,devices are good.I've actually been contemplating a T-,or a
Y-shape on the eye-end of blade steel,for the drift to bear upon that,vs wedging the seam apart...
Like my friend Kim Blair(an excellent Alaskan log-builder)often says:"To build with logs you just need to be smarter than a log is all"....:)
 
Back
Top