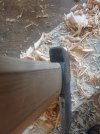
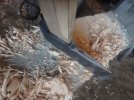
R&D,18th c.American axe

Square_peg, I predict that this axe is one you will use often and have for a very long time.

You know it! I took it with me to my friends wood lot today. As soon as I picked it up I just loved the feel of it. It's a great size and weight. I have a strong connection to it. And it actually works very well.

I only did some light limbing with it today. I was at the woodlot for other reasons.
 
Ok,gents,it's been a while Again...:(...This time besides my regular excuses i'm also sicker'n a dawg...
I need to finish one of these axes for my friend,and having offered him the choice,being a very old experienced hand he chose that latest one...Good enough for me,i think it's decent enough forging,and i'd like to see it become a tool and get some feedback from him.
(in any case my head is wedged way too firmly right now to undertake the next attempt).

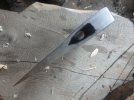
I scrubbed the forging down in a preliminary manner.Here's about what it looked like then:
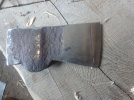
2004.jpg

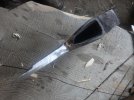
And top;then bottom views:

2006.jpg

2008.jpg

So then back to the hot-work.First order of business is to straighten and align the blade with the other parts.I find it very challenging.My drifts are all short;the axe itself is ill-suited for sighting down it's own lines....This time i experiment with a busted old handle that i shaped roughly to fit the eye.I jab it in in spite of forging being hot,and cough and hack and squint through the smoke trying to gauge the alignment.
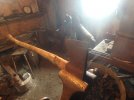
2014.jpg

When done with that whole circus,it's time to normalize the hardenable parts of that head.
I do three Normalization cycles,at descending heat,allowing it to cool to black in still air each time.
What it's handy for(other than the main purpose-to reduce the grain-size)is as a practice run at heating this particular forging.Also time to collect oneself mentally,to go through the following stages,so as not to forget something when one'll need to move fast,at quench-time.
Here it is slowly cooling from one of n. cycles:

2020.jpg

So since i've just heated this thing three times in identical fashion,by now i know pretty well just how and where to place it in the fire.
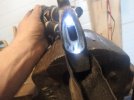
In this next photo you can see the blade facing you in the fire;the concentric "hot-spot" of my firepot is centered about the eye area.I can see the heat penetrate the forging,and can adjust things so that the heat penetrates the blade evenly,and at the rate that i like.
The clinker breaker-ball at the bottom of my pot is so old and burned,and leaks so much air,that i hardly need to add any with the blower,i barely spin that handle,it's all happening very slow and meditative-like(hectic mode is not great for HT).
I'll run sufficient heat right up to that edge,and hold it there for a minute and a half by the clock.
The butt-plate is on the other side of hot-spot,and again,in my norm.trials i know that it'll be to heat as well.

2023.jpg

Then into my bucket of filthiest waste oil west and north of the Rockies...I have a handy hanger bent out of 9-wire that i insert into the axe-head at the last moment,and which hangs on the wire stretched across the bucket,with forging suspended in oil.
(I pre-heat the oil to about 200F,and i'm not a proponent of agitating things in the quench).
The wire hanger allows me to step outside,and not stand there holding the tongs as i'm trying not to breathe the smoke coming off that oil(instead i go outside and smoke tobacco...not sure which is the fouler of the two actually).
But the main reason is that i can slam that lid on if oil starts burning and won't quit,as it does sometimes.If it happens sooner,and gets bad,it can cause me to have to re-do the entire sequence,a pain in the neck,that.
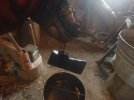
2032.jpg


Out of the oil,wiped,and quickly scrubbed to shiny where i need to see oxide colors,it goes into my fancy toaster oven.It's a lovely Black&DEcker one i got out of a local dumpster...one of the legs was broken...I was extremely happy to've found this,have been without electric tempering means for a few years,and tempering a double-ended forging such as this,where the blade and butt-plate both need tempering,is a goat-rope with charcoal and/or torch...
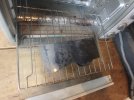
2034.jpg
 
Geez! that axe for your friend looks great. The eye is so nicely formed and the welds look very good. I'm sure he'll enjoy it. What was it's finished weight?
 
I don't know the weight...:)...Inexcusably silly,but in all my trips to Fbks i consistently spaced out on buying a scale...
I'd guess under 3#...(in the past i'd go to our post office and ask to use their nice electronic scale,but i'm in quarantine and can't do it...(i love my quarantine,btw,can only recommend it-getting All kinds of things done!:) ).

I'm just done filing the crap,scale,and burned oil et c. out of the eye.It Is kinda decent eye,i like it...In dimensions it comes close to a standard 2 1/4#/28" boy's axe eye(just a touch under in both directions).

But,i'm again confused:The size of eye seems normal,if a bit minimal,yet the sides are quite thin(close to 3/16").
Most older originals have visually much thicker sides...I know i'm veering off on the pattern by having this unfortunate lack of mass forward of the eye(one unsuccessful attempt at welding costs a Lot of mass,and it took two tries,and that's what one gets...).

So,older heads were either thicker in general,or their eye was Way skinny...:(

But i'm inspired by your wonderful hafting job,Square-peg,and am just about to start cutting out a 30''-ish blank,out of this bow stave i've already started on before.
If i can do even nearly as nice a job as you did with that Black locust i'd be psyched!
 
This is as far as i went cleaning up the eye(it should do...):

2003.jpg

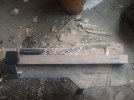
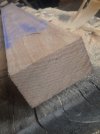
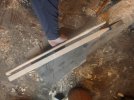
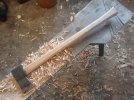
And this is the general idea;head just resting on the blank that's 2" square:

2006.jpg

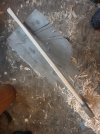
After eye-balling it the best i could i sliced off a tapered blank.So far it's still 2" wide.but tapering in thickness from about 3/4" at the head,to 1 3/8" for the swell.I measured a regular Link job i've laying about,and that was the thickness of the swell,so what the heck,sounds ok...
(it's not a Perfect blank,but very decent;air-dried,many years old by now,cuts very nicely with drawknife...):

2008.jpg

2008.jpg

(sorry,stuck photo in twice)

Next i'll work on the tongue,i figure once i have that adjusted i'll strike all the rest of the lines and remove the excess...

2013.jpg
 
I don't know the weight...:)...Inexcusably silly,but in all my trips to Fbks i consistently spaced out on buying a scale

Do you have measuring cups? You could measure its displacement and then calculate the weight from that. Steel weighs about 495 pounds per cubic foot or about .02 pounds per cubic centimeter. E.g. - set a paint can full of water in an empty shallow pan. Drop the axe in the paint can. Measure the volume of the water which spills into the pan. Voila! You have the displacement of the axe.

https://www.aqua-calc.com/calculate/volume-to-weight
 
:)

Thanks!:)...Though i can't say i have a measuring cup that's Too exact...Maybe them little Stihl oil cans...i have one of those around...But i'll try!
(be silly to not know the weight,and then it'll be hung and be a guessing game...).
I'll try the Archimedes way!:)
 
Jake- I REALLY like where you are going with this axe!
I agree. I'm loving how this one turned out. Especially knowing all the effort you've put into it. Just awesome man! Gives me the itch to go do some more bucking!
I took a 20" popple (quaking Aspen) last week and I've chopped up the whole darn thing. :confused: I've got it all cleaned up and have the next one in my cross hairs. Seeing your axe is inspiring man. Thank you so much for the photos and descriptions. :D:thumbsup::thumbsup::thumbsup:
 
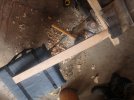
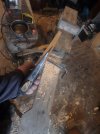
I've gotten the tongue through...At the last it started trying to steer off,still will point at the swell,but to right of center...i may regain control at the final fitting/wedging...

2007.jpg

Meanwhile i trimmed it to general outline with circular saw,while the blank was straight and square...I think this haft will end up in the neighborhood of 1 3/8" "tall",if you will,in the longer dimension of section:

2003.jpg

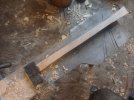
In thickness i haven't bothered with power tools,here it is next to a 28" link just for scale.I don';t think i want to go That thin..Under 1",but how much i'll just see by feel,being able to put the head on gives one an idea.
It is often gloves or even mittens-weather here,and a guy wants just a bit more volume in that haft...

2009.jpg

This wood is lovely.As old as it is it still has Plenty of "life" in it.Carves in the nicest manner,i never had to use anything but a drawknife on the tongue.I may just avoid any rasping or sanding at all,i so like that closed-pored,planished feel of blade-finished wood...(won't take oil too good i suppose tho'...).
Still need to contrive my Archimedean trick...
 
Ok,i Did it!

Actually found a legal,legit Pyrex measuring beaker,and was very careful to fill container to the Very brim,and not splash the axe in too hard...
Fortuitously the volume displaced came up to exactly 2/3 cup,or 150 ml.
Converting ml/(cm3) to cu.inches gives me 9.15356
Steel weighs 0.283 lbs a cu.inch,
Which gives the total of 2.59045748,i'd round it off to 2.6 lbs

(do i get a Home Ec. badge for this?!)
 
A bit more progress on the handle.

Squared everything up to a set of outside lines...(still haven't used anything but drawknife,and still don't know that i will...).

22016.jpg

Then went ahead and crudely markied it out and octagonalized everything...These facets should make it easier to judge the shape than a smooth rounded surface...

22021.jpg

Back of handle,and then couple closeups of right by the head:

22026.jpg

22024.jpg

22025.jpg


I kinda lost the battle with straightening the blade...Forgot to take a photo,but it points not to the center of the swell but off about a third closer to the side of it.Too much to take out by trick-carving the tongue,and i was too lazy to swing the entire handle off to the side...

It Ain't no piano,and i have to keep reminding myself of it,yet i would like to make as competent of a job of it as i can...
Dimensions as it sits seem acceptable,1 1/4" x fat 3/4".
It'd get slimmer if i streamlined the facets...should i leave it octagonal?...If not,it'll be slimmer yet.
But feels ok to handle...29 7/8" overall,that head feels fairly massive on the end of that...
 
Square-peg,thanks,your haft is my inspiration(along with those in Old Axeman's photos).
(and thanks again for that cool water trick!AND the badge:)

This wood is hickory,from this cool hardwoods supply store in Fairbanks,Interior Hardwoods.
It's a smallish local business supplying the custom woodworkers,cabinetmakers,any carpentry stuff.
It's the second set of owners in my time in the area,and both are these super conscientious,efficient people,totally reliable and accommodating...
They carry a number of hardwood species,hickory of course.They buy it in 2" or sometimes even 4" plank,and will sell a chunk you select(if you're reasonable,and what's left is not mangled and in some normal dimension).

I just ask them for stuff i want,and they usually have it...We were always spoiled like this in Fbks,that's an old store...


But this particular chunk here is even nicer grade,originally selected for my friend as a self-bow blank...(bow never happened for him,and i inherited it when he moved...and i can't be trusted with hickory for long...)
 
Everything here possibly temporary/provisional;just enough to take it out for a spin...
Need to put some kind of an edge on it,and dig out a log that's not too dry...

View attachment 1310092

View attachment 1310093

View attachment 1310095
Can't wait to see some photos of that thing in use! Something about knowing all the effort that went in makes it so much more interesting. That's why I enjoy axes so much anyway. Picturing the craftsmen that made them, ground them, tempered them, handled them etc.
And here I got to see the whole process! Looks awesome Jake!
 
Youve done a great job on this. Yes, a lot of work to build, but also a lot to share it all. Especially where you are from the sound of it.
So thanks x2!
 
Back
Top