Shop Talk Q4 - Build Challenge - Kephart Knife

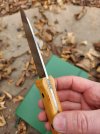
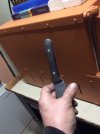
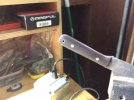
i snapped a few pics on how i ground the blade... i was fascinated with this project because of the detail about the convexed blade. As David C Anderson described in the knife magazine article.
"the shape is convexed about halfway up the blade, and then slightly convexed back toward the spine as well."

MdawQBk.jpg
3ypvSSB.jpg
3pNzzXn.jpg
7KE8TOC.jpg
xWn3HOT.jpg
DP2ltKU.jpg
800Kwat.jpg
5Urkhej.jpg


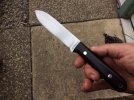
So Ive got it now fully ground and convexed with the slack belt to smooth it all out. this blade shape looks real good with a lengthwise hand finish.
Ive got some walnut scales primed and ready for some corby bolts.
 
That looks freaking awesome. I read the description and tried thinking about the part where the story read "the shape of the knife and convex grind could have been from the skill (or lack there of) from the back woods Appalachia smith he commissioned to perform the work, or from the lack of appropriate tooling in a place as poor as the area." And I tried to think of how to do it without proper tools. I found that if I held the blade just at the right spot near the tensioner wheel it would naturally ride on the front 2/3 and the slide off the back 1/3. It also mentioned it doesn't have a squared off spine which would also lead me to the method I used. I imagine them using one of those giant 10' pine tar and sand belts with a 200# flywheel running off a water wheel or a mule. Or even worse an apprentice cranking away at some horrible contraption.
 

Well it damn sure isn't what you guys have made. Hell, it's not even good. But I like it a lot, I can count on two hands how many knives I've made and I'm gonna use this until it breaks and see what I can be better. Thanks to everyone in this challenge showing me what needs to be done to improve. Having a tool that everyone is making at the same time to compare is invaluable.
 
It's hammer, closest to the shape, just left some material to have clean bevels after grinding. First picture shows pre-form and making the guard.
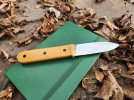
I'm def gonna be making several of these until I get as close to final as you did. Doing the convex basically erased all my hammer marks. Gonna have to get way closer to be able to leave some on the top n bottom. I think leaving any at the 2/3 "center" is hopeless
 
This knife kicked my tail and more errors were made than I could count. I am going through a slump in the shop and had lots of personal/health stuff going on that kept me properly distracted from this build. Regardless I got a completed build done at last. I had several instances where I wanted to restart but I figured Kephart would have found wasting materials for ascetic reasons laughable given his own knife and being a conservationist so I pushed on. I am happy I have a finished build but will make another and do my best to resolve some of my errors for future builds. :) - Love seeing everyone's photos and builds.

4.5 blade - 3/32 (8670) - Osage wood and black micarta pins.
20231215_123854.jpg
20231215_123703.jpg
 
Kephart is retained best in that taco style sheath. Needs to be just snug when the bolster goes in. Having tried both. If you do one with retaining strap, build it with the strap low and close to the bolster so knife doesn't try to slip up. Kabar got it right with their BK 62 sheath IMHO.
Thanks ! I google *taco stile sheath* . Is this sheath taco stile ? If is that I like it for this knife .

lFOeSAO.jpg
 
Thanks ! I google *taco stile sheath* . Is this sheath taco stile ? If is that I like it for this knife .

lFOeSAO.jpg
I believe that is the correct term. I still have yet to make a sheath I think this knife will be my first effort because of the rugged simplicity. And that spear point is stabby as hell, it needs some coverage. I'm starting to get a pile of knives in a plastic shoe box. Gonna have to get some leather and kydex and learn something else I didn't think about. I was just a blacksmith that thought making a few knives sounded cool. Now I'm buying damn woodworking tools, about to get leatherwork stuff. Wtf have I gotten myself into.
 
I'm finishing up a Kephart. I just installed the Corby bolts and lanyard tube tonight. When I'm done I'll post a picture here. A2 steel .092 thick, African blackwood scales with red G10 liners. Nickle silver Corby bolts. I should be done before the 31st. This is the first knife I've etched with my logo.
 
so my neighbors like.,..."anyway you have something for me by christmas?" hmmmmm ... guess the kephart will be getting finished up this saturday :) Ill have to test it out a little bit before i give it up.

Ill post a few more pics too.
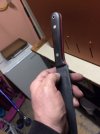
I'm equally as horrible. I went to pops today and asked if any of the makers there could have me a nakiri by Saturday. I actually had a taker. I'm a horrible person. I'll do better next year. I hope.
 
3 Kepharts

The Kephart was an interesting challenge. I like the straight forward simplicity in the original design. Mine are a little stylized. I made a small one with linen micarta, one stock removal from 1084 bar with figured Walnut, and a forged 1084 with Desert Ironwood. Carving the swell with Desert Ironwood was a laborious task.
 
Half day at work, so I was able to shape and sand the handle to 3000 grit. Tomorrow I plan on polishing the handle with some wax. Then I will finish hand sanding the blade and put put the final edge on the blade. African Blackwood, red G10 liners, nickel silver Corby bolts, stainless lanyard tube. A2 steel. I heat treated it at 1775F for 20 minutes with an immediate cold treatment in a dry ice/isopropyl slurry (confirmed below -100F). I did the first temper at 300F for 90 minutes followed by another cold treatment. I then tempered twice at 400F, 90 minutes each time.
IMG_0406.JPGIMG_0405.JPGIMG_0404.JPG
 
Finished. My only criticism is that it's a little thick about an 1/8 of an inch in from the edge. I'm finding I like that measurement to be .020-.025. This one is .030. It's slightly handle heavy, with a balance point just behind the first finger, right in front of the Corby bolt (blackwood is heavy). I haven't tested it out yet, except that it passes the paper test.
IMG_0409.JPGIMG_0410.JPGIMG_0411.JPGIMG_0412.JPGIMG_0414.JPGIMG_0416.JPGIMG_0418.JPG
 
this design really does feel great in hand. looking forward to making more. I did not taper the tang. It seemed like I would want more weight in the hand than less.
oGmcIXR.jpg

7RDw0Jt.jpg

HsK6yHn.jpg
 
this design really does feel great in hand. looking forward to making more. I did not taper the tang. It seemed like I would want more weight in the hand than less.
oGmcIXR.jpg

7RDw0Jt.jpg

HsK6yHn.jpg
I like the tapered spine. Nice job!
 
Back
Top