- Joined
- Mar 8, 2008
- Messages
- 26,323
Just for a little more contextual cost conversion, their 90lb anvil is priced at $5.55, which would be $1,130.00 today.
The BladeForums.com 2024 Traditional Knife is available! Price is $250 ea (shipped within CONUS).
Order here: https://www.bladeforums.com/help/2024-traditional/
That is just fascinating. I checked my other Seymour 'Austria' blade and that too had these markings, but only on the heal. On all of my blades
the heal is much sharper, maybe preserving a trace of the standard that the old farmers were able to reach on the rest of the blade that I have
to struggle to reach. I wonder what the stories of these blades might be. It seems they are essentially new old stock. I can imagine the old folks
after the harvest, feeling too worn out to fight with the old blade on the grindstone yet again and flush with cash after the harvest giving in and
getting a new blade from town. And like guys who retire or lose a spouse, not making it to the next harvest.
Here is a page from the 1897 Sears Catalogue that gives a nice sense of the relative prices of things:
http://books.google.com/books?id=pavHOWOWKEEC&pg=PA64#v=onepage&q&f=false
Not that they seemed to call just the blade a scythe. Note also how much more expensive a lawn mower
was, and how much decoration and page space they got. 50c for a top end grass blade, 55c for a grass snath,
versus $2.35 for an entry level lawn mower, almost the same price as grain cradle.
In my struggle to get to and keep a sharp edge:
I was trying to use a cup to maintain my edges. A wind storm blew it over. Now I have this that perfectly and safely fits my thumb:

It takes off metal, but I don't know if it is enough surface to be effective.
Great link, Panyo.
If I’m correctly reading the illustration of the grain cradle, it shows the arrangement I had always pictured. The cradle lying horizontal and parallel to the scythe blade. Am I misinterpreting the drawing? Or were there different arrangements of cradles for different purposes?
The catalog shows an example of The Historian’s Nightmare. “The old well known lightning pattern hay knife, so well known an illustration is all that is necessary to describe it.”
It’s not well known by me. I’m willing to bet it had something to do with making hay. Beyond that….does anybody have a clue how and why the lightning hay knife it was used?
Thanks Raymond.Great link, Panyo.
If I’m correctly reading the illustration of the grain cradle, it shows the arrangement I had always pictured. The cradle lying horizontal and parallel to the scythe blade. Am I misinterpreting the drawing? Or were there different arrangements of cradles for different purposes?
The catalog shows an example of The Historian’s Nightmare. “The old well known lightning pattern hay knife, so well known an illustration is all that is necessary to describe it.”
It’s not well known by me. I’m willing to bet it had something to do with making hay. Beyond that….does anybody have a clue how and why the lightning hay knife it was used?


Hay knives were used for cutting portions of hay from a stack. I use one for portioning round bales (they're cheaper than square bales by a lot)
[video=youtube;0wg62i6RP4A]http://www.youtube.com/watch?v=0wg62i6RP4A[/video]


As mentioned, it was used for cutting portions from a stack. Once hay settles you can't get it out any other way without disturbing the whole stack and exposing it to the elements, risking spoilage. Here's a vintage trade card that shows the proper use of one.
and an ad describing its various uses:
")
No no no-- the cradle is not used with the plane created by the fingers running parallel to the ground-- the support post stands vertically. The blade runs roughly parallel to the ground and the fingers of the cradle float above it in a verti.cal stack


 :thumbup:
Oh nice--the tang on that one is properly pitched!
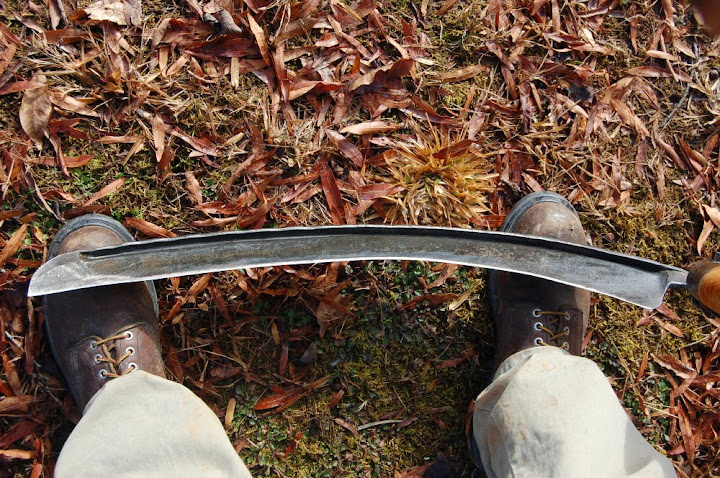
That secondary curve likely comes from the toe of the blade having become dulled more frequently/rapidly that the rest of the blade (thanks to it being the first part of the blade to encounter problematic obstructions like hillocks, rocks, fence wires, etc) and probably got ground down more in repair of that dulling than the rest of the blade. Preferably one would use the geometry of the curve at that point and see how it could be smoothly blended back into the arc of the rest of the blade. See what "bumps" lie between the curve at the tip and the main length of the edge and grind them down so you have a nice continuous and uninterrupted arc. The region that was "excavated" will then need to be ground thin again and honed.
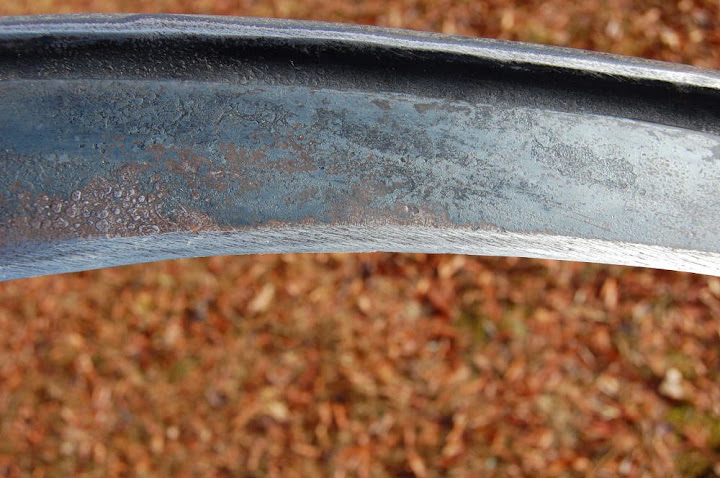
As far as the nicks go, those are little ones. Don't worry about them until you go to refresh your edge on the grindstone or 1" belt sander (but the grindstone is vastly preferred)
. I hit a finishing nail working with my best plane yesterday, maybe if I dull up a few more things I can convince the missus that it's a necessity! 