- Joined
- Jan 29, 2007
- Messages
- 199
Well,
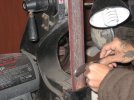
for what it's worth I'm going to try a work in progress thread. This is going to be my 10th knife (God willing) and I thought it would be cool to share the process as well as get some feedback along the way.
I'm pretty thick skinned so, even if your not real diplomatic, feel free to give your 2 cents.
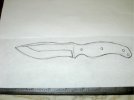
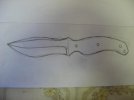
I normally do pretty detailed scale drawings, I'm not real good at calculating radiuses and since this is a curvy knife I just sketched an erased until I was comfortable with the overall look.
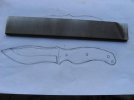
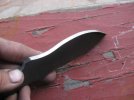
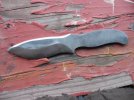
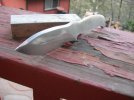
This is the knife I was hoping to trade steel/lignum for. I found a good and dull Nicholson file down in the shop that eclipsed my 1:1 sketch so I figured This will be a good start. if there's anything I don't like about the design, I can fix it on the more expensive stainless version.
Some quick and dirty specs:
OAL: 7 3/4"
handle length: 3 7/8" (to quillion(?))
Material: 1095 File
thickness: about 7/32"
Let me know what you think!
for what it's worth I'm going to try a work in progress thread. This is going to be my 10th knife (God willing) and I thought it would be cool to share the process as well as get some feedback along the way.
I'm pretty thick skinned so, even if your not real diplomatic, feel free to give your 2 cents.
I normally do pretty detailed scale drawings, I'm not real good at calculating radiuses and since this is a curvy knife I just sketched an erased until I was comfortable with the overall look.
This is the knife I was hoping to trade steel/lignum for. I found a good and dull Nicholson file down in the shop that eclipsed my 1:1 sketch so I figured This will be a good start. if there's anything I don't like about the design, I can fix it on the more expensive stainless version.
Some quick and dirty specs:
OAL: 7 3/4"
handle length: 3 7/8" (to quillion(?))
Material: 1095 File
thickness: about 7/32"
Let me know what you think!
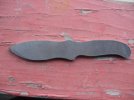
 or my sketch too sloppy... My intention is to do a primary/secondary on bottom and a false edge on top
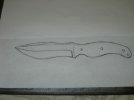

")