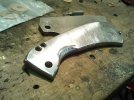
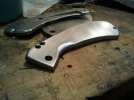
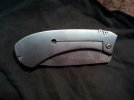
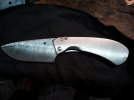
Hey, Tiiiiiiiiiiiim, I just learned that a small enough piece of Ti(like a spring in a slipjoint) in a spot welder will ignite. Not quite like magnesium, but close, more flash than burn. Grinding sparks are nothing compared to that! Yes, it's definitely light and works different than carbon steel. Personally, I love the clean-ness of it and enjoy the fact that it won't rust, corrode, or about anything else. When you get done look into anodizing with 9v batteries. Very cheap to do and easy. It looks great and a LOT can be done with it. I just ordered 8 more pieces of Ti, similar to what I sent you.