Advanced Knife Machining WIP, Pointy Fighter

Man this makes grinding feel totally obsolete. Now I want to go back to school and take some machining courses.

Naw man, grinding isn't obsolete. Machining is a good way for somebody like me to get the geometry I've envisioned into steel, but it is only one of many approaches. I approach it as a machinist, so I cut chips. But someone who forges or someone who grinds isn't behind the curve IMO. In fact, I can't mill a finish as slick as I can grind one, so a lot of these are getting finish ground to remove tool marks.
 
Man this makes grinding feel totally obsolete. Now I want to go back to school and take some machining courses.

I sure hope you already have some machining experience cause looking at pictures might give you the sense this is easy but I am pretty sure you need more than a few machining courses to get to this level.
By the time you are done you will have spent enough money to buy about a dozen TW90 and enough time to master grinding a recurved dagger blindfolded with one hand behind your back. ;)

Good stuff Nathan, thanks again for taking the time to share. :thumbup:
 
Patrice Lemée;12200514 said:
I sure hope you already have some machining experience cause looking at pictures might give you the sense this is easy but I am pretty sure you need more than a few machining courses to get to this level.
By the time you are done you will have spent enough money to buy about a dozen TW90 and enough time to master grinding a recurved dagger blindfolded with one hand behind your back. ;)

Good stuff Nathan, thanks again for taking the time to share. :thumbup:

Very true. I would just love to learn the basics of machining for when I eventually get a Bridgeport. It would probably take $50K and a decade of schooling and practice to get to where Nathan is skill wise.

Thanks again for documenting this process Nathan. :thumbup:This is one of the most information rich threads I've ever seen....even if most of it is way over my head.

I dont think $50k will cover what's in Nathan's shop. :)
 
Just read this entire thread and learned so much. There's obviously much more here than I will ever comprehend. Still, it was accessible to someone with no background and only an ever more passionate interest in knives. It's people like you who make this forum the best. Thanks so much! I'm going to re-up my paid membership.


Edit: All paid up.
 
Last edited:
50k would pay for half of a radial arm drill in my manual machine shop, let alone the high end cnc stuff!

Awesome WIP!! Love it.
 
WOW !! Very cool Nathan. What a Beautiful Knife !
I always appreciate the time, effort, knowledge and experience you so graciously share with us :thumbup:

Thank you :cool:
 
Okay, this is the last post of this WIP, finishing the blades post HT:

Despite all the fine finishing I've attempted to do on the machine there were some blades that had flaws that need to be ground out. And although the side milled bevels turned out pretty good, they're not as slick as a ground finish. So, once the blades returned from Peters I pulled the best and put them into the vibratory finisher for “field grade, as machined”, but the rest are receiving some kind of grinding.

The nature of these flaws is difficult to photograph but this picture shows it well:

80_zps75e5055d.jpg~original


I'm taking an unusual approach to this. I'm grinding them lengthwise against a flat platen with an end radius shaped to match the plunge radius. This kind of platen is something I have offered here for sale, so this would be a shameless plug except I don't have any more of them and I don't have plans to make more any time real soon.

This is something you can make yourself with a grinder, file and radius gauge.

The benefit to this for finish grinding is a perfect clean plunge and a very straight forward simple grinding technique that leads to a nice surface finish and nice straight flat geometry. Finishing grinding something I've ground the regular way is an eye opener because this finds and fixes all kinds of flaws.

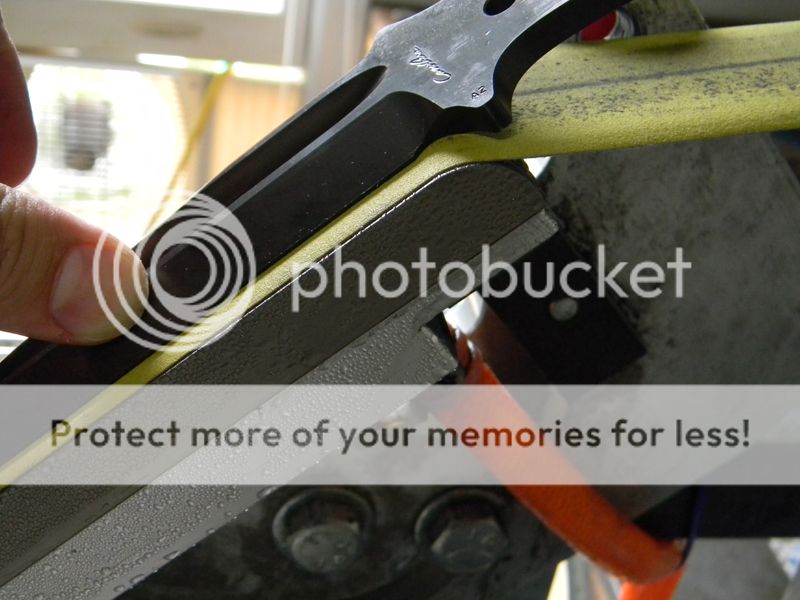
This is what my setup looks like:

81_zps4b566cf4.jpg~original


You'll notice it is dripping with condensation. It was a humid rainy day and I shut my grinding area off from the rest of my shop when I have a lot of grinding to do and ventilate it with outside air. So all that humid North Carolina spring time air condenses on my ice cold platen (another shameless plug). I'm keeping my platen cold by circulating ice water through an aluminum chiller. This is necessary when grinding with the top wheel removed because all the heat from the friction, but an advantage to it is you don't need to lift as much.


To use this technique you need to make contact out on the belly of the blade first, edge first. Then lay the blade flat. Then work down to the plunge. Don't let the part of the belt traveling over the radius make hard contact anywhere on the blade unless you're actively grinding your plunge. But, when you're actively grinding your plunge you need to press it in firmly and keep hold of it so you don't spoil your plunge.


I made a video to illustrate the technique.

[video=youtube_share;qSMJhAj3-gY]http://youtu.be/qSMJhAj3-gY[/video]

I got the hang of it in five or ten blades. It is not difficult to do, but it is important to practice a few times before attempting it on real work.

This is a picture of that same blade immediately after the video. The blade has been heat treated, so the contrast with the heat colors and ground area really illustrate the imperfections that are being ground out.

82_zps8700e273.jpg~original


Here is one that has been tumbled to remove the color from the fuller and then finish ground to 300 grit

83_zpsab52b276.jpg~original


Pretty slick technique huh?

And here you go:

5_zps0d95ac5c.jpg~original


6_zpsf773f6f3.jpg~original


Thanks for following along.
 
Last edited:
Holy cow, you jump through some hoops with that platen!

I use the same technique on every knife I grind, but I have that lip on the near side of the platen, and the platen level to the ground.

So, I can stand in my normal spot, and hold on to the handle without it hanging over the belt!

DSCN2431.JPG
 
Holy cow, you jump through some hoops with that platen!

I use the same technique on every knife I grind, but I have that lip on the near side of the platen, and the platen level to the ground.

So, I can stand in my normal spot, and hold on to the handle without it hanging over the belt!

]

Cool setup. :thumbup:
I've been afraid to stand in line with it, for fear of a launch. I've also been afraid of running it tip first. Do you ever have problems with the tip catching or have I been being overly paranoid?
 
I've had 1 tip catch in probably over 1000 knives ground.
That belt was lifted up at the seam, and I figured I'd squeeze a little more life out of it.
My fault.

Try it, you will be happy you did.
 
Hey man, i was just curious as to what type of mill you are running? btw...love the duel kurt vices. I am currently using a vintage kurt (must be 20 years old) but it is still heads and tails above any SHARS junk. I had a G0 oopsie into a SHARS 4th axis a couple months ago with a 2" turbo and it just turned into powder. lol. Its like they cast their vices and chucks out of compressed sawdust.
 
Great WIP Nathan, loved the thread and really love the knife, I still have that Hunter with the Osage scales you gave me, one of my favorite Woods Walkin' knives.

Again, great read and informative thread, thanks for taking the time to share.
 
The water cooled platen, and that CNC'd grip are too cool. Great design man.
 
Back
Top