-
The BladeForums.com 2024 Traditional Knife is available! Price is $250 ea (shipped within CONUS).
Order here: https://www.bladeforums.com/help/2024-traditional/
You are using an out of date browser. It may not display this or other websites correctly.
You should upgrade or use an alternative browser.
You should upgrade or use an alternative browser.
BladesByBaz
- Thread starter BladesByBaz
- Start date
- Joined
- Aug 2, 2014
- Messages
- 79
Love these threadspeople helping eachother out just to be nice! Quick question Biz, what are you using to seal/protect the handle?is that lacquer or polyurethane?
It was a poly mate. I actually don't really like it so I might not be using it again. All this for me is just experimenting, listening to other's advice and finding out for myself by trying all kinds of things. It's just fun for me.
Baz.
- Joined
- Aug 2, 2014
- Messages
- 79
I've been asked to make a very special knife that requires a brass pommel on the end of the handle.
So, I quickly whipped up a steel crucible to fit nicely in my forge and tested it to see if it could get up to the required temperature to melt brass for casting.
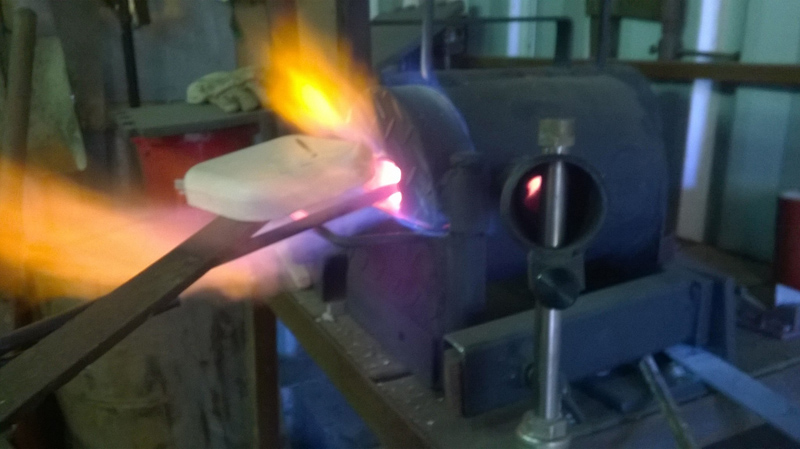
1. Time to put my forge to the test and see if it get's hot enough to melt brass for casting. Some spare brass gas fittings.

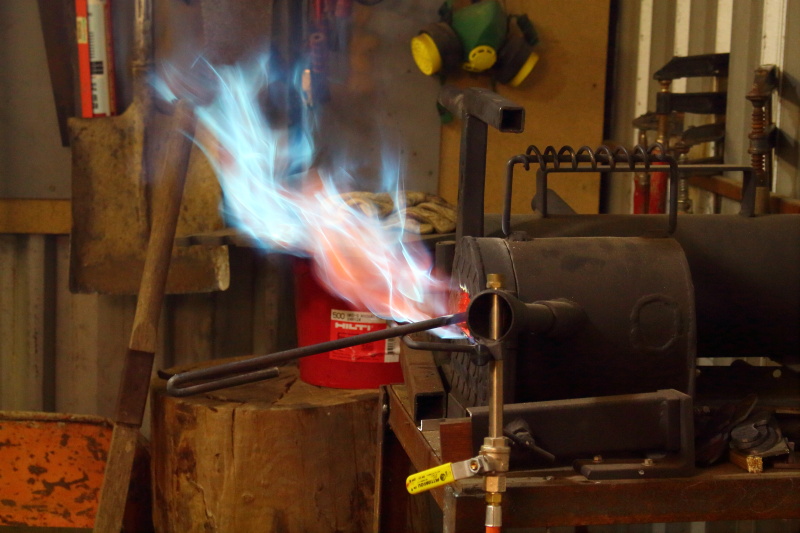
2. Burn baby burn! Brass melting test.
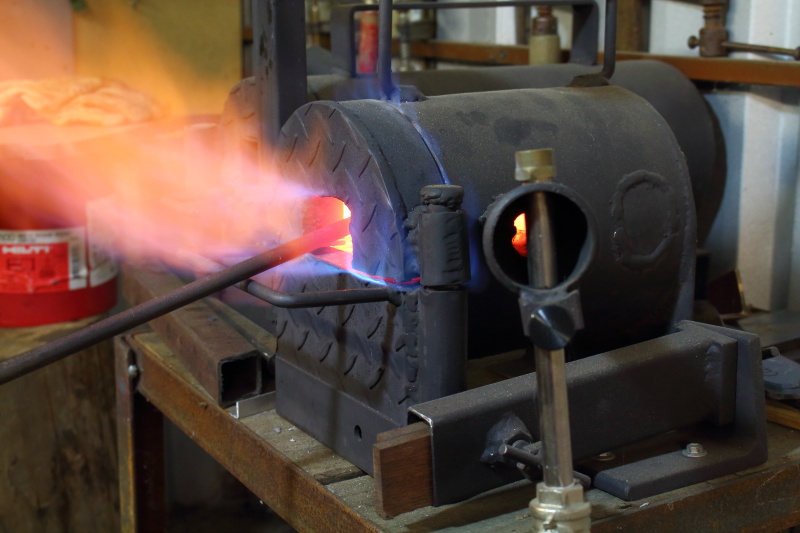
3. Checking to see if the brass has started to melt. It turned liquid a couple of minutes after this shot.

4. Something awful in one of the fittings. At this point I vacated the shed and watched through the open door until it burned off.
5. Successful pour of the molten brass.
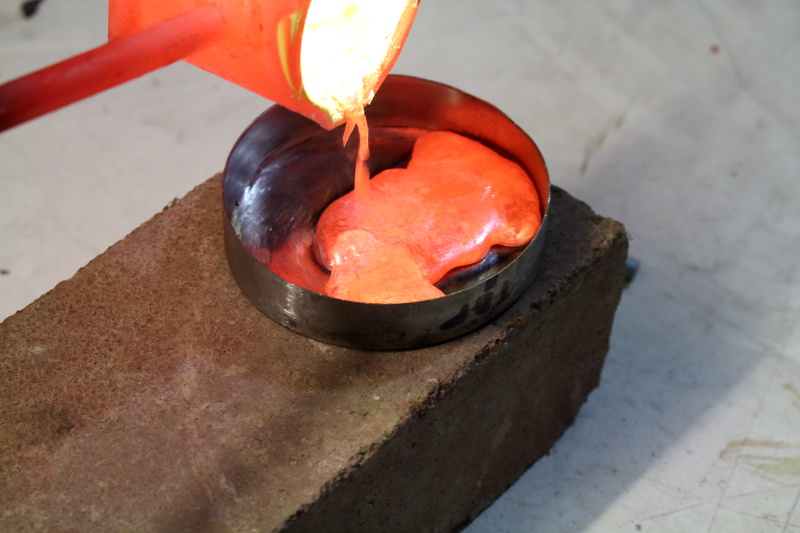
6. Brass poured and solidified. Successful test. Go for casting.

So, I quickly whipped up a steel crucible to fit nicely in my forge and tested it to see if it could get up to the required temperature to melt brass for casting.
1. Time to put my forge to the test and see if it get's hot enough to melt brass for casting. Some spare brass gas fittings.
2. Burn baby burn! Brass melting test.
3. Checking to see if the brass has started to melt. It turned liquid a couple of minutes after this shot.
4. Something awful in one of the fittings. At this point I vacated the shed and watched through the open door until it burned off.
5. Successful pour of the molten brass.
6. Brass poured and solidified. Successful test. Go for casting.
T.Saslow
Periodic Thinker
- Joined
- Jun 12, 2013
- Messages
- 479
It was a poly mate. I actually don't really like it so I might not be using it again. All this for me is just experimenting, listening to other's advice and finding out for myself by trying all kinds of things. It's just fun for me.
Baz.
Gotcha, I like to use danish oil or linseed oil on my knives. Although, I have heard some good things about tung oil. I haven't really had any problems with it yet, so long as you get the wood stabilized.
Good luck with the brass pommel, looks like it could turn out really cool!
- Joined
- Aug 2, 2014
- Messages
- 79
Gotcha, I like to use danish oil or linseed oil on my knives. Although, I have heard some good things about tung oil. I haven't really had any problems with it yet, so long as you get the wood stabilized.
Good luck with the brass pommel, looks like it could turn out really cool!
Thanks mate. Not sure what it would be like on a handle, but I dress my wooden stairs with a 50/50 mix of boiled linseed oil and mineral turps. The turps helps the oil penetrate the wood more and then sets it more like a wax. That way you don't get oil all over your hands and transfer it to clothes, furniture and walls.
Tactile contact with wood is great. Unfortunately putting lacquer on it takes that contact away.
Just my two cents.
Baz.
- Joined
- Aug 2, 2014
- Messages
- 79
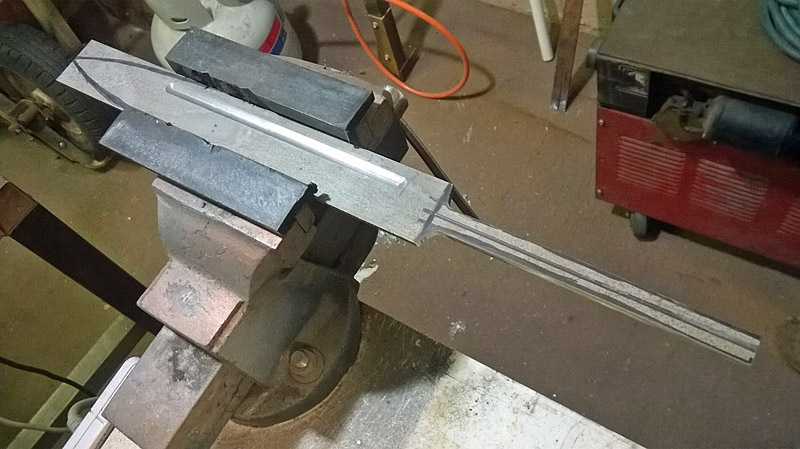
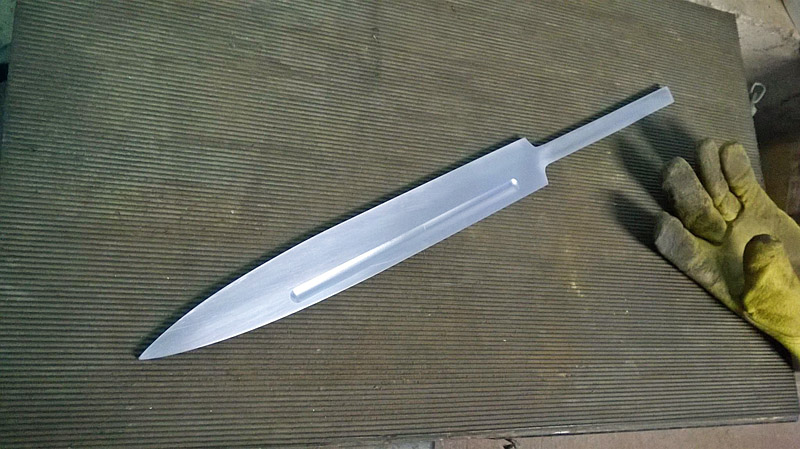
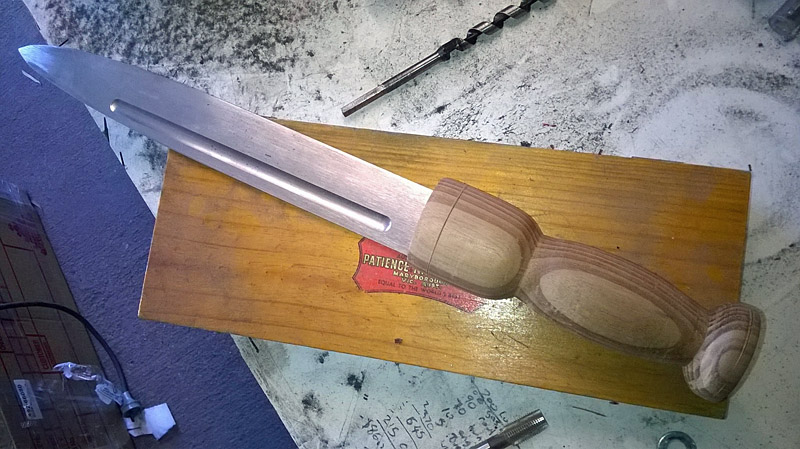
Scottish Dirk. Roughed out the blade shape tonight.

- Joined
- Aug 2, 2014
- Messages
- 79
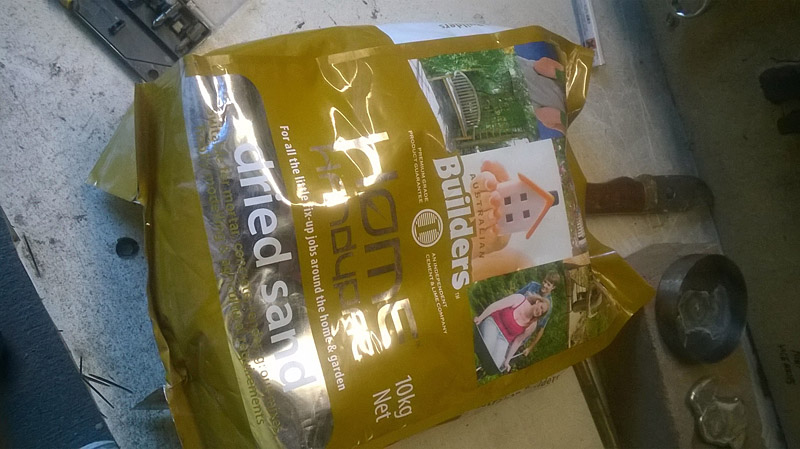
Found some dried sand from Bunnings for the brass casting on the blade.
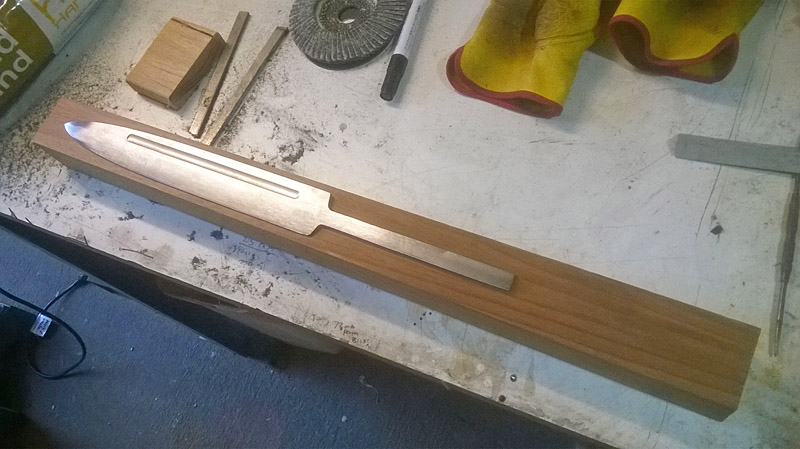
Lovely block of timber for the handle. Fine grain and HEAVY!
Basic shape to be lathed out before the detailed carving.

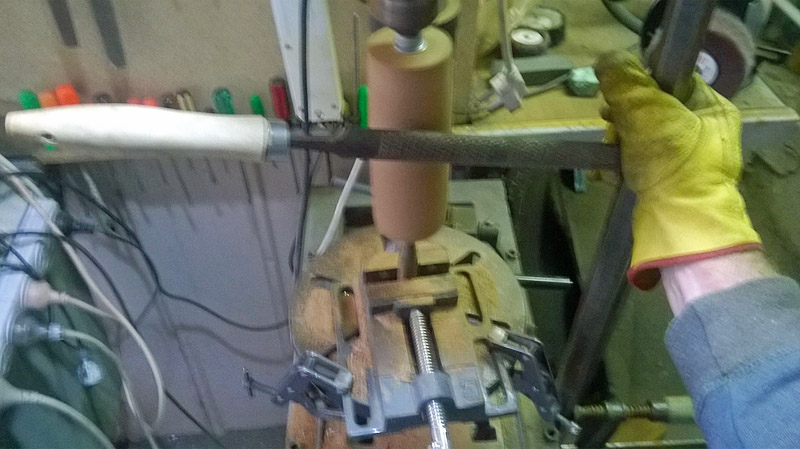
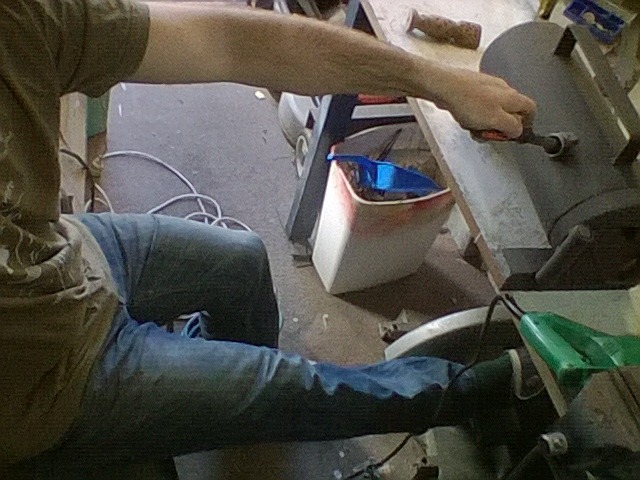
Time to get inventive. Improvise, adapt and overcome. To make a round handle out of a square block, I will need to make some sort of rudimentary lathe.

Cup head bolt right through the middle of the handle.
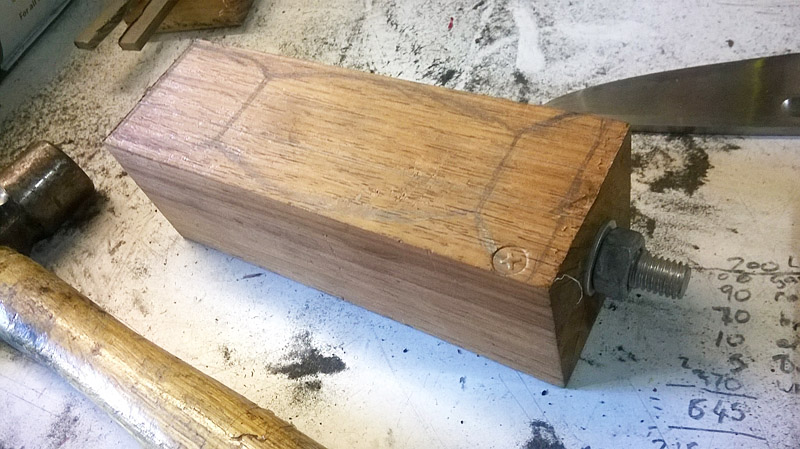
Making a lathe out of a drill press. Using an old punch for a tailstock, reshaped it to a point and drilled a small hole in the end of the cuphead bolt for it to centre. Protruding thread on the bolt is held by the chuck.

Clamped a crowbar to the side of the bench and using it to steady my rasp file.
Handle shaped, ready for intricate pattern carving.
Lovely block of timber for the handle. Fine grain and HEAVY!
Basic shape to be lathed out before the detailed carving.
Time to get inventive. Improvise, adapt and overcome. To make a round handle out of a square block, I will need to make some sort of rudimentary lathe.
Cup head bolt right through the middle of the handle.
Making a lathe out of a drill press. Using an old punch for a tailstock, reshaped it to a point and drilled a small hole in the end of the cuphead bolt for it to centre. Protruding thread on the bolt is held by the chuck.
Clamped a crowbar to the side of the bench and using it to steady my rasp file.
Handle shaped, ready for intricate pattern carving.
- Joined
- Aug 2, 2014
- Messages
- 79
I got a little more done today.
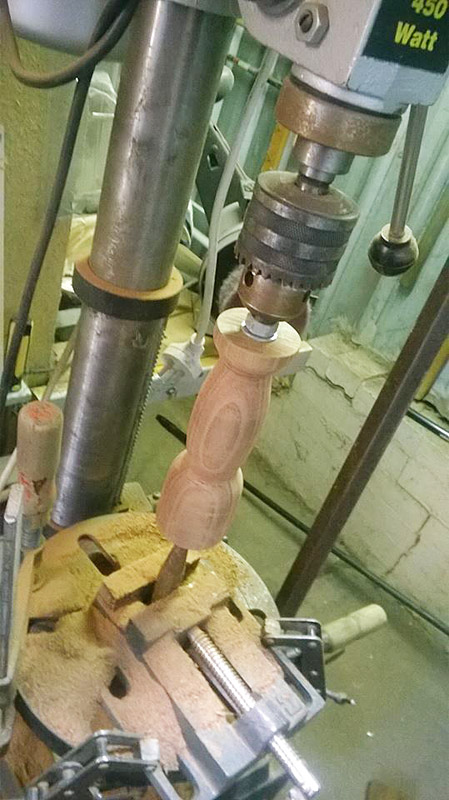
Handle turned to basic shape and sanded. Guide-lines either end mark where brass will adorn the handle.

Starting to carve in the scroll work.

Handle turned to basic shape and sanded. Guide-lines either end mark where brass will adorn the handle.
Starting to carve in the scroll work.
- Joined
- Aug 2, 2014
- Messages
- 79
Well this is annoying and slowing me down a lot on projects. A very loud crack was heard and down for the count.
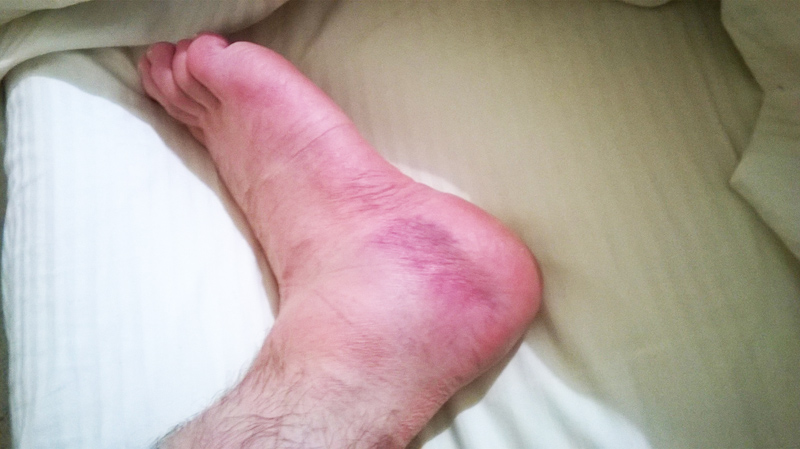
Modified workshop techniques for cripples 101: Filing on the workbench while sitting on the MIG welder, bung foot elevated on the drop-saw. Winnin'!
Got a bit more detailing done on the handle today. Also insulated the new, longer forge, ready to harden the long blade. Not much else I could do sitting down. The Iron Man suit and the deck will have to wait until I've healed.
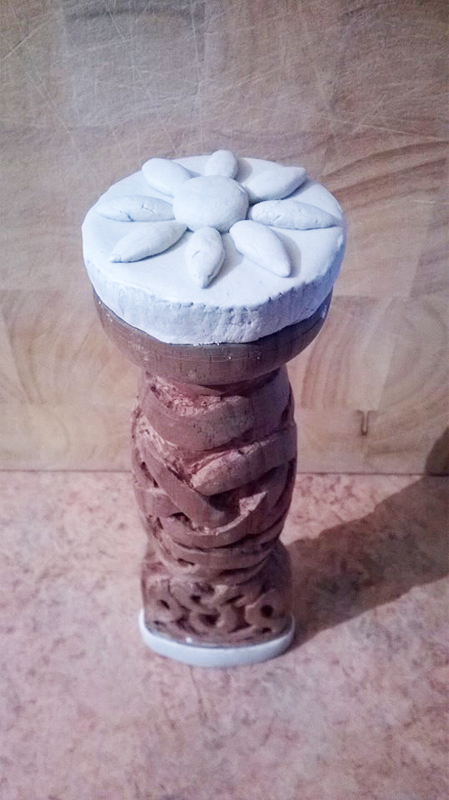
Pommel and hilt design. This is made of self-drying clay which when hard, will have a plaster mold poured before casting in molten brass. Final detailing will be engraved into this basic design.
Modified workshop techniques for cripples 101: Filing on the workbench while sitting on the MIG welder, bung foot elevated on the drop-saw. Winnin'!
Got a bit more detailing done on the handle today. Also insulated the new, longer forge, ready to harden the long blade. Not much else I could do sitting down. The Iron Man suit and the deck will have to wait until I've healed.
Pommel and hilt design. This is made of self-drying clay which when hard, will have a plaster mold poured before casting in molten brass. Final detailing will be engraved into this basic design.
- Joined
- Apr 11, 2014
- Messages
- 644
Baz, Your a serious "go getter"! Your thread and WIP is very interesting to keep watch of. It's refreshing to see you take the direction and critiques so well. A lot of new guys on here want to argue with the more experianced makers suggestions. Keep it up and you'll go places with this. Big thumbs up man!!!!!
Jay
Jay
- Joined
- Aug 2, 2014
- Messages
- 79
Baz, Your a serious "go getter"! Your thread and WIP is very interesting to keep watch of. It's refreshing to see you take the direction and critiques so well. A lot of new guys on here want to argue with the more experianced makers suggestions. Keep it up and you'll go places with this. Big thumbs up man!!!!!
Jay
Thanks Jay.
I just like to keep busy and be creative. I find it physically sickening to do nothing.
I know I'm not the best at any one thing, but I like to have a go at everything. I'd rather have a wide range of skills where I can make something that will get the job done and look ok, than to concentrate on a single thing and be the very best at only that.
However, I do learn a lot from listening to the experts and watching what they do. Some brilliant people here have given me some top advice.
On Tuesday night I'm going out to the Tharwa Valley Forge to hone some of my grinding skills. We'll see how we go after that.
Cheers,
Baz.
Last edited:
- Joined
- Jul 7, 2013
- Messages
- 2,614
I like the carving. How are you going to clean up the edges of the carved lines in the handle? Sandpaper with some kind of sanding block?
- Joined
- Aug 2, 2014
- Messages
- 79
I like the carving. How are you going to clean up the edges of the carved lines in the handle? Sandpaper with some kind of sanding block?
Sandpaper, mini-files, a dremel - whatever it takes.
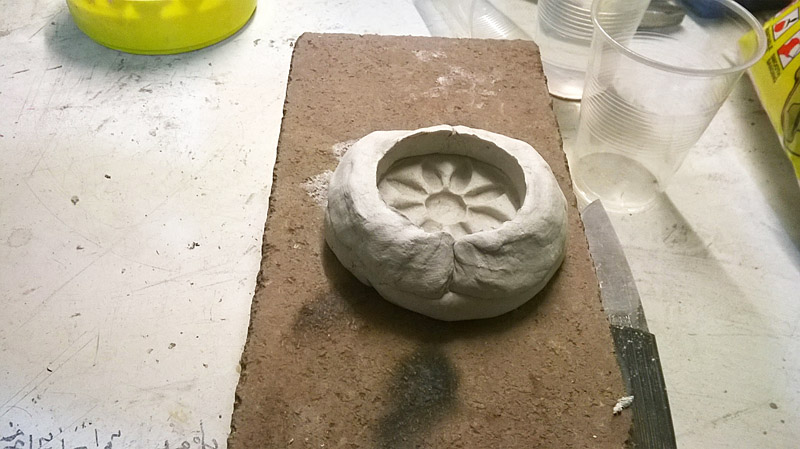
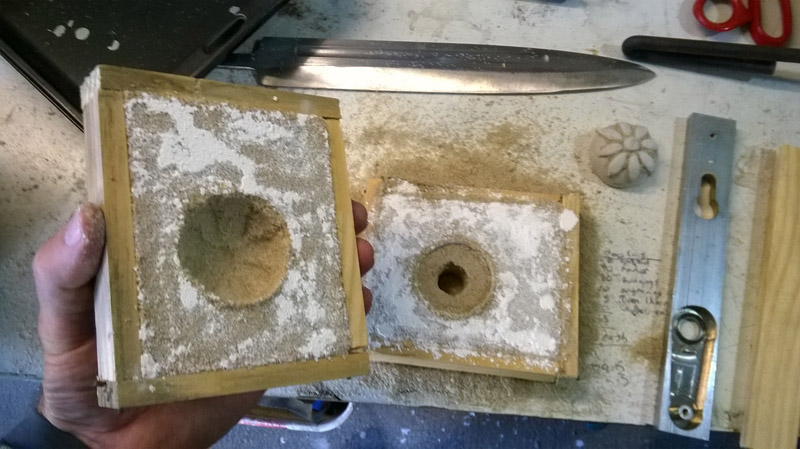
Clay hilt hard and dry, sanded for exact fit.
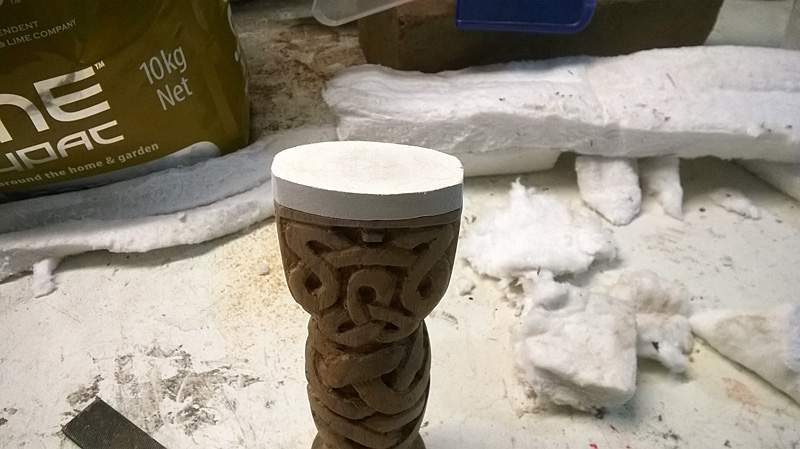
The great thing about using air-drying clay is that once you pour in the wet plaster, it gradually softens as the plaster sets. It then pulls out easily and perfectly with zero damage to the mold.
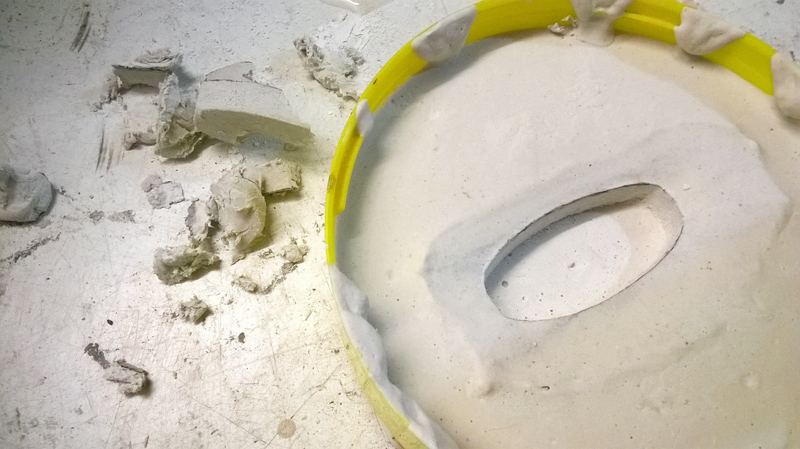
Clay pommel pressed into soft clay to form a mold. This might work to pour molten metal into, but I'll do a plaster mold as well. Both need to be bone dry before contact with liquid metal or, BOOM!!!
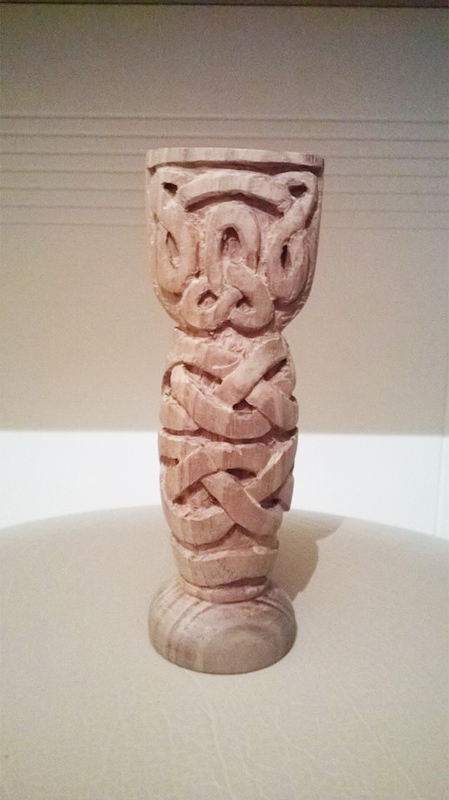
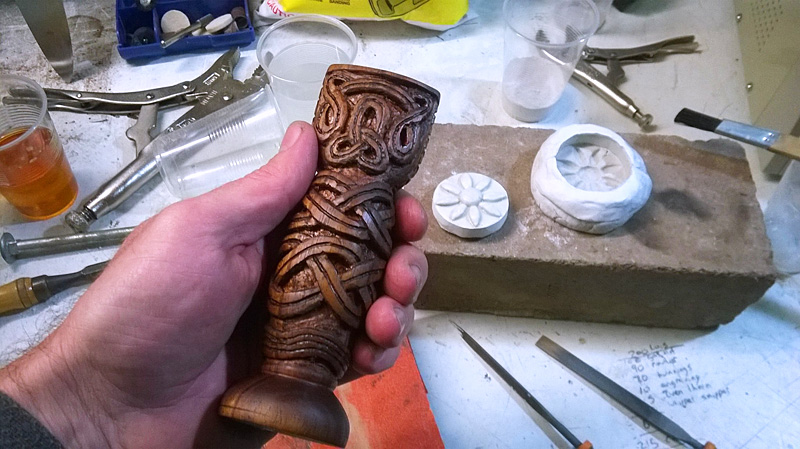
Finished carving the handle, dressed with boiled linseed oil.
- Joined
- Aug 2, 2014
- Messages
- 79
Now the plaster is set, I spent some time digging out the clay then carving in some detail for the brass pour to pick up. It is a bit agressive, but I'm planning on sanding it down to a dull pattern once cast.
Hopefully the plaster will be dry enough tomorrow for hot metal.

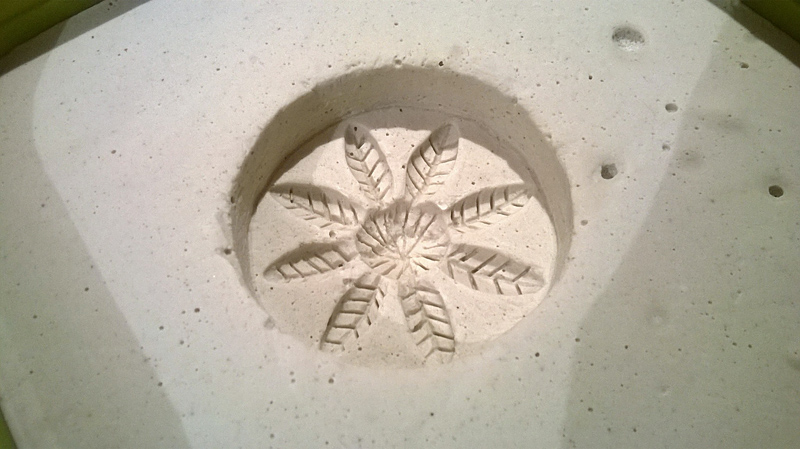
Hopefully the plaster will be dry enough tomorrow for hot metal.
- Joined
- Aug 2, 2014
- Messages
- 79
A day of questionable brass, wet molds, short-supply of gas. These are the problems I need to rectify.
1. Preheating the plaster mold to minimise reaction with hot metal.
2&3. Pouring the brass. You can see the mold on the left reacted more, as it wasn't preheated.
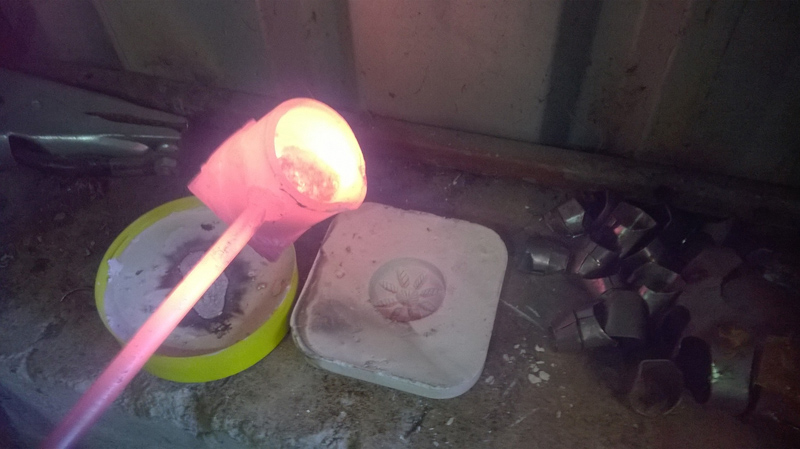
4. You can see how the one on the right reacted badly, where as the one on the left filled in all the way. Unfortunately I don't think the brass is pure. I tried to scrape off a lot, but much of the brass was being lost in the process. I need to find pure and unquestionable brass.
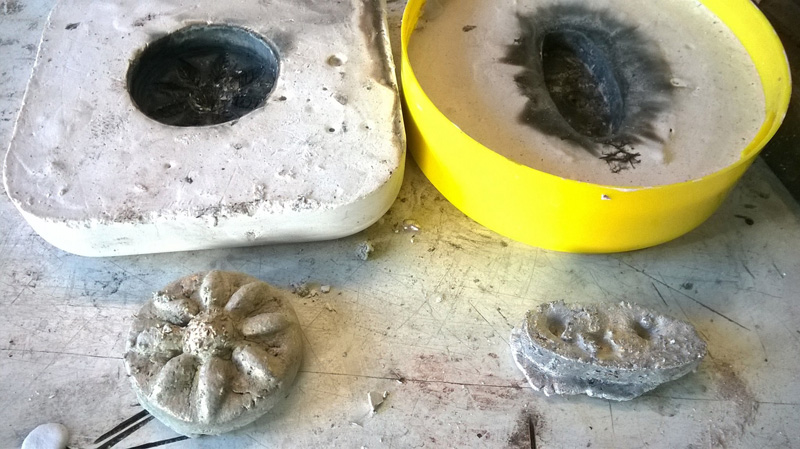
5. Even after a quick wire brush you can see it needs doing again.

6. Another attempt. It filled in much smoother but the brass was too cool I think and stopped pouring half way through filling the mold. GRRRR!
7. Total failure again. Full of holes and pits, then the mold separated. Back to the drawing board.

The brass I am using is from old bolts and brass pipe and gas fittings. I am beginning to doubt how much of it is actually brass. I'll do some research on the right brass to be doing this with.
Oh well, better to have a go than procrastinate about doing it.
1. Preheating the plaster mold to minimise reaction with hot metal.
2&3. Pouring the brass. You can see the mold on the left reacted more, as it wasn't preheated.
4. You can see how the one on the right reacted badly, where as the one on the left filled in all the way. Unfortunately I don't think the brass is pure. I tried to scrape off a lot, but much of the brass was being lost in the process. I need to find pure and unquestionable brass.
5. Even after a quick wire brush you can see it needs doing again.
6. Another attempt. It filled in much smoother but the brass was too cool I think and stopped pouring half way through filling the mold. GRRRR!
7. Total failure again. Full of holes and pits, then the mold separated. Back to the drawing board.
The brass I am using is from old bolts and brass pipe and gas fittings. I am beginning to doubt how much of it is actually brass. I'll do some research on the right brass to be doing this with.
Oh well, better to have a go than procrastinate about doing it.
- Joined
- Aug 2, 2014
- Messages
- 79
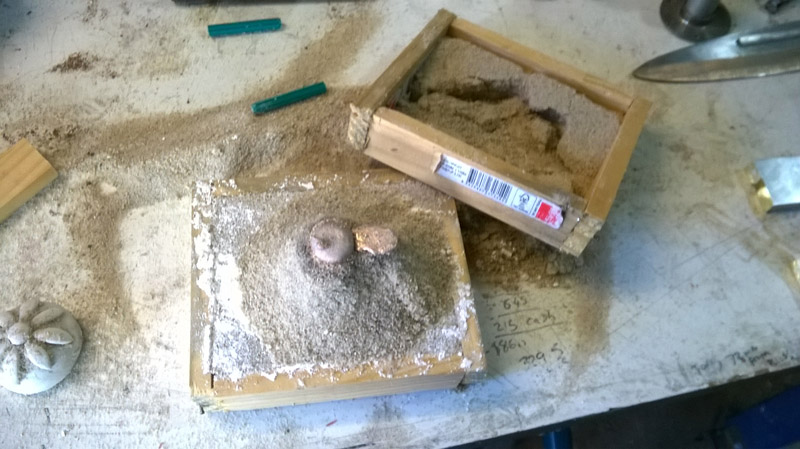
Today I bought some kitty litter made of bentonite clay and ground it to a fine powder with a coffee grinder then mixed it with my dried sand to make casting sand. A spray-bottle of water got me just the right moisture content to pressure form the sand to hold it's shape.
I made another pommel out of wet clay to make an imprint in the sand.

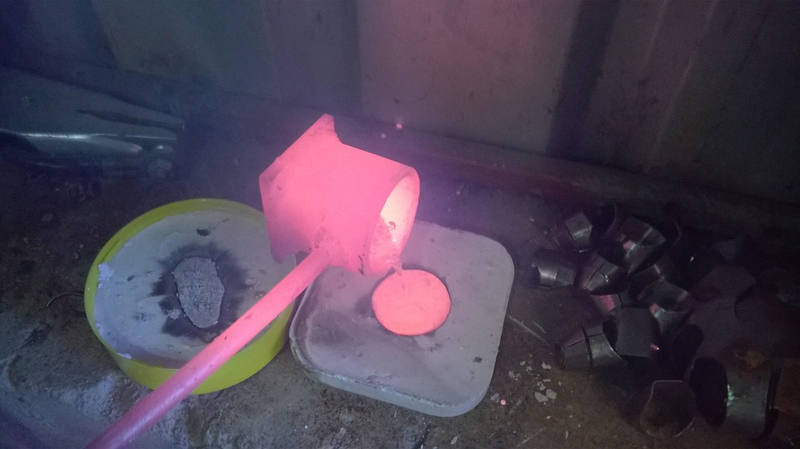
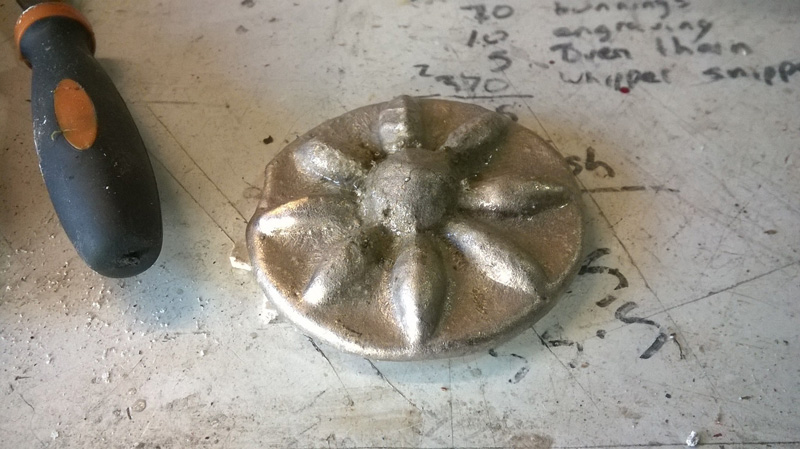
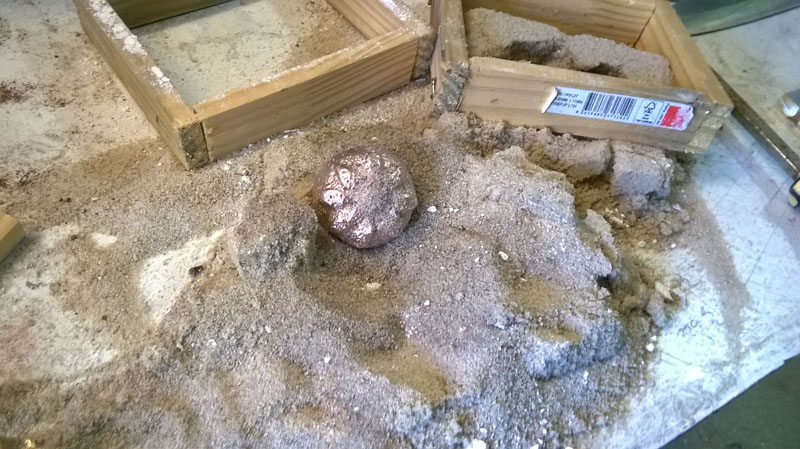
Molten brass poured.

Looks like it worked although I might add more clay into the mix for the next cast.
No knife is legit until it's been blooded.

Still some finishing work to go on the handle then it's into the forge with the blade followed by tempering and sharpening.

I made another pommel out of wet clay to make an imprint in the sand.
Molten brass poured.
Looks like it worked although I might add more clay into the mix for the next cast.
No knife is legit until it's been blooded.
Still some finishing work to go on the handle then it's into the forge with the blade followed by tempering and sharpening.
- Joined
- Aug 2, 2014
- Messages
- 79
Holy crap man! That looks amazing. Great job. You are obviously very artistic by nature this hobby seems to be a good fit!
Thanks Jemblade.
I really don't have much need for knives, but it is a good way to repay those who have done me favours by making something personal for them that I can put some heart into. Much more meaningful than money or vouchers as thanks.
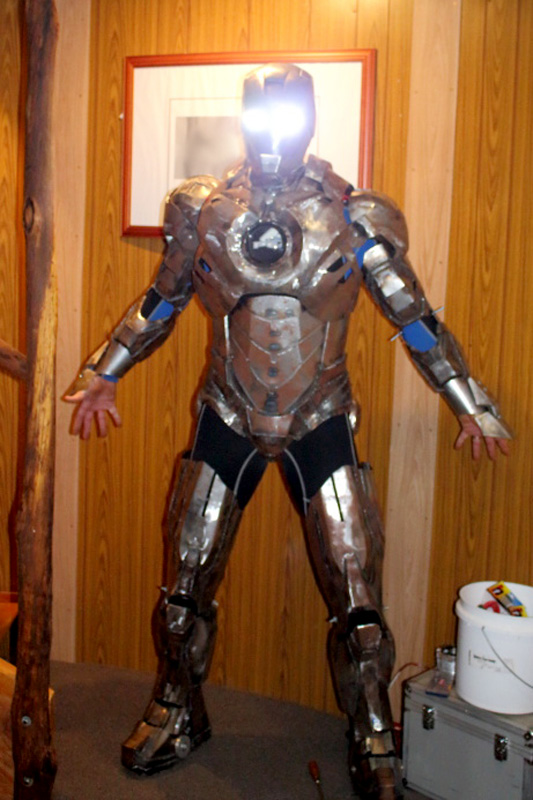
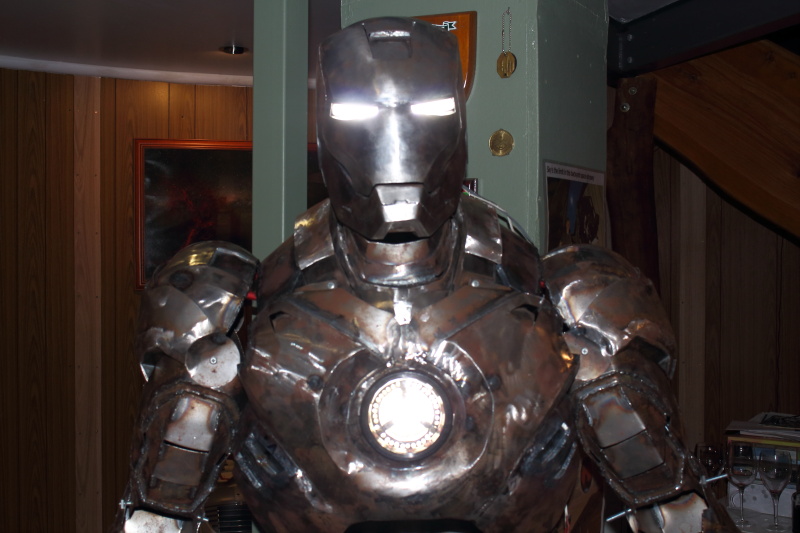
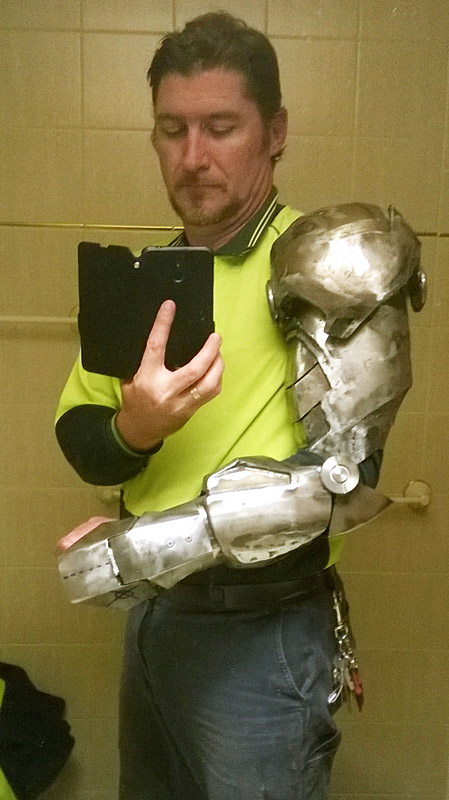
Lots of people have been helping me out with my big projects along the way, like my Iron Man suit I've been building. (See below) I have a tight budget so making knives is a sweet deal. One lady in Sydney is making me some custom leather under-gloves for my armour, something I have no idea how to do, but she wanted a Scottish Dirk so that's a great barter.


Last edited: