- Joined
- Nov 5, 2005
- Messages
- 331
Hey Rick!
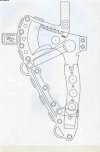
I am sad to see that the saw was taken off. Believe it or not, we use little things like that quite often down range, and having it incorperated into such a compact designe I thought was a good idea...
If you look at the back of an M-9 Bayonett, it has a type of file/saw combo. I can't tell you how many times I have used that little thing in the field!!
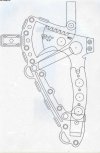
As for Rust in the field, that is what power coating is for, or a little bit of CLP that we use on our weapons (Clean, Lubircate, Protect oil) so I would go with the toughest avalible metal, and not worry about a high carbon content steel.
The sheath looks great!! Somthing to keep in mind, is that all "dangerous" surfaces must be covered in order to do Airborne ops with it, and it also must incoperate a double retention feature...
What a beaut of a project!! Thanks for thinking of us!!!
V/r,
Frank B
I am sad to see that the saw was taken off. Believe it or not, we use little things like that quite often down range, and having it incorperated into such a compact designe I thought was a good idea...
If you look at the back of an M-9 Bayonett, it has a type of file/saw combo. I can't tell you how many times I have used that little thing in the field!!
As for Rust in the field, that is what power coating is for, or a little bit of CLP that we use on our weapons (Clean, Lubircate, Protect oil) so I would go with the toughest avalible metal, and not worry about a high carbon content steel.
The sheath looks great!! Somthing to keep in mind, is that all "dangerous" surfaces must be covered in order to do Airborne ops with it, and it also must incoperate a double retention feature...
What a beaut of a project!! Thanks for thinking of us!!!
V/r,
Frank B


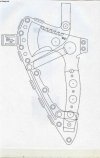
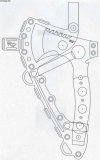
 I'll put the saw function back in the design.A feature you use because you have it.
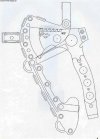
") Once I make one,I'll have a ball park price on it.
Once I make one,I'll have a ball park price on it.