-
The BladeForums.com 2024 Traditional Knife is available! Price is $250 ea (shipped within CONUS).
Order here: https://www.bladeforums.com/help/2024-traditional/
You are using an out of date browser. It may not display this or other websites correctly.
You should upgrade or use an alternative browser.
You should upgrade or use an alternative browser.
Introduction and a WIP
- Thread starter Will Morrison
- Start date
- Status
- Not open for further replies.

- Joined
- Sep 3, 2008
- Messages
- 269
Will,
I will be in Melbourne next week and will have Friday the 19th free. Send me an e-mail (emmonscustomknives at gmail dot com)with your contact information if you want to get together a talk knives.
WIP looks great so far, keep it coming.
James
I will be in Melbourne next week and will have Friday the 19th free. Send me an e-mail (emmonscustomknives at gmail dot com)with your contact information if you want to get together a talk knives.
WIP looks great so far, keep it coming.
James
- Joined
- Apr 25, 2009
- Messages
- 329
Will,
I joined this forum so I could thank you for the detailed and clear explanations - you have presented clear and usable solutions for several issues I have had.
Many thanks and as stated by others, great to see yet another talented Aussie maker.
Looking forward to seeing this knife done and dusted (I am wearing out the refresh button on my browser hoping for more!)
Regards
Gavin
Sydney
Wow, thanks Gavin.
I'm glad you've found this useful. I'll have more photos up soon.
- Joined
- Apr 25, 2009
- Messages
- 329
Hey thanks everyone .
.
My annotations have been pretty weak in the last few sets of photos, so I think I'll go back and edit them if I can come up with anything better.
.My annotations have been pretty weak in the last few sets of photos, so I think I'll go back and edit them if I can come up with anything better.
- Joined
- Apr 25, 2009
- Messages
- 329
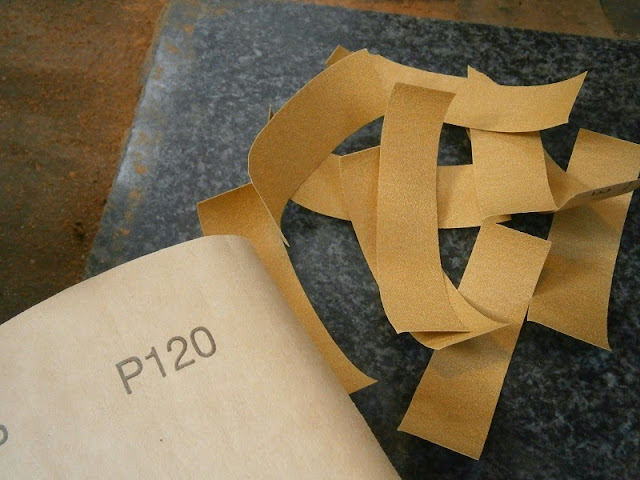
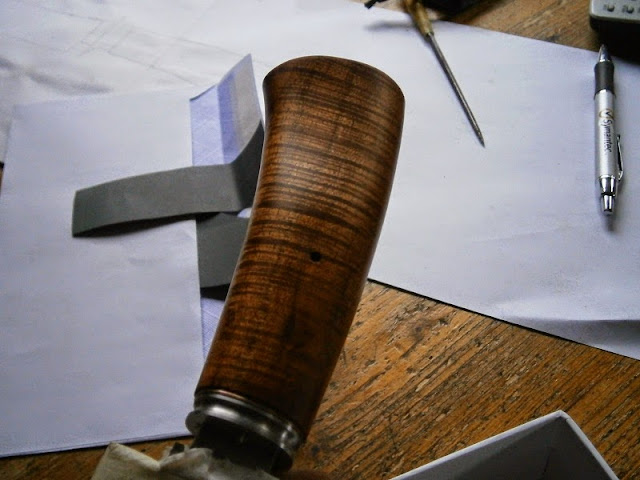
When I'm happy with the shape of the handle, I can get rid of the 60 grit paper, and switch to 120 grit.
This was a most useful tool for finishing the curved parts of the handle. Just a section of pipe with some thin rubber glued to it.

Now I move to 320 grit.
Then 600 grit.
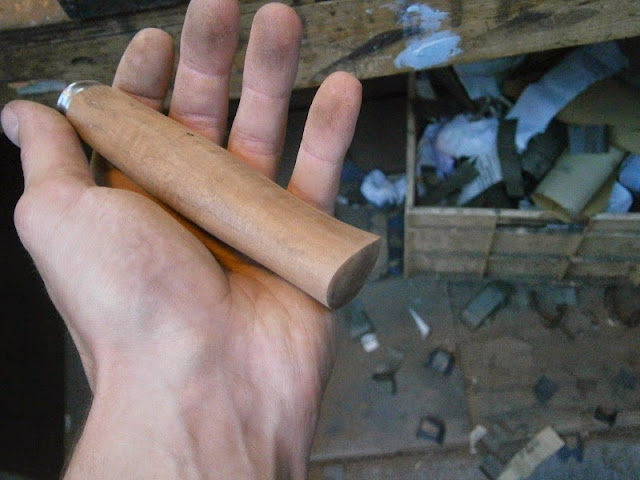
This was a most useful tool for finishing the curved parts of the handle. Just a section of pipe with some thin rubber glued to it.
Now I move to 320 grit.
Then 600 grit.
- Joined
- Apr 25, 2009
- Messages
- 329
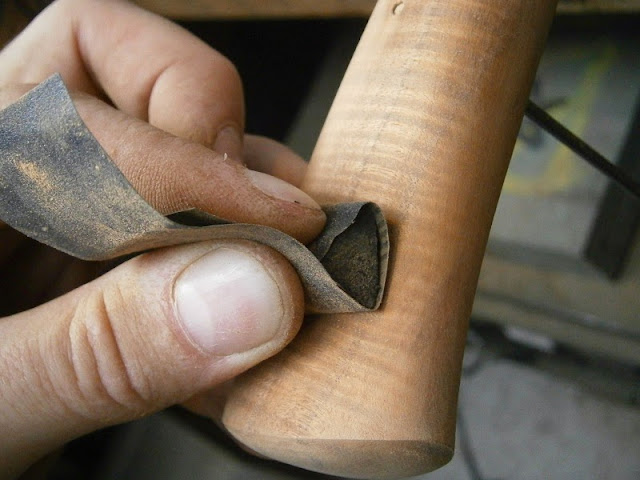
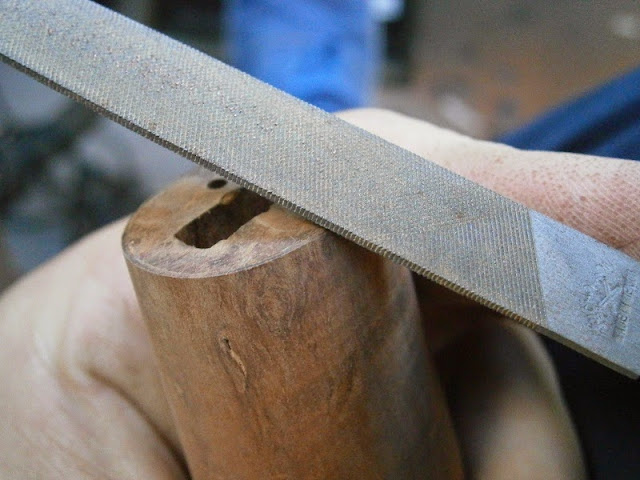
I can't explain this next step, but the pictures make it obvious. I think the Idea is that if the handle material shrinks or expands for whatever reason, it will be less noticeable than if the handle was flush with the fittings. I just think it looks nice.
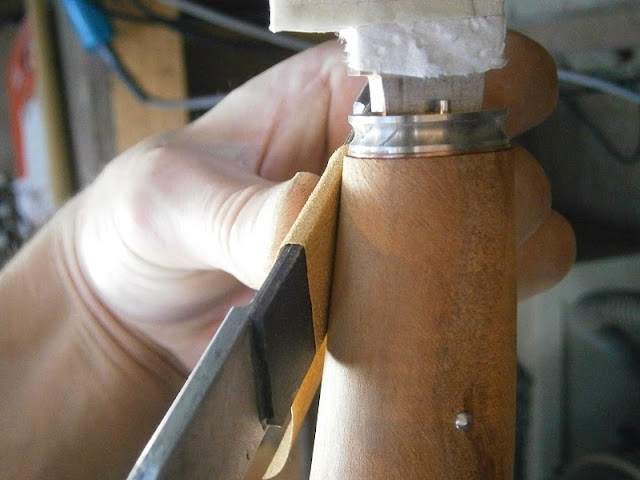
To begin with, I scribe a line around the spacer.

Then I roll the edge over to that line with a sharp file.
Finishing the bevel with some 1200 grit paper (I think)
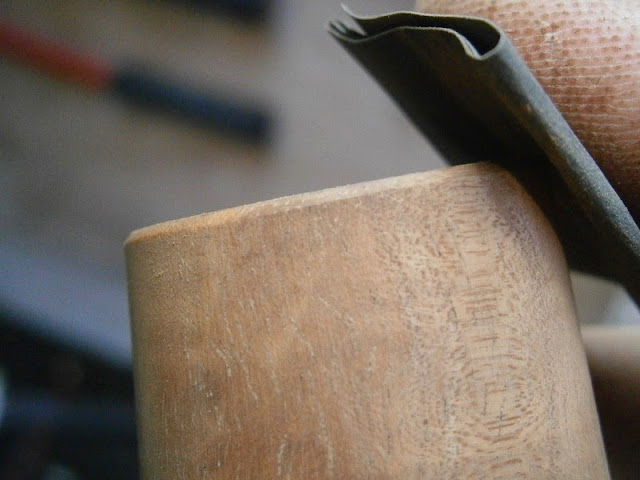
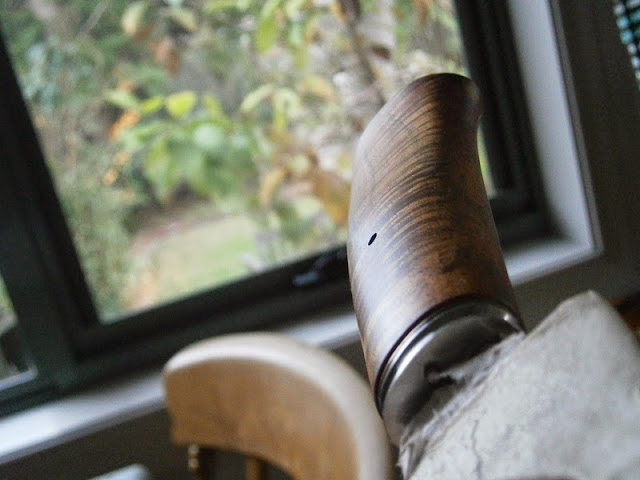
Here the handle has been finished to 1200 grit, ready to be oiled.
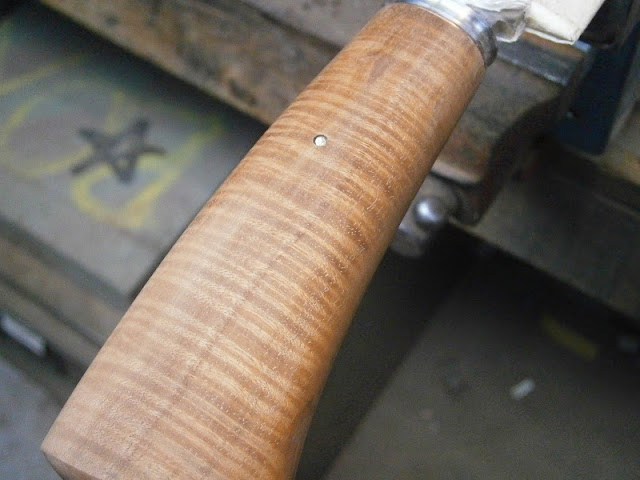
Pop.
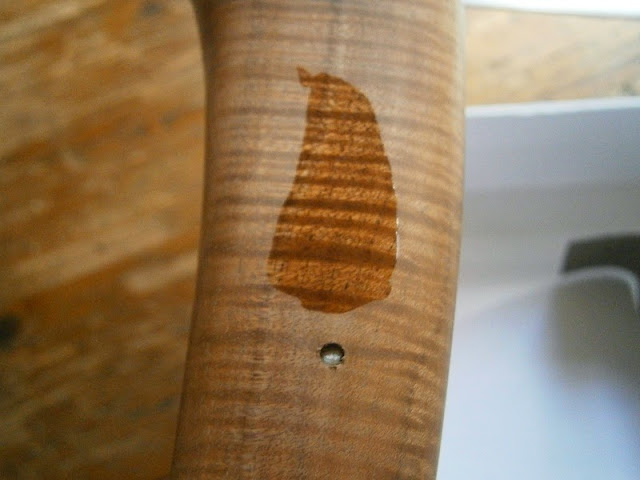
I applied the linseed oil with 1200 grit sandpaper. Here it is after I wiped it down.

Now, during the next few days, it became apparent that I hadn't in fact removed all the course grit scratches. The scratches were very difficult to find in amongst the pattern in the wood, but sure enough they were there.
Anyway, I managed to drag myself back into the workshop and started re-sanding at 600 grit. Oily wood clogs up 600 grit sandpaper very quickly.
The scratches seemed almost like bruises, they didn't seem to have depth. Anyone experienced this?
To begin with, I scribe a line around the spacer.
Then I roll the edge over to that line with a sharp file.
Finishing the bevel with some 1200 grit paper (I think)
Here the handle has been finished to 1200 grit, ready to be oiled.
Pop.
I applied the linseed oil with 1200 grit sandpaper. Here it is after I wiped it down.
Now, during the next few days, it became apparent that I hadn't in fact removed all the course grit scratches. The scratches were very difficult to find in amongst the pattern in the wood, but sure enough they were there.
Anyway, I managed to drag myself back into the workshop and started re-sanding at 600 grit. Oily wood clogs up 600 grit sandpaper very quickly.
The scratches seemed almost like bruises, they didn't seem to have depth. Anyone experienced this?
- Joined
- Apr 25, 2009
- Messages
- 329
Finally I can think about putting the final finish on the fittings and blade.
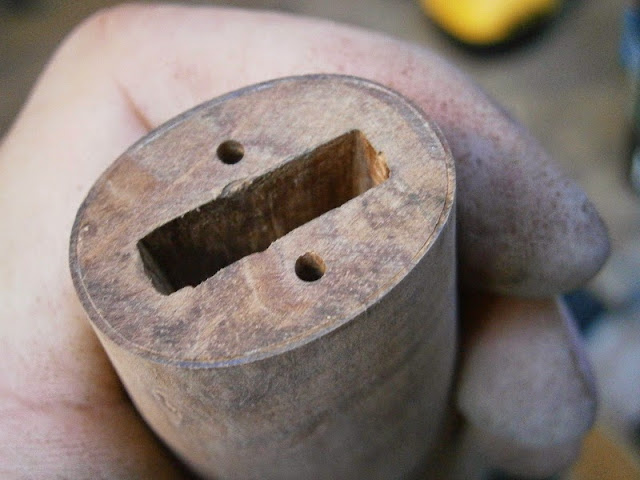
Starting with the fittings.
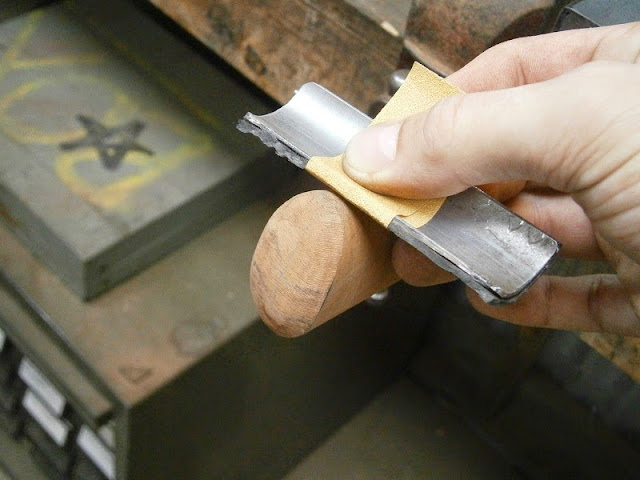
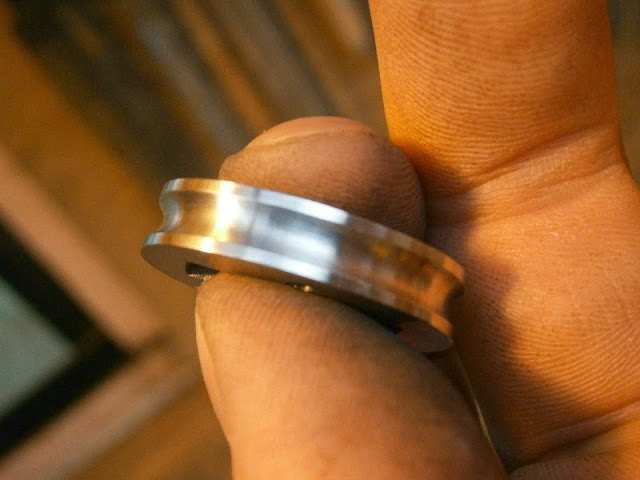
This is how I held the spacer during the final cleanup.

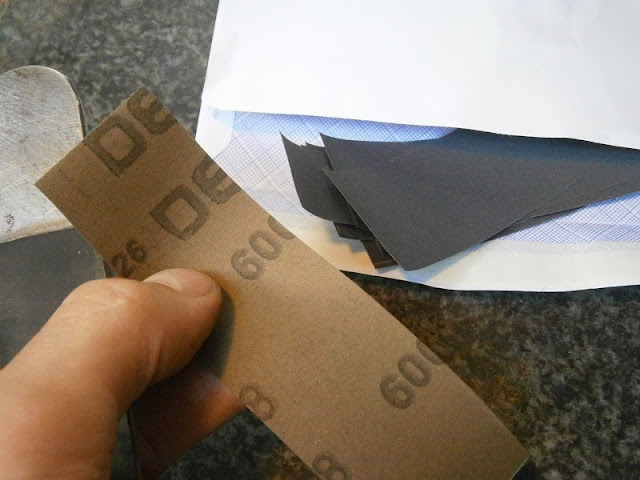
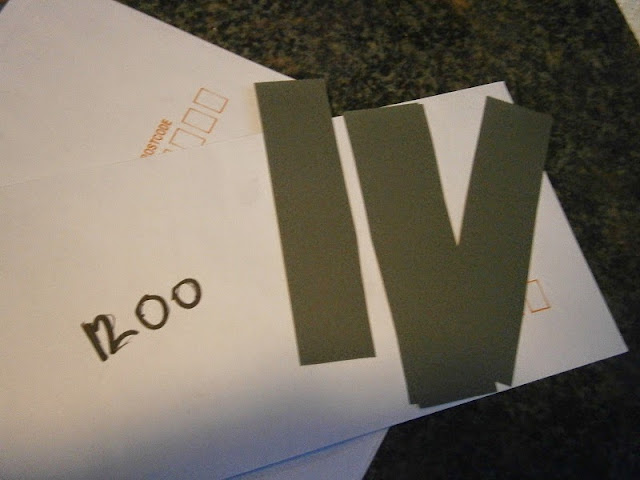
I put the sandpaper in envelopes to prevent contamination.

Here are the tools I used.
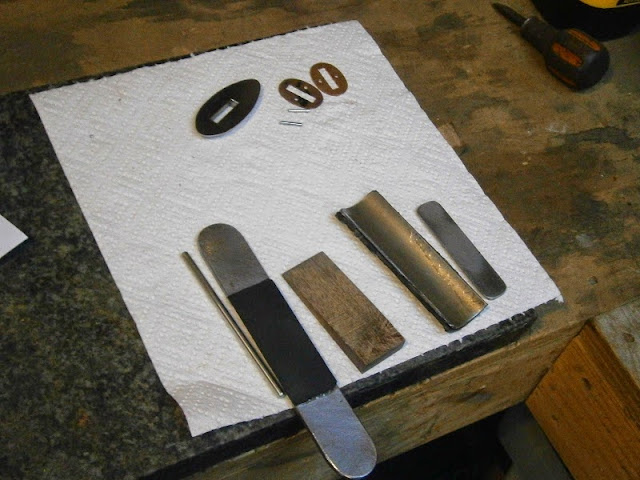
I had previously taken the fittings to 600 grit, so I give them another very quick sand with 600 and then it's straight to 800 grit.

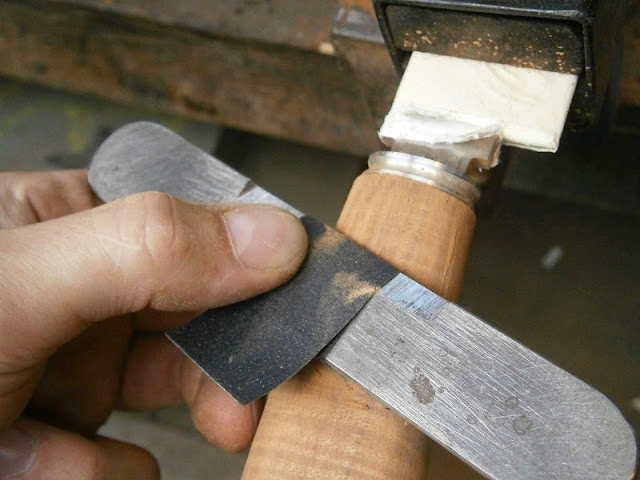
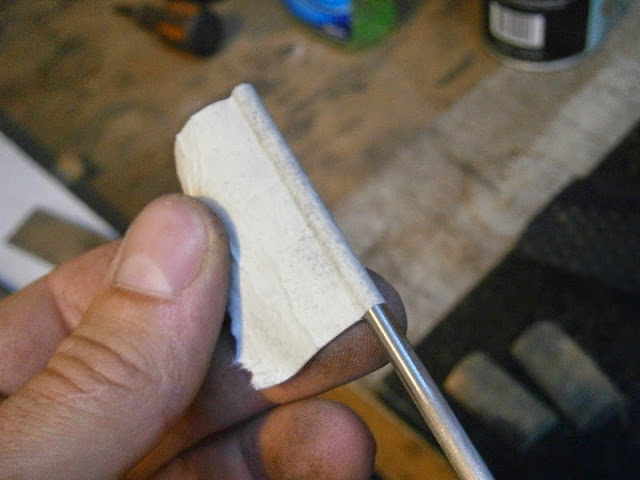
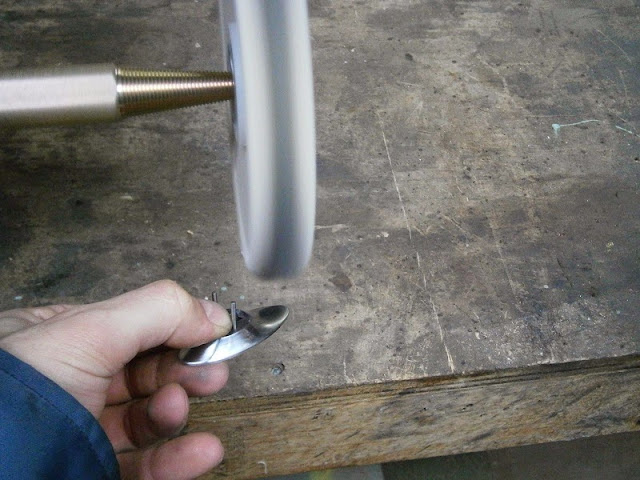
Masking tape on the pinstock helps to cushion the sandpaper which helps to create a nicer finish. The tape tab handing off also provides a handy place to pinch the sandpaper against. I use this to sand the groove.
Spacer at 800grit.
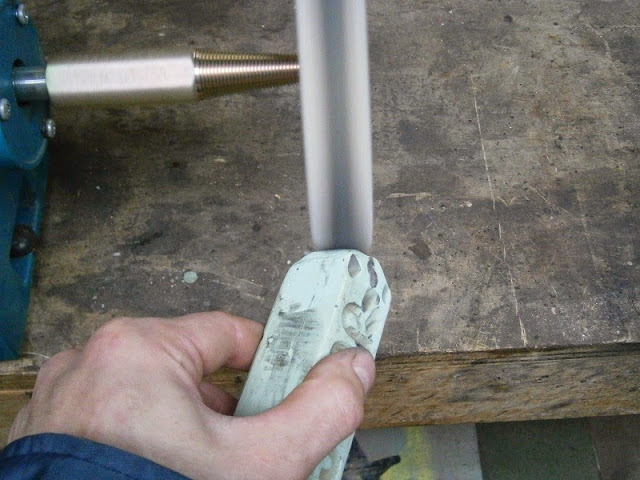
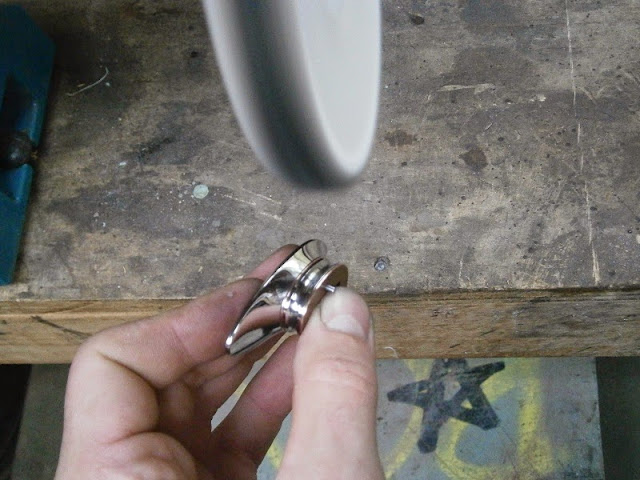
I used this pipe thing for much of the guard finishing. This 304 is a pleasure to finish, the previous grit scratches just vanish.

Guard at 800grit.

Guard at 1200grit. The scratches are orientated randomly at this point, as the fittings will be buffed next.

Starting with the fittings.
This is how I held the spacer during the final cleanup.
I put the sandpaper in envelopes to prevent contamination.
Here are the tools I used.
I had previously taken the fittings to 600 grit, so I give them another very quick sand with 600 and then it's straight to 800 grit.
Masking tape on the pinstock helps to cushion the sandpaper which helps to create a nicer finish. The tape tab handing off also provides a handy place to pinch the sandpaper against. I use this to sand the groove.
Spacer at 800grit.
I used this pipe thing for much of the guard finishing. This 304 is a pleasure to finish, the previous grit scratches just vanish.
Guard at 800grit.
Guard at 1200grit. The scratches are orientated randomly at this point, as the fittings will be buffed next.
")
Willie71
Warren J. Krywko
- Joined
- Feb 23, 2013
- Messages
- 12,214
Regarding the scratches: I have found that over 320 grit with wood finishing, steel wool works much better, unless wet sanding. The finer sandpaper shreds or tears the wood, rather than cutting it. Imagine sanding a carpet. The fibers just flop over when sanding rather than cutting. Steel wool shaves the fibers off. I learned this from a master woodworker about 30 years ago. Some woods sand better than others, but as a general rule, once over 320, go to the wool. As an aside, I prefer danish oil over the linseed oil. Just personal preference.
")
- Joined
- Apr 25, 2009
- Messages
- 329
Regarding the scratches: I have found that over 320 grit with wood finishing, steel wool works much better, unless wet sanding. The finer sandpaper shreds or tears the wood, rather than cutting it. Imagine sanding a carpet. The fibers just flop over when sanding rather than cutting. Steel wool shaves the fibers off. I learned this from a master woodworker about 30 years ago. Some woods sand better than others, but as a general rule, once over 320, go to the wool. As an aside, I prefer danish oil over the linseed oil. Just personal preference.
Thanks, Willie.
I've only ever used steel wool (grade 0000) to 'sand' between coats of oil, it never occurred to me to use it earlier in the process.
I'm going to be trying some danish oil for my next handle, I've grown to really dislike linseed oil during this build.
- Joined
- Apr 25, 2009
- Messages
- 329
Now I buff the fittings.
Here is the 1200 grit finish. Pretty ugly.

I used a loose flap calico wheel, loaded with green compound.
It doesn't take long, but I think if I had any crisp lines that I didn't want washed out, it would be better to sand to 2000 grit before buffing.
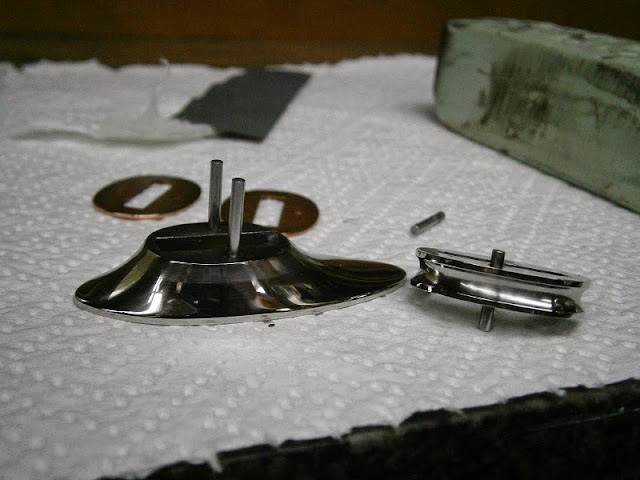
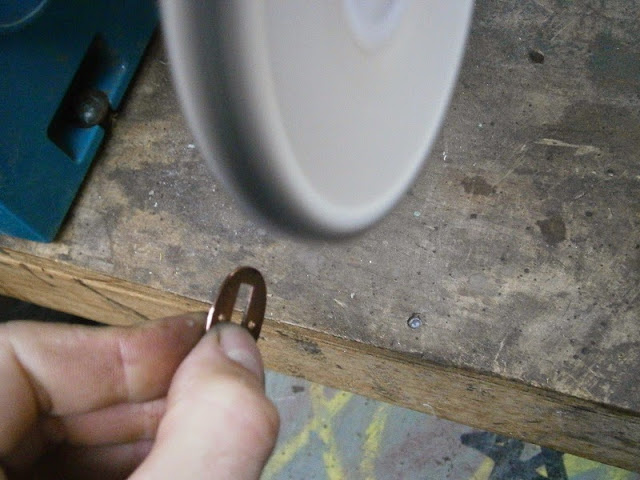
Then I buff the edges of the copper spacers. These are slightly proud of the guard and spacer, so I want the edges nicely rounded.
Next I put it all together and buff it as one. Why? I don't know, it just felt right.
Not too bad. It's not a flawless mirror polish, but I don't really want one.

Here is the 1200 grit finish. Pretty ugly.
I used a loose flap calico wheel, loaded with green compound.
It doesn't take long, but I think if I had any crisp lines that I didn't want washed out, it would be better to sand to 2000 grit before buffing.
Then I buff the edges of the copper spacers. These are slightly proud of the guard and spacer, so I want the edges nicely rounded.
Next I put it all together and buff it as one. Why? I don't know, it just felt right.
Not too bad. It's not a flawless mirror polish, but I don't really want one.
Willie71
Warren J. Krywko
- Joined
- Feb 23, 2013
- Messages
- 12,214
Thanks, Willie.
I've only ever used steel wool (grade 0000) to 'sand' between coats of oil, it never occurred to me to use it earlier in the process.
I'm going to be trying some danish oil for my next handle, I've grown to really dislike linseed oil during this build.
I personally like the Watco brand danish oil. PM me if you can't find it locally. I have a recipe to make my own danish oil when needed. A slightly damp rag moistening the wood will get the fibers to stand up as it dries, making shearing the fuzz off easier. You will be amazed at the look of end grain "sanded" with steel wool.
- Joined
- Dec 24, 2005
- Messages
- 883
Will, Bunnings will have several varieties of Danish and Tung oil. The one by Cabbotts has a hardener added to aid it setting in the wood once it has soaked in. Buy the gloss rather than the satin to make the grain really pop. You do have to use it within a year or so once opened as it will thicken in the tin.
There is another brand that I can't remember that comes in a Tin hip flask type bottle with a small screw lid, doesn't ever go off. Bottle will be marked as Tung oil. Looking forward to seeing this puppy finished.
There is another brand that I can't remember that comes in a Tin hip flask type bottle with a small screw lid, doesn't ever go off. Bottle will be marked as Tung oil. Looking forward to seeing this puppy finished.
- Joined
- Apr 25, 2009
- Messages
- 329
Thanks for all the suggestions, guys.
Willie: I like the idea of moistening the wood to get the fibres to fuzz up, I'll be trying that.
Peter: The Cabot's product sounds cool, seems like it dries pretty fast, which I like. Is the other company you're thinking of Organoil perchance? I had planned on buying some Organoil Danish oil at Keith F's recommendation, I think I've seen it at Carbatec.
- Status
- Not open for further replies.