- Joined
- Nov 14, 2017
- Messages
- 762
I have the exact same hatchet head in my project pile. Nice.
Does it have eye ridges in it also?
I did a quick file test and the steel seems to be exquisite
The BladeForums.com 2024 Traditional Knife is available! Price is $250 ea (shipped within CONUS).
Order here: https://www.bladeforums.com/help/2024-traditional/
I have the exact same hatchet head in my project pile. Nice.
 IMG_20180218_151140 by Justin Lyttle, on Flickr
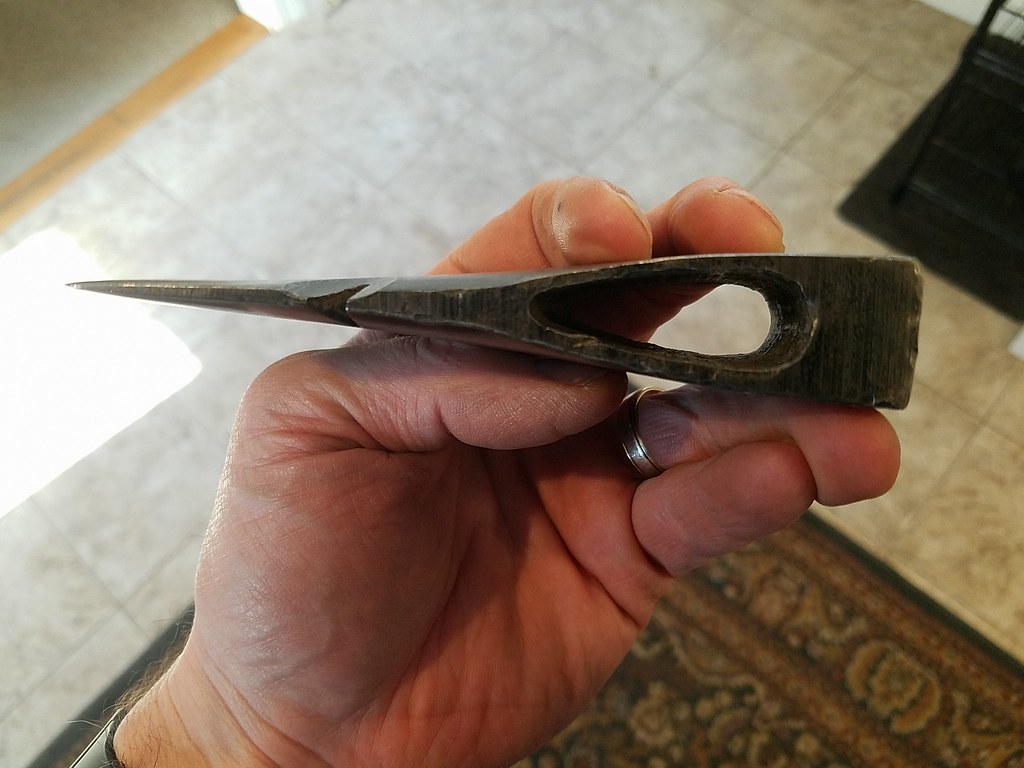 IMG_20180218_151155 by Justin Lyttle, on Flickr
...I think my best option is to make a straight line directly below the mushroomed section above the eye from the pole to the bit and take off 1/4” or as least amount possible while still getting rid of the mushrooming. Then clean it up with a file. Does anyone have any other suggestion?
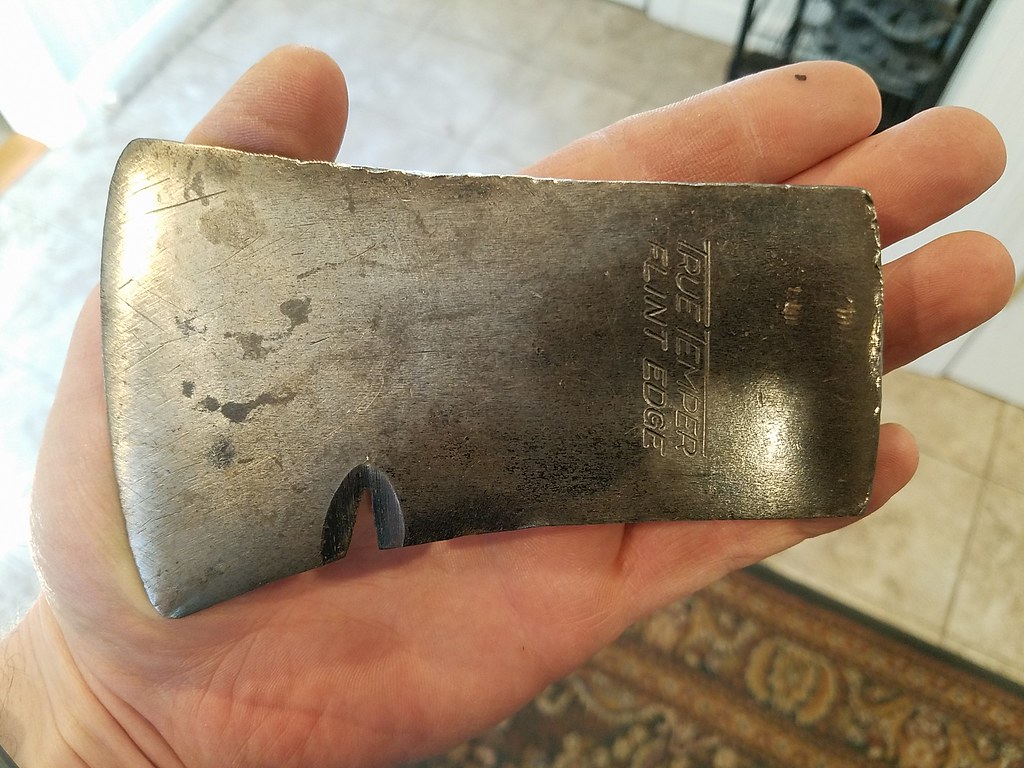
They sure beat the hell out of that one. As bad as it is I would be tempted to mark out the eye and then go at it with a jig saw, hack saw holder or sawzall (preferable) and then follow up with a file. I think you are going to find it to be pretty soft.Went to the flea market in town this morning. Usually I don’t have too much luck out there but today I did decent. Met a few people that should be bringing axes next weekend supposedly so we will see. But the first is something that has been on the list for a while. A True Temper Flint Edge hand axe! Don’t see these in my area.
The next is what I believe is a Kelly Perfect from Charleston West Virginia. I was heart broken after seeming the stamp.
Someone obviously saw the head was loose and thought they could just bang the crap out of it. Should I just put it on a shelf? The only way I can see to fix it is take an angle grinder to it. I was so disappointed because I think it was a Dayton pattern. But it also could have been a very deformed Michigan. Please tell me what you think I should do. Thanks!!
Edit: I just cleaned up both these heads on the wire wheel. The Kelly Perfect actually has almost no pitting and looks pretty good. I’m not sure how the eye kept it’s shape but it did. Since the impact was coming from the top I guess it didn’t affect it. But I think my best option is to make a straight line directly below the mushroomed section above the eye from the pole to the bit and take off 1/4” or as least amount possible while still getting rid of the mushrooming. Then clean it up with a file. Does anyone have any other suggestion? Thanks.
The little Flint Edge cleaned up super nice. I will just file off the mushrooming on the pole and it will be ready. I was surprised to see eye ridges in that little guy. There are four of them and they seem huge compared to the eye but I love it!! Thanks for looking and please give suggestions.
I agree with this. It's routine to have to clean up axe eyes. Dremel doesn't give these away (they're pricey) but they do offer carbide cutters (square ended and round ended) that are pretty good at removing metal without wearing out every 2-3 minutes such as stones do. I use them for all kinds of stuff including removing the ridges on worn brake drumsdremels do good with that sort of stuff brian
Does it have eye ridges in it also?
I did a quick file test and the steel seems to be exquisite
No eye ridges.


Please give me some guidance because I would love to make this a functioning user that still looks correct
I'd use a flap disk and then once you get the desired profile, use long, sweeping passes with the front section of the disk perpendicular to the side of the axe, having the scratches run long ways down the head makes it a little easier to sand or if you're using an old flapper disk, you'll pretty much be fine.Please give me some guidance because I would love to make this a functioning user that still looks correct
Much as I can understand the logic behind eye ribs I would be sorely tempted to grind them off. You're going to have to rely much more on precise caliper-derived dimensions (unlike gradual hand shaping and fitting) and then you'll have to expertly score deep enough (and precise) grooves in the wood so as to get the handle started. Hickory unfortunately is not forgiving enough to willingly compress. I have never tangled with a ridged eye tool, (nor a Marbles 'nutty eye') and am looking forward to hearing about your experience with this.


