-
The BladeForums.com 2024 Traditional Knife is available! Price is $250 ea (shipped within CONUS).
Order here: https://www.bladeforums.com/help/2024-traditional/
You are using an out of date browser. It may not display this or other websites correctly.
You should upgrade or use an alternative browser.
You should upgrade or use an alternative browser.
Kerry Hampton Knives
- Thread starter VCM3
- Start date
Leslie Tomville
Gold Member
- Joined
- Dec 19, 2016
- Messages
- 2,325
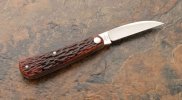
Beautiful jigging Kerry! That is going to be a special knife. It is great to see the extra attention to detail. The dye color looks like it will be incredible when the knife is finished.
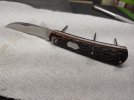
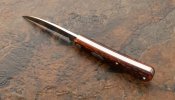
And, ladies and gentlemen, we have the beginnings of a new Barlow! Fresh out of heat treat.
View attachment 2122900
And, ladies and gentlemen, we have the beginnings of a new Barlow! Fresh out of heat treat.
View attachment 2122900
KnifeHead
Knifemaker / Craftsman / Service Provider
- Joined
- Apr 5, 2006
- Messages
- 5,573
That's probably because WilfredWorks is the tree with which the nuts don't fall far from.Kerry, that bone reminds me a lot of the bone on this R. Bose sowbelly I used to own...
View attachment 2122954
KnifeHead
Knifemaker / Craftsman / Service Provider
- Joined
- Apr 5, 2006
- Messages
- 5,573
- Joined
- Apr 10, 2018
- Messages
- 340
Absolutely gorgeous, great work, Kerry!
Leslie Tomville
Gold Member
- Joined
- Dec 19, 2016
- Messages
- 2,325
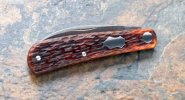
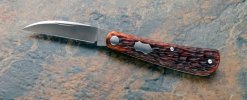
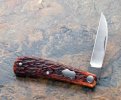
That is a great looking Swayback!! It is perfect!! Excellent jigging and color! Beautiful workmanship!
I shared these photos with Kerry and thought I would put them here if that is okay. When Tony was building my Saddlehorn, he showed me how he prevents the jigging being worn off in the finishing process. He would shape up the handle first and then jig the bone. True attention to detail by both Tony and Kerry. I am so happy that you are cranking things up Kerry. It brings back a lot of excitement to Blade Forums which has been missing for a while.
View attachment 2123962View attachment 2123963View attachment 2123964
KnifeHead
Knifemaker / Craftsman / Service Provider
- Joined
- Apr 5, 2006
- Messages
- 5,573
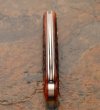
It's a thing, for sure. The jiggin must flow. Thanks for noticing. Full disclosure: I don't really know exactly how the bone is going to look until the finishing process because I'm not that good at it. So, after sanding I will always go back in fill in where the jigging gets a bit thin. This is mainly on the edges because you can't get very close to the shields , pivot, pins, and other hardware. The jigging HAS to be good there because once the knife is together, yer done. It's more work than it looks like on the surface, even though, it's on the surface.Ooh...me likey. Nice job contouring the covers. Nicely radiused, without removing the bone's jigging.
KnifeHead
Knifemaker / Craftsman / Service Provider
- Joined
- Apr 5, 2006
- Messages
- 5,573
I know you mean it, thanks.Absolutely gorgeous, great work, Kerry!
KnifeHead
Knifemaker / Craftsman / Service Provider
- Joined
- Apr 5, 2006
- Messages
- 5,573
It's a labor of love and I love that it's done.That's a beauty, Kerry.
kamagong
Gold Member
- Joined
- Jan 13, 2001
- Messages
- 10,966
It's a labor of love and I love that it's done.
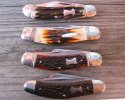
 Now that you're warmed up, it's time to tackle a proper lambsfoot knife. With clean and square joints please. Something along the lines of the knife on the left.
Old knives ROCK! They were made to be used not to win any dang contests! The flush joints on the knives in the 3rd image are SCARY FLUSH! This is the kind of thing that truely inspires a great knifemaker.
- Joined
- Apr 3, 2009
- Messages
- 3,283
Really great work on the swayback Kerry. Bone looks fantastic! I gotta figure out a good dye process for sure. Think I'm gonna give Ken Coats old recipie a try soon.It's a thing, for sure. The jiggin must flow. Thanks for noticing. Full disclosure: I don't really know exactly how the bone is going to look until the finishing process because I'm not that good at it. So, after sanding I will always go back in fill in where the jigging gets a bit thin. This is mainly on the edges because you can't get very close to the shields , pivot, pins, and other hardware. The jigging HAS to be good there because once the knife is together, yer done. It's more work than it looks like on the surface, even though, it's on the surface.
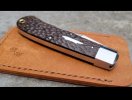
I'm certainly no expert and I have only tried this with bone once, unfortunately my dye process didn't work on that one and I moved on. That said when I've jigged micarta I put masking tape on the liner and the back of the micarta. With just a dot or 2 of super glue I adhere it to the liner and then contour it. Once contoured you can pop it off with a razor blade pretty easy and then jig it up. Here's my first attempt with the technique.
KnifeHead
Knifemaker / Craftsman / Service Provider
- Joined
- Apr 5, 2006
- Messages
- 5,573
Whoa! That thread! Those old knives had one HUGE advantage that a custom knife maker doesn't have. They didn't have to worry about the occasional booger or miss alignment or scratches here or there. When you don't have those things to worry about you can take lots of risks. But, since I have the whining phase of this post out of the way, I am tending to agree with you. I should do something sKerry.Now that you're warmed up, it's time to tackle a proper lambsfoot knife. With clean and square joints please. Something along the lines of the knife on the left.

KnifeHead
Knifemaker / Craftsman / Service Provider
- Joined
- Apr 5, 2006
- Messages
- 5,573
Thanks. That's pretty much what I do and have been happy with the outcome.Really great work on the swayback Kerry. Bone looks fantastic! I gotta figure out a good dye process for sure. Think I'm gonna give Ken Coats old recipie a try soon.
Looks like that works well. The process I use is super simple, like most of the things Tony showed me, but I get in a rush and cut corners knowing I can nail it later. I'm lazy, OK!I'm certainly no expert and I have only tried this with bone once, unfortunately my dye process didn't work on that one and I moved on. That said when I've jigged micarta I put masking tape on the liner and the back of the micarta. With just a dot or 2 of super glue I adhere it to the liner and then contour it. Once contoured you can pop it off with a razor blade pretty easy and then jig it up. Here's my first attempt with the technique.
- Joined
- Mar 2, 2014
- Messages
- 808
Lol….caught my typo. But not before you did lolUh-oh. Someone's being moved down the list.
- Joined
- Apr 3, 2009
- Messages
- 3,283
Right after I did mine Brent C. brought up Ken. I remembered last year Ken was telling me his method at the Badger show. I should have followed it to begin with but hey, I'm relatively young and I didn't listen. Thought I could do it a different way. End result....fail! Better listen to my elders!. Sure wish I had the opportunity to bend Tony's ear for a minute. He passed right after I started making. I've learned a lot just from what's online but his personal guidance would have meant the world to me. We'll keep him going in spirit though. Only promise I'll make as a knife maker.Thanks. That's pretty much what I do and have been happy with the outcome.
Looks like that works well. The process I use is super simple, like most of the things Tony showed me, but I get in a rush and cut corners knowing I can nail it later. I'm lazy, OK!

