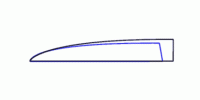
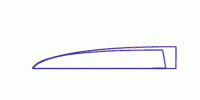
Let's Design Some Knives...

Phill it is very generous of you to help us.
I have tried your first lesson looking forward to the next. I have Adobe 5 it is slightly different but I can still figure it out from your lesson.
Thanks

I use a flat bed scaner to scan images and actual knives. your lesons will get me much more use of trhe rest of the program.
 
Ya know Phil, that shape doesn't look all that Elegant.

Ahhhh, this is true Grasshopper, but I did tell you is was just step one, and I do hope you tried it.

Now we’re going to learn two more tools, the BLACK and WHITE Arrows, in the Toolbox just above the Pen Tool. We’re going to change the shape, but first let’s give ourselves some room and move the whole shape to the right with the BLACK Arrow. Then we’ll make the shape more elegant with the WHITE Arrow...Let’s see Backboogers do this with his French Curve. ;)
 

Attachments

  • annimation#1.gif
    annimation#1.gif
    18.3 KB · Views: 407
What we have now with this wharncliff shape is a PATH it’s just floating above a Layer. We need to put this first shape in a Layer.

If you have a shape you like, click on the canvas with your Cursor and the Anchor Points will vanish.

In your Paths Palette, if your “Wharncliff” path isn’t selected, click on it to select it.

Now, Click and Drag it down to the icon Next to your Trashcan. If you missed and put it in the trashcan, go back to Lesson #1

We now have a copy of the blade shape. Control + S to Save.

I want to make sure you’re not working on the Background Layer. Let’s click on the Layers Palette Tab > Click on the icon next to the Trashcan “Create New Layer”. Make sure the New Layer is selected, if not just click on it. Control + S.

Click on the original again, down in the Path Palette’s Icons Click on the THIRD from LEFT “Make Selection”.

Geeeez Phil, my Blade Shape looks like Marching Ants!

Yeah I know, when you get bored watching them.
Go up to the EDIT menu > STROKE (2 Pixels, BLACK, CENTER, NORMAL, 100%) OK.

Control + D, to De-select
Control + S to Save.

Now you have your Blade Shape, outlined in Black and Saved on it’s own Layer.

PhotoShop is all about Layers

Go back to the PATHS Palette, Double Click on the “Copy” name it GRIND. OK

Layers Palette, click on the New Layer icon again, and select it.

What you should have now on your canvas is, the Black outline of your Blade Shape and a Work Path hovering above it.

From the Toolbox get the WHITE Arrow, Click on the Upper Right corner of the Work Path, Drag that handle down and in. This is going to be the top of your Grind.

Now Click on the Lower Right corner and Drag that straight to the Left, to complete your Plunge Cut. Click anywhere on your canvas to remove the handles.

Who wants to see the Ants again?

Paths Palette. do you remember which icon to Press for the Ants?

Icon? What’s an Icon?

Thoes Circles down on the bottom of the PATHS Palette...Click on the Third one from the LEFT.

Uhhhh...Is that your Left or My Left?

We better finish this up fast, I can see your head is about to explode.

EDIT menu > Stroke...2 Pixels...BLUE ....OK.

Control + D
Control + S

You should have in your Layers Palette, 3 Layers; Background, Black outlined Blade Shape and your Blue outlined Grind Shape.

BTW you can Name and Color Code these Layers. Double Click on them and a New Dialog Box will open. Control + S.

Your pic should look something like this.
 

Attachments

  • lesson#3.gif
    lesson#3.gif
    1.4 KB · Views: 409
Ya know Phil, I like the Proportions, but that Sucker is 4 1/2 inches...Can we make it smaller?

It’s like you were reading my mind.

In the LAYERS Palette. Click on the EYE Icon next to the Background Layer (To Make it INVISIBLE...there should be NO Eye by the Background Layer).

Make sure one of your other Layers is Selected, just click on it.
In the Upper Right Corner of the Layers Palette, Click on the little ARROW
Select “MERGE VISIBLE”...DO NOT FLATTEN IMAGE Control + S.

You can turn the Background Layer on again by clicking where the EYE Icon was.

On your Keyboard, Control + T will give you a Box with Corners around it.

DON’T DO THIS YET!...JUST LISTEN

If you Clcik and Drag on one of the corners you’ll FREELY CHANGE THE SHAPE

But, if you HOLD the SHIFT KEY Down while you DRAG. you’ll KEEP the Same PROPORTIONS!

Watch...Then you can do it...only your box won’t be RED.
 

Attachments

  • control-_t.gif
    control-_t.gif
    14.2 KB · Views: 388
Let’s Review, what have we learned?

HOW TO:
Make a Shape with the PEN TOOL.
Make a Curve with the CONVERT TOOL.
Move a Shape with the BLACK Arrow.
Change a Shape with the WHITE Arrow.
Change a Selection with CONTROL + T.
Select a PATH.

”Was that the Marching Ants?”

I knew you’d like those Ants.

Copy a PATH.
Save a PATH.
Stroke a PATH.
Make a New LAYER....Name & Color Code it.
Turn a Layer On & Off.
Merge LAYERS.
Save a Document....CONTROL + S. (Have you noticed yet I want you to SAVE OFTEN?)

That’s a lot!

”Yeah Phil, but all I have to show for it is some Black & Blue Lines...Not exactly what you promised...Is it?”

Patience Grasshopper, we’ll get there.

What I need is some FEEDBACK to know;
Who is doing these lessons?
Are they easy to follow?
Are you learning anything?
Do you see the Potential of these Tools?
Are there any questions?

If you have the BASICS down, I’m going to raise the level a bit and get down to some real work, but I want to know if we’re all on the same page?
 
Tim, Control + T should give do it, if not from the EDIT Menu select FREE TRANSFORM.

What does the Shortcut Keystrokes next to the command in the Edit Menu say?
 
Phil I get the same thing, Free Transform Path is greyed out. The Wharncliffe layer that was merged with the Grind layer is selected.

Dave
 
Dave & Tim, you may have Merged with the Locked Background Layer, that wouldn't let you do the Free Transform. If your file is still open, go back in your History Palette, to just before the MERGE. Click of the EYE Icon on the background Layer (To Make it INVISIBLE), make sure one of the other layers is selected and both are visible, then Merge VISIBLE....DO NOT FLATTEN IMAGE.

It's funny, I was just working on a pic and I tried to do a Control + T on a layer, and nothing happened. Free Transform was greyed out in the Edit menu, hmmmm. So I opened a new layer, and put a blue square with the Marque tool. Then I hit Control + T and it worked again. Not just for that layer, but for the other layer I was working on as well. Very strange. :confused:
 
Sorry Phil, no dice. The background layer isn't merged, it's turned off. I tried adding a layer, putting a square on it and was able to Free Transform the square - but not the blade layer.

Dave
 
Hiya Dave:

This is very strange, there is nothing special about the layers we made for the tutorial, and after all a layer is a layer is a layer. I was going to suggest closing the file and then reopen to see i f Free Transform worked, but my guess is that you already did that. Since we know another layer in the same file will accept the command, I wonder if making a copy of the layer with the blade shape and pasting it in would work?

The keystrokes for that would be:
Control + A
Control + C
Control + D
Control + V

If you then try Control + T and it works then there's just some glitch on that original layer and we could Trash itr. Or we could just leave this a mystery and move on to the next lesson. We won't be using this file any more. If everyone has the Basics down my plan was to move on to something more complex.

I'm just waiting to hear more feedback and to see who is actually doing the lessons.

Did you find any other problems besides the Control + T part?
 
PhilL, but if i did that, they people would think I can make a knife that looks that good! :p

Oh, By the way, I AM USING STAG ON A HANDLE :D Forumite got a folder with some nice stag, and i am using the stage handles from the folder on a small sheepsfoot fixedblade. :) I'll be sure to show u pics when its done :D
 
Originally posted by Taz
PhilL, but if i did that, they people would think I can make a knife that looks that good! :p

Taz, I can see your problem,
 
:p :D

LOL. Did your eyes hurt after seeing the problem? :barf:

Ask rich for pics of some of my newer stuff if you really are a glutton for punishment :D
 
Let’s say a customer wants a Bowie; 5 1/2 inche Blade Length, 1 1/2 inches wide, Hollow Grind, with a deep Clip and a Swedge. Now you can grab a piece of steel and head to the bandsaw, but after this you may just want to fire up PS.

Open up a new canvas, Control + N. Name: BOWIE, Make it 7” Wide by 3” Height, 72 pixels/inch, RGB Color, White Background...OK.

Click and Drag on the corner of you New File Window and bring it up against your Palettes on the left of your screen.

BTW, these are the Palettes I like to see when I’m working.
From Top to Bottom; NAVIGATOR, SWATCHES, HISTORY, LAYERS/PATHS.


Let’s go to the Navigator Palette. With the Slider under the thumbnail, move it to the right and fill your window with the Canvas.

Next drop down to the Layers Palette and make a New Layer (Create New Layer icon)

If your Rulers aren’t showing Press Control + R.

To make our layout easier, from the View Menu > Show > GRID.

On your keyboard Press P to bring up your Pen Tool...you should have the one with the little x next to it.

Move your Cursor on the canvas to 1” Across and 1 3/4” Down and Click to leave the first point (The Point of your Bowie).
Next click at 3 1/2 Across and 1” Down (The back point of the Clip).
Click again ae 6 1/2” Across and 1” Down (The Upper corner of your blade).
Still at 6 1/2 Across move down and Click at 1 1/2” Down.
Move to your left at 1 1/2” Down and Click at 3 1/2Across and 1 1/2” Down. (For the BELLY of the Blade).
One more Click on the Point again to finish the Work Path.

Your shape should look like this.

11612601.jpg


Phil, now we know why you play with Photoshop and don’t make knives.

It’s just a Basic Shape, we’re going to move everything.

Let’s start by making the Belly of the Bowie.
With the CONVERT Tool from the Pens Toolbox. Click and Drag to the LEFT from the point we set for the BELLY of the blade).

Now Click and Drag from the POINT of the Blade straight to the RIGHT.
The HANDLE that starts coming out in front of the blade...Click and Drag it Back to the Point

Your Bowie should look something like this.

11612615.jpg


Now we can start moving things with the WHITE Arrow.

I moved the Point of the Blade up a bit, the Clip back a bit and the Bottom Corner up a bit and came up with a shape like this:

11612626.jpg


If you make something you like, but want to keep on designing...Just go to your Paths Palette...Click and Drag the Path to the CREATE NEW PATH icon Next To the Trash Can. Your Original Path is Saved and you can continue to work with your New Path.

If you want to show your Customer a Line Drawing of your designs:
In the LAYERS Palette Make sure a New Layer is activated...Not the Background Layer
In the PATHS Palette make sure the right Path is Selected...Click on LOAD PATH AS SELECTION Icon (third circle from left).
Edit menu > STROKE.

You could save this Line Drawing as a .GIF, 2 Colors and E-mail it to him...Or you could wait and show him something more impressive

Me, I would wait.

We will be using this file in the next lesson so let’s make sure we Save it....Control + S.
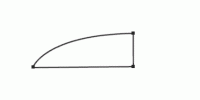
 
It should be pretty clear to you by now, that with the few tools I’ve showed you, you can design; any size, shape or curve. What I’m going to show you now is two more PEN Tools, that will allow you to build more complex designs.

Let’s say, you have a nice Bowie design, but you’re wondering how it would look with a Curved Choil. We can’t do that with what we have, we need to add some Anchor Points.

Open up the file of the Bowie.
Make a Copy of the Path.
Open a New Layer in the Layers Palette.
Click and Hold on the Pens in your Toolbox and select the one with the PLUS Sign +. ADD ANCHOR POINT TOOL..

You can use the Navigator Palette Slider to ZOOM IN on the Lower Corner of the blade.

Add one Point on the Back of the blade and another on the Edge where the Choil would start.

11612634.jpg


Now from the Pen tolls select the Pen with the MINUS sign (-) DELETE ANCHOR POINT TOOL

Clcik on the Corner.

11612676.jpg


With the CONVERT Pen Tool move those two handles up and into the blade shape and form your Choil. Control + S.

Here’s what mine looks like

11612678.jpg
 
We put a Grind on the Wharncliff Blade in LESSON #3.
Now it’s time to put a Grind on the Bowie
You can use the Path we just made with the Curved Choil or you could Make a Copy of the Path of the shape before the Choil Path.

Pick one of them and Drag it down to the Creat New Path Icon.

In Layers Palette Make a New Layer. Control + S.

Start with the WHITE Arrow...Click and Drag the Upper Right Corner down and in and Place the Top Corner of the Grind.

Again with the White Arrow, move the lower right corner in to mark the bottom of the Grind. .

You may want to also move the Point between the Point of the Blade and the Top Corner of the Grind to give it more of a curve...I did.

If you want to play with the curve of the top of the Grind switch back to the CONVERT ANCHOR POINT Tool.

My GRIND looks like this.

11612683.jpg


We’ve got one more Path to make...THE SWEDGE!!!

I don’t think you need me to repeat the steps again.
Make the Swedge...Here’s mine.

11612693.jpg


Don’t be affraid to ZOOM IN with the Navigator Palette to get a better view of what you’re doing

Next we make this Puppy come to Life.
 
Well Phil I've been experimenting, cannot under any circumstances use free transform on a stroked path. I can free transform the actual path, and I can free transform any shape, but not any lines drawn from a path. I've tried this under every combination of variables I can think of. FWIW I'm using PS 6 on an iMac in OS 9.2.

I guess we'll just move on to the next lesson knowing I have to get the shape I want without free transform. I sure do appreciate the investment of valuable time you're making on our behalf, and I will take advantage of every bit of it. Your pace is excellent and your sense of humor helps relieve the stress of working with a compute!. :)

Thank you very much.

Dave

PS Edit: HA! I type too slow, you slipped a bunch of lessons in on me! :D
 
Lesson #8

Okay let’s Review, you have about all of the tools you need to design just about any knife you want, but you don’t have anything to show for it. All you have are PATHS, I think you understand that Paths are great to work with, certainly more control for designs than you could do with any of the PAINT TOOLS, and we really haven’t done any DRAWING have we? Let’s give this puppy the breath of life.

Now, we could paint this to look like steel, but when I said No Drawing I meant No Painting either, but we still want our knife to look like it was made out of steel...The Answer is to use a GRADIENT!

In your Toolbox next to the Eraser is the PAINT BUCKET, Click and hold on it and select the GRADIENT TOOL. Here is one of my Helpful Hints, it’s the only other tool in there besides the Paint Bucket.

Up in the Options Bar, if you Click on the Little Arrow to show your Presets you’ll notice none of them look like Steel, (Grey & White). So let’s make one. Click on the Gradient Preview to the left of the Arrow to show your GRADIENT EDITOR

”Geeeeez Phil, are you out of your mind? I ain’t gonna tackle that!”

Easy Big Fella, I can walk you through this.

Take a deep breath, do you see the one that is Orange-Yellow-Orange?
Click on it, you’ll see it now in the long Gradient Preview Bar

Do you see the Little Orange House on the Bottom Left? Click on it.

Now do you see the Box Marked COLOR? Click on the Color Swatch, (Helpful Hint..it’s ORANGE). Now pick a MEDIUM GREY. Do the same thing for the little Orange House on the Right side...Same Medium Grey. Now the Little Yellow House in the middle, make this one LIGHT GREY.

Name it STEEL #1, Solid, 100%...and then just Press the NEW Button.

Look! There it is in your Gradient Palette Presets.
Now the truth, don’t you feel silly?

That was such fun, let’s do it again...Only this time I want...LIGHT GREY-MEDIUM GREY-LIGHT GREY

Uhhhh Phil, I do feel silly for not trusting you, and I feel even sillier asking this, but what’s a Medium Grey?

Ahhhhhh Grashopper, there are no silly questions. Medium Grey is one of those greys between Black and White. The fact is if you do a lot of work in PS you’ll want to make lots of Custom Gradients, I have only one more planned for these tutorials, but not now I don’t want to overwork you.

Now, we’re ready to Make Steel.
 
Back
Top