So, I finally did the Babbitt pour. My good friend Laif came over to help, hes one of the guys that helped me move this thing in the first place. Heres some pics and text of how the day went:
We marked center lines on the shaft ends.
I cut some thick leather and made little stands for the shaft, checked to make sure it was centered vertically with the top of the pedestal. We made sure it was centered horizontally, and with the shaft shimmed up on the leather, we ran a framing level up from the hammer slide face, then checked with a square against the shaft to make sure they were truly perpendicular. We got lucky, everything was easy to get centered and square.
We made cardboard templates, then cut some 1/8 steel shims for the pedestal bolting surfaces.
Ive read to use brass shim stock, in a bewildering array of thicknesses, all designed to facilitate the removal of minute amounts of thickness to tighten the bearing as it wears. After a conversation with Sid Suedmeier, (very helpful, nice guy) I felt it was okay to revert to my default blacksmith sensibility and just use steel for now. I can grind them thinner as needed, or make some thin shims later. I didnt feel like spending $200 on brass shim stock and three days cutting shims.
We cut out four plywood dams, using an adjustable bit and dremel to make the 2 holes tap-fit onto the shaft.
We blackened the shaft thoroughly with an acetylene flame. This is best done with the shaft off of the pedestals. By the end of the day, we figured its best to pre-heat the shaft now, too. The inner boards were installed prior to blackening.
With the shaft sooted, we put it up on the leather shims, and slid on the outer boards. After originally centering, we had clamped the shims onto the pedestals so theyd hold as a reference for replacing the shaft. This worked well.
We slid on the outer boards, then used bar clamps to snug the boards up tight to the pedestals, one on each side, four total. After clamping, we removed the shims.
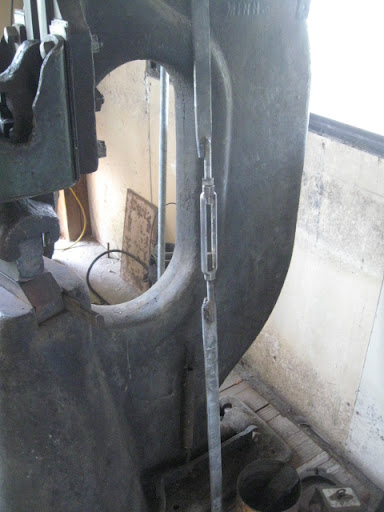
With the assembly clamped in, we caulked it all up with Babbittrite damming compound. We made a little dam along each side of the top of the bearing, to help pour in and keep in any over flow.
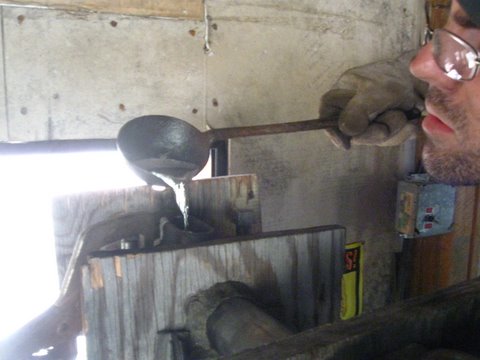
With the assembly ready to pour, we fired up the rosebud torch and threw the old Babbitt scraps in the melting pot. The torch quickly melted them; stirring with a wood stick helped.
We skimmed the schmutz off the top with a tablespoon, and when the stir stick toasted nicely in the babbitt, we poured the metal into a ladle, then poured the front bearing.
It didnt flow very well. The ladle needed to be pre-heated. Oops. Also, the shaft and pedestal needed more heat. We figured right away it would need to be re-poured.
Armed with our lesson from the first bearing, we melted more. This time, we took a plumbing torch and pre-heated the shaft and pedestals a lot more before the pour. Also, we blasted the ladle a bit with the rosebud right before transfer.
The second bearing went a lot better. Its all about thorough pre-heat.
We waited ten minutes, then took the shaft off. The first one we poured did need to be taken out, not too hard with some tapping and judicious cold chisel work. The back bearing was much better, and stayed.
We re-blackened and heated, re-assembled the shaft and dams up etc., and re-poured the front lower bearing. Laif ran the ladle this time, I got too close and a spatter of liquid babbitt hit me in the lips. It didnt do as much damage as one might think; today I just have a little burn blister there. Nevertheless, dont get your face close if possible, this stuff likes to spatter.
The re-pour went well.
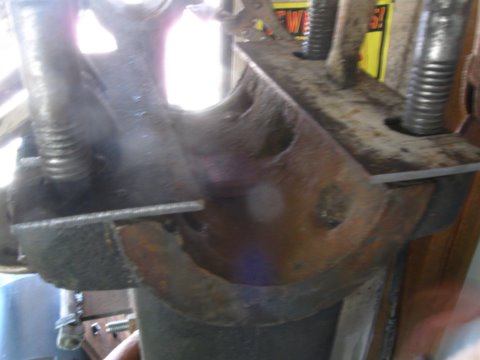
We had to cut a lot of extra metal off the back bearing tops. We tied a porta-band, but ultimately an angle grinder with 36 grit flap wheel did a good job of hogging it off. I finished by rasping the tops, and scraping as needed with my knife, feeling the surface, scraping more, etc. Sid told me that scraping a chamfer along the middle of the top edge of the bearing works well to retain and distribute oil. This chamfer is deepest at the center of the top edge, and tapers to shallow nearing the bearing front/back ends. It stops ¼ short of the ends.
I did not use string or other methods to make oil channels in the Babbitt.
Here are the lower caps, finished and scraped level.
We put the shims up, pre-heated the top bearing shells and the shaft well with the rosebud, then re-blackened the shaft. We quickly assembled the boards, clamps, and top bearing shells, then caulked them again with Babbittrite. Our idea was to heat everything really well, then assemble, quickly melt babbitt and pour, as the blackening/heating goes easier with the shaft out. Our method ended up working well.
We melted more Babbitt. It took a good amount more than what I had left from the old bearings; Laifs grandfather took an interest when our project was related to him, and sent along some new babbitt bearings for us to melt. They worked great. Thank you, sir!
I poured the top front bearing in through the front oil hole, until the metal raised up out of the back oil hole. It went fine.
We melted one more batch of Babbitt, then poured the back top until the metal backed up out of the single oil hole. It also went well.
We waited another ten minutes, then took it all apart. Everything looked as it should, we trimmed the ends back and scraped burrs off the edges. We wiped the shaft as clean as possible, check-fit it up with shims and bolts. Its a tight fit, but can be turned by hand with effort. With some heavy oiling and 3hp driving it, it should be about right.
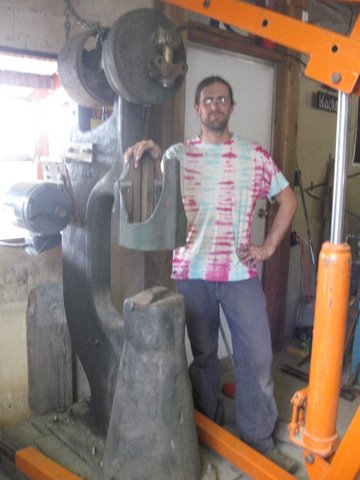
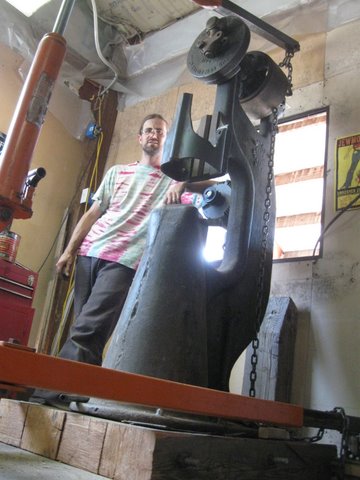
Heres Laif, the exuberant helper. Thanks, man.
A few gratuitous shots of new tools Ive acquired the past few days.
A Victor porta-torch.
A new Dremel.
My new smaller anvil, a Trenton #140.
A Makita wood-turned-metal chop saw on L.T.L. from Laif.
Thanks for staying tuned. Im getting a lot closer to smashing steel with this thing.
")


") That is too sexy! Leaving all us guys madly searching craigslist for one of our own.....
That is too sexy! Leaving all us guys madly searching craigslist for one of our own.....