- Joined
- Nov 2, 2009
- Messages
- 162
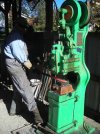
I tried to post a picture but it didn't work. I'll try some more.
Last edited:
The BladeForums.com 2024 Traditional Knife is available! Price is $250 ea (shipped within CONUS).
Order here: https://www.bladeforums.com/help/2024-traditional/
Dan, how do you copy the danged IMG code for a picture from Photobucket and insert it in a reply here? How much of it do you copy?

 Everything from about 12 LG 25#'s, up to a couple of Wolf air hammers and even a Nazel 2b.
")

") I actually would like my LG's to be bathed in oil and happily dirty, but being nearly in the center of my very clean and organized shop makes it hard to let that be. In the next shop, they'll have a cozy corner where they can be dripping in Power Punch, filthy and guilt free!
I actually would like my LG's to be bathed in oil and happily dirty, but being nearly in the center of my very clean and organized shop makes it hard to let that be. In the next shop, they'll have a cozy corner where they can be dripping in Power Punch, filthy and guilt free! 


....I have thought about it some more, and I will probably post a separate thread about the rebuild, when it is all over, complete with pictures....
It's sure your call, Robert. I understand the topic title doesn't lead a person to believe it would be a thread about rebuilding a hammer. Maybe linking the new one you propose to this one would help, I don't know....