Looking for Fairbanks hammer operating manual...

Bruce, you are telling me that it froze deep enough that is raised your hammer that was set 40 inches down!? I guess it was setting on wood and not earth, but still. Man, I think it may be time to move, not readjust the setup!

After the wear I have seen on my hammer, I would fully suggest that you take the links and side arms off the hammer and inspect the pins. The darned pins are fixed by a little tab to stay in one position, and they are not allowed to rotate. Therefore, they wear out on one side. When they wear, the side arms and links will wear. Plenty of oil would sure prolong their life, but I would take a look and see where they are now. I think I would also consider cutting off that tab that holds them in position and just let them rotate. Mike may have an opinion on that. I intend to discuss that with Sid, when I put my hammer back together. I will post some pictures of what worn out pins look like.
 
Yep!, we have a 48" frost line here. That's what the "experts" fogure is a safe depth for waterlines. etc so they don't freeze. Bare ground will freeze, in the middle of winter, to a greater depth than ground that is covered with sod.
When I assemble my hammer 3-4 yrs ago, the pins had a wears pot but not bad The holes have wore moreso in the arms.
That pin is just a piece of 1/8' wire and are removeable. I've replaced several of them.
 
Bruce, just saw the pinstriping - uh, nice touch. Is that actually on the hammer or drawn on the picture? Was it to show the flow of energy from Blacksmith to metal?

What size is your hammer? I thought it was a 50# but looks bigger than that to me. 150#?
 
No, it's an A-50#.
I just went thru the paint cabinet one day and started brushing.
I like the old fashioned pinstripning on old machinery.
 
Bruce, does it look bigger because it is raised up some? Is it raised up and how much if it is? I completed my base, and it is 5 and 3/4 higher than the floor.
 
It's mebbe 2" above floor level. I'm 6" and it's just right for me. Just have to develope a stance that is comfortable. I found I bend my knees a bit is it's comfortable for me.
 
Bruce, you are telling me that it froze deep enough that is raised your hammer that was set 40 inches down!? I guess it was setting on wood and not earth, but still. Man, I think it may be time to move, not readjust the setup!

After the wear I have seen on my hammer, I would fully suggest that you take the links and side arms off the hammer and inspect the pins. The darned pins are fixed by a little tab to stay in one position, and they are not allowed to rotate. Therefore, they wear out on one side. When they wear, the side arms and links will wear. Plenty of oil would sure prolong their life, but I would take a look and see where they are now. I think I would also consider cutting off that tab that holds them in position and just let them rotate. Mike may have an opinion on that. I intend to discuss that with Sid, when I put my hammer back together. I will post some pictures of what worn out pins look like.

It was Sid that told me to use soft pins and let them rotate (Fairbanks pins are hard and positioned). Sid also told me LG pin/hole tolerances for "new" is 0.002" - 0.005".

Mike
 
Mike, you certainly must be right about the thick sleeve acting essentially as a large spacer to maintain the shaft position. (You have determined that it is 11/16" thick walls?) It would seem that the drive pulley and the crank/flywheel being screwed to the shaft on opposite ends of the yokes would accomplish that spacing, but the sleeve must be further insurance. I am learning more with each communication.

I've gotten behind...

In reference to your above, Robert. The other night I was at the neighbors for a birthday dinner... the neighbor where the shop and hammer are. I took a set of feeler gages and gaged the gap between drive disc and front of front yoke, both ends of sleeve to yoke, and rear of rear yoke to drive pulley ("donut face to drive pulley, brake side).

In order from front to back... Would take 0.020" but not 0.025"... would take 0.004" about all the way around but nothing bigger except 0.005" in very short area... would take 0.006" mostly (one stretch short stretch on both wouldn't take 0.001") and would not take 0.008" anywhere... would not take 0.020" but would take 0.016" (this last has limited access given our hammer is together).

It's the sleeve that limits shaft fore/aft movement... it's the properly set hammer guides that determines fore/aft drive disc/shaft position. You should find your pulley depth and distance between yokes dimensions are nearly identical... unless manufacturing ideas changed through time.

Mike
 
Mike, I have some of the measurements. The drive pulley is 4" thick through the main shaft hole. The width of the surface of the drive pulley that the belt rides on is 2 and 7/8". The front shaft bushing is 5 and 3/8" long and 3" in diameter with a 1 and 7/8" hole for the shaft. The rear bushing is 5 and 1/4" long and 1 and 7/8" in diameter with a 1 and 3/8" hole for the shaft. The rear one is pretty thin. I haven't used a micrometer in years, but I believe the shim thickness is .045".

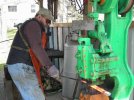
I am building a base for the hammer. I need to isolate it some, even though the floor in this shop seems really thick. I am planning on 3/4 plywood on bottom, 4x4 in the middle, 3/4 plywood on top and a layer of 5/8" rubber either on the floor or directly under the hammer. What do you guys think? Might be a little thick, but I am 6' tall, and wouldn't mind the hammer to be a little higher. How do you make the treadle work when you jack up the hammer?

Robert, it looks like, to me, to move the drive pulley to the rear, you need a new shaft at the same (- tolerance) of a reamed-to-round (or bored) (minimum 85% clean-up) front bushing hole. The rear bushing needs to come out, the rear yoke bored out, and a new rear bushing made that will interference fit in the new rear yoke hole. You should be able to have the new shaft stepped down where the end-mount drive pulley will go so the drive pully hole fits without modifying. These machines are precise but I still feel, having the ability, line boring/reaming both bushings off the same set up and while in place is the better road. Me, I'd be building a platform that carried the motor (and jackshaft, if needed) overheard, or for some other solution avoiding a rear mount drive pulley... but that's just me.

Many solve the problem of treadle-too-high-above-floor by throwing down a block tall enough that when the operating foot's heel is on it, the treadle can be reached. I've also seen "L" shaped additions to treadles... top of "L" hard to treadle, length of "L" upright moving base of "L" close enough to floor to rest operating foot heel on floor. The pan attached to your treadle changed the floor to treadle distance to some extent. I've also thought of mounting a pivoting ramp to the treadle where the treadle foot would most often be. If it easily pivoted on the treadle bar, with the other end ramped down to the floor and the floor end was able to slide (roll?) on the floor, a person could step on the ramp anywhere and move the treadle.

In the end, your machine needs to be rebuilt and running to figure out the linkage variables and how they effect a variable treadle height position. Until then, you won't know what the problem is (if there is one) you need to solve. An aspect of "rebuilt and running" is the hammer is very easy to regulate between very slow and very fast beats-per-minute... and that is a belt thing, in large part, and includes range of idler movement, belt stretch, belt sticktion... (how do you like that last word? May not have used it right but it's "real"... =] ).

A question I asked that got lost... does your machine have a treadle eccentric?... an about 3/4" thick and about 2 " diameter round with bolt hole offset near one edge of the 2" dia. flat? On Bruce's machine, which came with one, and on our machine, which did not, they are used to limit the treadle return height. I'm not sure they do not have a direct relationship to the return springs but I do know they have a direct relationship to the linkage setting, brake setting, counter weight setting. That is, you can't change any of those four things without effecting all of the others.

Mike
 
Last edited:
Hey Dan,

If you are still out there, I'd like to keep working with you on the belt type you have. Seems like from your description of how it picks up the hammer, it might solve a lot of my problems with lack of idler movement range, belt stretch, belt grab on motor pulley and drive pulley.

Mike
 
Welcome back Mike.
There wouldn't be a need to step down the end of the shaft for an extended shaft and rear-mount pulley. The pulley has set on the thicker part of the shaft. That is something that has concerned me. Moving the pulley outboard means that the heavy pulley would then rest on the smaller diameter portion of the shaft that passes through the smaller rear bushing housing on the back of the yoke. I would have to have a double-keyed bushing made for the pulley to stay on the smaller end of the shaft. I just don't know if I could make the shaft the larger diameter all the way back, since that rear bushing housing on the rear yoke is definitely a smaller diameter housing than the front bushing housing. That was an odd thing for Fairbanks to do.

Thanks for the clearance measurements for the sleeve on your shaft.

I don't believe I have a treadle eccentric. I believe there is some sort of stop pin that is attached to my frame.

I am still staring at the machine, and trying to decide how to proceed. I can't do anything with the shaft or bushings until I decide. I just don't see how I could do anything overhead, since I don't have rafters. That leaves me rear mount or side mount. Side mount high just can't work, since it apparently ruins the balance of the machine. Side mount high with a jack shaft and low with the motor and 2 belts may work but is more complicated.
 
Coupla things to chew on......
Figure out why they did the step shaft thing. Mebbe talk to some old machinists or engine guys. Yrs ago, things weren't done on a whim or a paper pusher's say-so like it is today. Designs were made for a reason , wether it was technalogical sound for the knowledge of the day or whatever.
When I bought my machine, it had been set up outside. Owner had set a 12inch I-beam along side on which he planned to mount the motor. it was mebbe 10 ft tall. He then got sick and it set till I bought it 5 yrs ago. If your ceiling is high enough, why not incorporate the same type setup? What is needed, 3 ft of belt area to work?

All these things we are discussing can be examined as to the why and wherefore. Such as the link pins. Why did they use a 1/8" pin to keep them from turning? Were they not worried about wear or was the use of hardened pins efficient for that day and age. Gotta remember that their resourses were much more limited then. I would think the engine guys might ahve some answers.
 
Welcome back Mike.
There wouldn't be a need to step down the end of the shaft for an extended shaft and rear-mount pulley. The pulley has set on the thicker part of the shaft. That is something that has concerned me. Moving the pulley outboard means that the heavy pulley would then rest on the smaller diameter portion of the shaft that passes through the smaller rear bushing housing on the back of the yoke. I would have to have a double-keyed bushing made for the pulley to stay on the smaller end of the shaft. I just don't know if I could make the shaft the larger diameter all the way back, since that rear bushing housing on the rear yoke is definitely a smaller diameter housing than the front bushing housing. That was an odd thing for Fairbanks to do.

Thanks for the clearance measurements for the sleeve on your shaft.

I don't believe I have a treadle eccentric. I believe there is some sort of stop pin that is attached to my frame.

I am still staring at the machine, and trying to decide how to proceed. I can't do anything with the shaft or bushings until I decide. I just don't see how I could do anything overhead, since I don't have rafters. That leaves me rear mount or side mount. Side mount high just can't work, since it apparently ruins the balance of the machine. Side mount high with a jack shaft and low with the motor and 2 belts may work but is more complicated.

I think the fact our 50# shaft is the same 1 7/8" at the rear mount drive pulley as your 75# shaft at the mid-mount drive pulley means, if you want a rear mount conversion, you have to have 1 7/8" all the way back.

Bruce, what is the diameter of your shaft where it sticks out the back? Now we are going to see if developement years changed shaft design for mid-mounts or if it's simply a rear-mount requires different shaft design. Of course, if Bruce's shaft is same dia. end to end, it could be quitting the shaft-step machining was more efficient... or ???... I don't know how to think "old time"... Bruce does... he's been seriously studying it for decades.

When I first got our hammer rotating, it wasn't bolted down. When run slow, it didn't move much. When run faster (not fast... not die knocking) it loped, front to back.

If a person thinks about it, the original design-engineering was mid-mount with overhead line shaft. The Motor-Driven models had to have been the lastest option. That option adds weight to the machine (a lot... on a 50# it was 12% of the total... 2050# to 2300# for diff. between mid and rear mount... that doesn't include the motor, because "motor-driven" and "counter-shaft" both have the same 2300# base weight in the catalog. I'd bet our original motor weighs 200#). All the extra weight was hanging off the back.

Where's Nicolas Wheeler (engineer and manipulator of metal atoms) when you need him?

Mike
 
Guys, I have to admit, hanging the pulley off the back is starting to be discouraging. There would certainly be a great deal involved. I would think that the shaft was stepped down on machines where the pulley mounted between the yokes simply because there was no need for the heavier shaft behind the drive pulley. All the weight was being handled by the two bushings. However, from a manufacturing standpoint, it would have been easier for them just to have a shaft of the same thickness all the way through. I will try to find a machinist to ask, in case they might know such an answer.

Bruce, was the guy just going to bury the end of the I-beam in the ground and stand it on end to mount the motor?

This whole exercise has been about trying to get the extra weight of the electric motor and mount hanging off the back, so that the extra weight is in line with the longer axis of the hammer. That way, the balance of the hammer would not be thrown off side to side and make the hammer wobble. The next best thing would be to have the extra weight down as low as possible, if it has to be on the side, so the balance of the hammer is affected less. A thought just crossed my mind that the key word here is "balance." I suppose the extra motor weight could go anywhere, as long as an equal weight is placed in a carefully calculated position on the other side to balance the entire mass.
 
Mike, The rear of the shaft where it protrudes from the rear yoke is 1 3/8", between the rear yoke and drive pulley is 1 3/8".
Front of drive pulley forward is 1 7/8".
Facing the machine, the beam was set to the right rear side of the slab the hammer was mounted on. And the treadle was on that side also.
IIRC, he had a plate up there to mount the motor on. It wa spretty substantial as the motor is a 3hp3ph. Heavy bugger!.
Robert, I don't see why you couldn't take apiece of 1" plate, drill/tap mounting holes then weld up some type of post to the rear for yer motor. Or somesuch arrangement.
You are quite a clever fella, you can figger something out. Mebbe sink a steel foundation of some kind in the floor and build of it.
Whatever ya do, keep it simple :-)
 
Robert, check out the treadle extension on Don Hanson's 100LG in the current Chambersburg thread. You'll like it!
 
Here are a couple of pictures of a Fairbanks "C" model that I found sometime in the past on the internet. Thought I would post them for you guys. Someone may get some use from something on one of them. I wish we had pictures of all sizes. We now have Bruce and Mike with "A" size, me with a "B" and these of a "C."

FairbanksC2lores.jpg
[/IMG]

FairbanksC3lores.jpg
[/IMG]
 
Here is a picture of the previous installation of my hammer. Notice the piece of strap on the right that comes down from the motor mount and then is bolted/welded to the wall. This "cured" the imbalance problem from the motor hanging on the side. There was another bar you can't see that went from the base of the hammer in the back up to the motor mount.
MyFairbankspreviousinstallationlore.jpg
[/IMG]

Bruce, I checked out the treadle extension on the LG 100#. That is simple and effective. Your idea of a piece of pipe or something attached to the back of the hammer that goes up above the hammer is interesting. As long as it was in line with the hammer extending out the back, it may not screw up the balance.
 
Back
Top