Modified Production Knives (traditional only)

Jsdistin, hey I don't know what's up with that. When I come here I can see my pic and the smaller copy you made when responding to my post. Sometimes when I come on here to check pics I can't see them either, just a small box with an x in it and IMG in brackets. Sometimes I can see the pic. Have no idea what the difference is or if it's me or the administrators or the software or the roll I take pictures out of to post. But some of the people on here can see them, or at least they hit the like button like they can see them. Wish I could help you or tell you what the deal is, but sorry, I can't explain.
This sort of thing happens when someone posts image links from a host that one has to be logged into to see. (like outlook.live) The poster can't tell that other folks can't see it, because it's showing for him.
 
Last edited:
I am a tinkerer and wanting to fiddle around with a blade delete and/or a rehandle. What is the preferred way to disassemble a slipjoint without damaging it?
 
YRzVl9T.jpg
78mnzq6.jpg
RfN0g6t.jpg

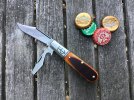
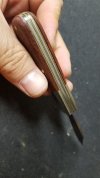
Subtle changes, rubbed the covers down with 800 grit emory paper, used a dremel with a small sanding drum to flute the bolster. I thought about pinching the bolsters, but didn't want it to end up "busy" looking. Rubbed them with 800 grit as well as it matched the satin finish it had already.
 
Thinking of making up a custom/dedicated pumpkin carver this weekend. Anyone ever do this that can share suggestions / brainstorms? Probably gonna need some serrations. I don't find those Case Halloween editions to be terribly appealing or those serrations to be terribly effective. Pics most welcome.
 
SAK Farmer?:D Got a good saw. GEC Lumberjack had a huge Spear and saw but it's a rare and somewhat incongruous pattern :cool:
 
I am a tinkerer and wanting to fiddle around with a blade delete and/or a rehandle. What is the preferred way to disassemble a slipjoint without damaging it?
I generally take a utility knife blade and hit it through the pins with a hammer or mallet and a piece of wood. Sometimes I put the utility blade in a vise and hit the knife down onto it with a mallet. This will cut through the pins and you can take it apart. It may not be the best way, but it’s worked for me.

I’ve also heard of people filing or drilling the pins and knocking them out with a punch.
 
I am a tinkerer and wanting to fiddle around with a blade delete and/or a rehandle. What is the preferred way to disassemble a slipjoint without damaging it?

I generally take a utility knife blade and hit it through the pins with a hammer or mallet and a piece of wood. Sometimes I put the utility blade in a vise and hit the knife down onto it with a mallet. This will cut through the pins and you can take it apart. It may not be the best way, but it’s worked for me.

I’ve also heard of people filing or drilling the pins and knocking them out with a punch.
I’ve done it both ways though admittedly with a razor blade only once, but many times with a pin punch if you’re going to do a rehandle I’d knock out the pins with a punch it works really well. I drill a dimple in the pin to give the punch somewhere to grab but also get rid of some of the expanded pin that will make it difficult to knock out the pin. I use a piece of wood to sit the knife on with a hole or two drilled larger than the pin so the pin has somewhere to go as you tap it out and the wood will not damage the knife when hammering. Sounds like others would know more than me but I’d be hesitant to use a razor blade on a knife without bolsters on both ends unless you went at it with the razor at the but end tapping on the blade end bolsters I think I’d be difficult to start at the back end getting the razor blade in there
 
I am a tinkerer and wanting to fiddle around with a blade delete and/or a rehandle. What is the preferred way to disassemble a slipjoint without damaging it?
I've done a couple now. I like to center punch the pins, drill the ends then use my automatic center punch to knock the pins out. Usually over top of a large hole drilled into a block of wood so the pin can freely work it's way out.
 
I am a tinkerer and wanting to fiddle around with a blade delete and/or a rehandle. What is the preferred way to disassemble a slipjoint without damaging it?
Also, if you’re having trouble seeing the pivot pin in the bolster, you can knock out the other two pins first and then swivel the handles around a bit. That can make the pivot pin more visible.
 
I've done a couple now. I like to center punch the pins, drill the ends then use my automatic center punch to knock the pins out. Usually over top of a large hole drilled into a block of wood so the pin can freely work it's way out.
I'm working on one now, and getting the pivot pin out was a pain. I was beginning to think they had soldered it in place... drilled it, tapped on it, drilled the other side, tapped it some more, wiggled and twisted it... finally got it out.

Of course, now I have to go back with a 1/4" pivot pin, but I got that sucker out.... :eek:
 
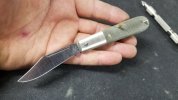
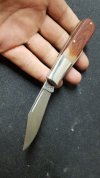
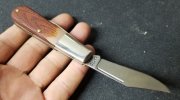
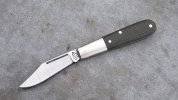
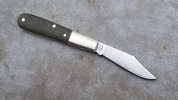
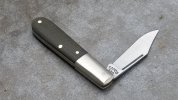
Been working on this Camillus CAMCO barlow recover. I deleted the pen blade. The f&f on this knife was terrible. It's been a challenge for me to get it respectable but it's coming along. Should have her finished up later today.
20191018_201016.jpg
 
Been working on this Camillus CAMCO barlow recover. I deleted the pen blade. The f&f on this knife was terrible. It's been a challenge for me to get it respectable but it's coming along. Should have her finished up later today.
View attachment 1215805
That looks like a new GEC build in progress. Very nice attention to detail... did you get the micarta online, or is it salvage? Man, I've got a long way to go... lot to learn.
I'm working on a conversion of an electrician's knife, and was going to use some winterbottom bone scales I bought online, but I bought a pair that was 1/4" too short... :oops: that's what I get for not measuring the knife frame, just working on "memory"... at my age, and my memory, I should know better than that...:D I'm thinking this one will get some type of wood scales. That's what it had to begin with, so there's a type of continuity to it, I suppose. Yeah, that's my story.... :rolleyes:
Thank you very much! This was a very rough knife as stock. Still not perfect, some imperfections I just couldn't square away but a vast improvement IMO. Micarta is from Maker Material Supply. Just some of their standard green canvas. Here she is all finished up. Before and after. Thanks for looking!

BEFORE
20191015_173408.jpg

20191016_135324.jpg

20191015_173411.jpg

AFTER
20191019_115842.jpg

20191019_115854.jpg

20191019_115913.jpg

20191019_120041.jpg

20191019_120052.jpg
 
Back
Top