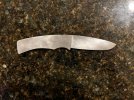
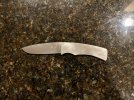
My first attempt

I think we might be back in action! Let me know if you still think I should still sidebar this one for now. Im eager to start on the next one knowing some of what I learned but this knife is like my child now, I just can’t give up on it 😂View attachment 2080110View attachment 2080111View attachment 2080112View attachment 2080113
to be clear; I wasn't suggesting what you should or shouldn't do, but what I'd do. Sometimes when I screw something up, walking away from that project and starting a new one breathes new life into my work. Also, I'm a designer, so for me design is paramount. If a screw up gets in the way of me seeing my design through to completion, I feel I owe it to myself to see the design through to the end, and sometimes that means starting over. That's just how I roll.

Maybe the most important thing to you at this point is to complete a knife, and that makes a lot of sense. One thing I'm pretty sure of, is that your second attempt will go way faster and more smoothly than your first. Whether you start after a major design-altering mistake or after you finish that altered knife may or may not make a difference in the trajectory of your work.

your altered design definitely looks workable to me.
 
Makes sense to me! I definitely want to get that bottom line to flow a bit more. I think I’ll need to bring it up in the middle a bit to do that. Learning something new with each step and really enjoying it so it’s a win-win for me
 
I get what Lorien is saying, but in this case, I think you need to follow the project through.
Carefully .... and SLOWLY ... reprofile the knife as suggested into a Loveless shape. From there I would clean up the bevels using the file by hand without the jig, then go to a sanding block and paper. I would suggest you stop all filing at .050". The sanding will take it down the rest quickly. The rule to remember is it is easier to take a little more off than to add any back on.
10-4, heading back into the garage now! What progression of grit do you recommend when sanding?
 
Once tghe main bevel is roughed in with a bastard file, switch to a second cut or finishing file to get the deep scratches out.
Switch to good sandpaper and a HARD backing block. A 2X2X4" piece of aluminum is perfect. Hardwood is also OK.
Start with 120 grit and when ALL file marks are gone switch to 220, then 400. It should be smooth and satin looking with no deep lines left.

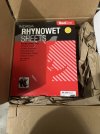
Now, about sandpaper. In the beginning, use the standard 3-M wet-or-dry stuff from the auto supply of big-box hardware. Get ten sheets of each and cut them into quarters. Write on the back what grit it is with a waterproof sharpie and store each grit in a gallon zip-lock bag. Make a dish of water with a quart of water, 1/2 teaspoon of Dawn or other dish soap, and a half teaspoon of baking soda. Later on, get top grade paper like Rhynowet red line.

Wrap the paper on the block and dip in the lubricant dish. Sand in smooth even long strokes that go angular down the blade. Go slow, pressing hard doesn't make it faster. Smooth and even is what goes fastest. Also, don't sand the paper back and forth, just stroke in one direction from spine to edge or straight down the blade from ricasso to tip.

When done with a grit level, dump and rinse the dish well and make new water. Wash off the blade, the work board, and your hands, too. Nothing will make you say bad words than a coarse grit stray particle showing up in the final sanding steps.
 
I separated this part deliberately.

Once the blade is sanded and HT is done, it needs to go back to 120 grit again.
Start by sanding the edge flat and removing the decarb along it. You can hit it with a file a few times first to get rid of most of the decarb.
Once the edge is cleaned up, Do the flats by gong up the grit steps just like before. You can stop at 400, or go as high as you wish. Once you are done with the 120 grit the edge should be about .020" to .010". Go on up the grits and refine the smoothness and edge. At this point it is nearly impossible to make the edge too thin but watch that it does not get sharp and cut you while sanding. If it gets sharp, dull it by sanding a few strokes along the edge with 120 grit paper.
The real champ for sanding above 400 grit is the 3-M polishing papers. They come in a color-coded pack from 400 to 8000. They can be used wet-or-dry until they are ragged. They are also really great for a quick touch up sanding. I'll toss a set in the box I am putting together for you.
 
Thanks, Stacy!

The tips you gave earlier about ditching the jig for a bit help tremendously. I’ve been to 3 stores here looking for 120, 220, and 600 grit wet/ dry sand paper. For some reason, I was able to get the latter to but no one has waterproof 120 by me. I picked up some standard 120 and will see where that get me. I’ll try it dry first and if that does t work I’ll try it with the water solution you had mentioned. If neither of those work I’ll just have to venture out further tomorrow to get the right stuff.

I’m going to need to figure something out for HT soon. I assume a HT oven would be better than a forge? I’m more concerned with getting the right price of equipment the first time then trying to save $ when it comes to the HT. Any recommendations?
 
I'll be stunned if you can find good sandpaper locally. Order some Rhynowet red from Pop's knife supplies. 50 sheets per box.
 
Once the main bevel is roughed in with a bastard file, switch to a second cut or finishing file to get the deep scratches out.
Switch to good sandpaper and a HARD backing block. A 2X2X4" piece of aluminum is perfect. Hardwood is also OK.
Start with 120 grit and when ALL file marks are gone switch to 220, then 400. It should be smooth and satin looking with no deep lines left.

Now, about sandpaper. In the beginning, use the standard 3_ wet-or-dry stuff from the auto supply of big-box hardware. Get ten sheets of each and cut them into quarters. Write on the back what grit it is with a waterproof sharpie and store each grit in a gallon zip-lock bag. Make a dish of water with a quart of water, 1/2 teaspoon of Dawn or other dish soap, and a half teaspoon of baking soda. When done with a grit level, dump and rinse the dish well and make new water. Wash off the blade, the work board, and your hands, too.
I feel like this looks better in person. The photo really shows all the imperfections . I’m gonna start over beginning with the 120 grit I think.
 
I feel like this looks better in person. The photo really shows all the imperfections . I’m gonna start over beginning with the 120 grit I think.
Alternate the direction of your sanding strokes when you switch grits. Like 120gr perpendicular to you, then 220 skewed more parallel to you, then 400 perpendicular, etc. this will help highlight any deep scratches from previous grits that you can catch early before moving on. You will NEVER get them out with higher grits. NEVER. Ask me how I know….. 😂
 
Alternate the direction of your sanding strokes when you switch grits. Like 120gr perpendicular to you, then 220 skewed more parallel to you, then 400 perpendicular, etc. this will help highlight any deep scratches from previous grits that you can catch early before moving on. You will NEVER get them out with higher grits. NEVER. Ask me how I know….. 😂
I’ll give it a go! Wax on- wax off. I feel like I should be a karate champ by the end of this 😂
 
I’ve never been so excited to receive sand paper lol
One year my mom asked me what I wanted for Christmas, and I responded with "$100 bucks worth of sandpaper".

She told me I was a strange man, and gave me a $100 gift certificate to Truegrit. Lol! One of the best presents I've ever gotten!
 
Ok so here’s where I’m at now. Knife number 1 has been mailed to Stacy for HT. I just finished filing knife number 2 (same shape and everything). Good news: I didn’t have to cut this one in half (yet lol) Bad news: I’m having trouble getting a consistent thickness at the edge. If I focus on getting the edge uniform, the knife does not come out symmetrical and vise versa. Maybe it’s it the jig? Maybe it’s my placement of the knife when I flip sides on the jig? Maybe the knife gods enjoy watching me hand file myself into insanity? 😂

Currently, I have the knife relatively symmetrical but from handle to tip I’m at .0490, .0165, .040. Another odd thing is that I feel like I spend the majority of my time filing at either end of the knife and not in the middle trying to correct this but it’s not working.

Thanks for any advice! 🔪
 
One thing that I found helpful is to color the blade with sharpie marker or layout fluid and then mark a series of lines at different distances from the cutting edge. Set your calipers to 5mm and run one jaw along the cutting edge while marking the blade with the other jaw. Repeat at 10mm, 15mm etc. Start filing at a relatively steep angle and try to get a consistent edge thickness and a grind line that is parallel to the edge and the lines you marked. As you lower the file angle, all you need to do is watch where the color comes off the blade and keep the line of shiny steel parallel to the lines you marked. Every time you lower the file angle, you can go back with a sharpie and mark the blade at the cutting edge. You'll know that you have to lower the angle again when the file takes off the color at the edge. Your edge thickness will be consistent because the jig keeps the angle constant. Well, that's the theory I guess. My biggest problem with the file jig was the flex in the blades as they became thinner. I only used the jig for a few blades before getting a grinder, but I still use layout fluid and mark grind lines on the blades a good bit.

Another tip is to wear a head lamp, it has made a big difference for me both on the grinder and hand sanding blades.

Your first knife looks really good. If you make a few knives with a file jig and don't lose interest in knife making, you might as well buy a 2x72 and a heat treat oven. There won't be any escaping the rabbit hole.
I’m doing all those things lol. I think your point about the flex in the blade is a good one. I tried to play close attention to keeping light pressure and support the underside of the blade but it seems to still be an issue. I’m already grinder shopping too. Let it begin! 😂
 
Back
Top