My first Bowie/present for a friend WIP (fingers corssed)

So decided to monkey with the guard a bit more to get an idea what it would look like bent. I took a piece of paper and cut it out the same size as the guard and bent it the way I was thinking and put it up against the knife and it still looked too big for what I'd like to see. So finally something went off in my head that said "hey dumbass, why don't you see if that metal cutting bandsaw and little grinder you have that are actually designed specifically to cut and shape steel can be applied in this situation?" Son of a gun! Wouldn't you know they actually do? :o So I knocked down the guard a bit and I still have a little shaping to do it make it fairly equal looking on both ends of the oval, and if I can't I can always modify it a bit with those fancy machines I mentioned earlier.

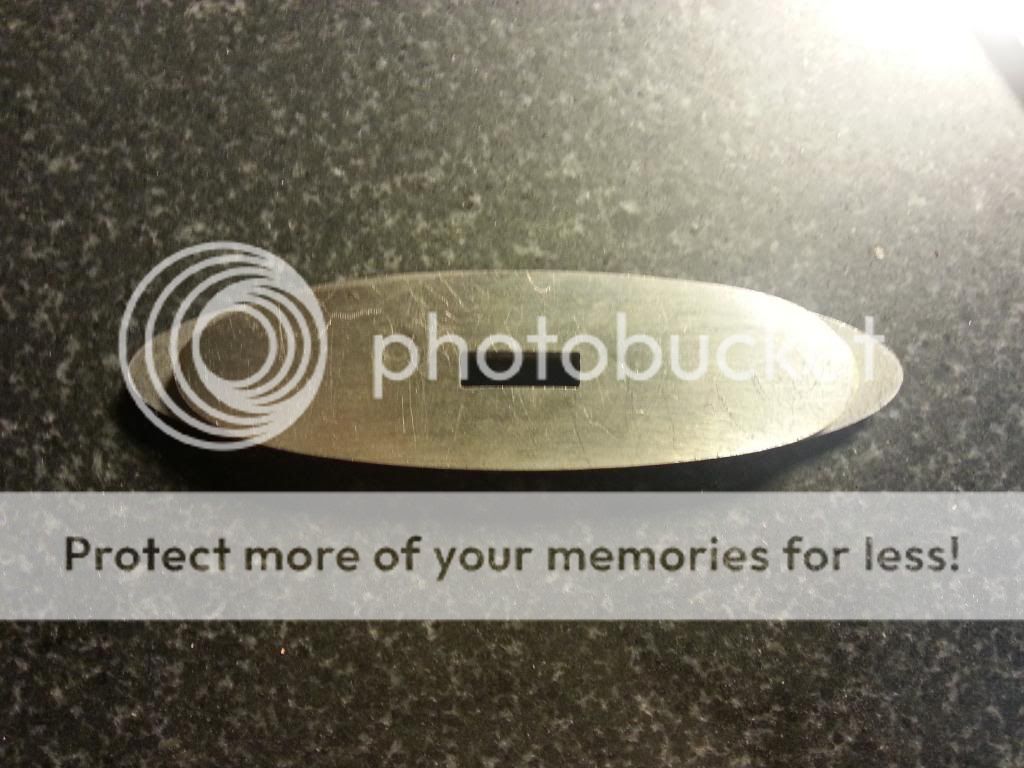
So here is the other guard that was the same size that I put underneath to show how much I took off.


Here is a layout of it on the knife. Possibly still a tad long but I'll do another mock up and see if I need to make it smaller

 
Okay I've been a bit busy lately and have not really had a chance to get a ton of shop time in but I managed to get everything sanded to 400 and am about to move up to 600 but I want to start thinking about the guard since it would likely only take me a couple solid hours to have everything sanded up to 600. What is the best way to go about shaping the guard. I have a few needle files but I'm unsure if sitting there and filing away such little amounts with each stroke would take forever to shave off enough it would take months to widen the opening to fit the tang. Is that just the way it's done or would it make sense to drill holes and then file out the spots to make it wider a bit quicker?
 
Drill holes slightly narrower than the tang. File the holes to a slot, then carefully shape the slot to precision fit the ricasso. Will Morrison did a wip a few weeks ago in the customs forum. Look it up. He took some good pics of how he did it. Nick Wheelers wips show figment as well, but he has a mill which helps a lot.
 
Are you still gonna bend it?
Eddie


I'm thinking so, but now that I shortened it up a bit I don't think I'm going to have to go as extreme as I was planning before maybe just a slight one to give it a little flair, going to kind of play it by eye when I get the hammer on it.

Thanks Willie that's kind of that I was thinking would be the way to go but wasn't sure. I'm guessing just measure the with of the tang near the ricasso and drill out the holes a bit smaller than that measurement and adjust it with the files. Truth be told I'm fairly excited about this because I'm hoping I have the skills to get a nice tight fit but at the same time I'm a bit worried about screwing it up. I guess worst case I just order another if I do or even cut one out of a piece of stock :D. But I'm hoping to be able to bang it out without screwing it up. Fitting this and the handle are probably going to be the most nerve racking parts of the whole thing. Mostly the handle because I only have one piece of dyed blue curly maple to make this happen.
 
I find this the hardest part of knifemaking. My last two guards were damn close, but I still have a few hairline gaps about 0.0005". Taper the tang slightly, and make sure there are no wide spots on the tang, as it is very frustrating to get past that spot, and have the guard flop around at the ricasso. Ask me how I know :). I measure the tang/ricasso width calipers, and use a drill bit that passes loosely through the calipers when set at that width. Use good files and take your time.
 
This is where I would use my little mill to make a "trough"in the blade side of the guard to guarantee a day-light free fit.
 
Question(s) on tapering the tang a bit. Is it absolutely necessary? Also if so do I need to worry about sanding it back down to say 600 or 800 before I go about fitting the guard? I'm assuming no simply because it's going to be buried in the handle. But also what is the best way to go about accurately tapering the tang? I'm wondering if there is a way to do it with Fred's bubble jig but my only real power tools to work with either way is my little Craftsman 2x42. The more I'm looking at how some people are doing guards I kind of like the idea of having something "flow" from the guard into the handle (like what Will Morrison did in that WIP that was mentioned earlier.) I was planning on just having the handle butt up against the guard but the other ways really look sexy. I don't think I want to take on that much challenge at this point though.
 
No,it is not necessary to taper the tang. As far as sanding , as long as the tang isnt marring up your guard , or widening the slot on the guard every time you try it on , its probably smooth enough .As for flow , your guard may not be thick enough for the kind of shaping that Will Morrison did, but you may be able to add a couple of spacers to give you enough meat to put a radius that blends right into the guard .
 
It's not necessary to taper the tang, but making it .010 narrower makes guard figment a bunch easier. With a mill, you have better precision. I just dis another guard following the taper technique, and it is my best yet. Pics tomorrow.
 
If you can spend 2 days shaping the guard, it's not hard. It's just time consuming. I hope I didn't discourage you.
 
Not discouraged at all Willie. Since I missed the time frame of getting this thing done by a country mile I can spend the time with it. I'm nowhere near fast when it comes to making knives usually anyway mostly because my shop time is often fairly limited.
 
Okay I hit a minor SNAFU tonight. I get the blade all sanded up nicey nice to 400 and am ready to bang out the 600 grit and I'm looking it over with my optivisor just to make sure it's looking good. I notice on the flat on one side what looks like little divots like 2 of them. I almost want to say it looks like they put the hardness tester on there because I can clearly see them down on the tang but these aren't as prominent. Which means I'm going to have to go back down in grit on that side and get them out :mad:.

Then thinking about what you guys were saying on here about tapering the tang I decided to take my height gauge out just for laughs and check the tang on my surface plate. I set it so it was just grazing the tang near the ricasso and slid the knife forward. Sure enough the closer it got to the butt of it it grabbed the gauge. Oh and to make myself feel better I grabbed that guard that has the nice slot cut out to help me get started and put it on the tang and had the pleasure of wiggling it and seeing daylight though it already on what should be the thickest part of the tang. Looks like I'm making it out of a piece of stock.
 
Always have some taper to the tang. It aids in fitting the guard, and allows for the metal removed in sanding the blade.
Also, never fit the guard until the blade is finished sanding.....or it will be too loose by the time the extra metal is sanded away.

Hammering the guard from the side while not on the blade can close the slot some. You will have to clean up the edges where you hammered, but it helps close the gap. It is usually a bad idea to hammer the guard while on the blade.
 
Last edited:
Depending on the size of the gap, you can also pein the face of the guard while installed. First you'd want to add a slight taper to the tang, so the WIDEST part of the tang is the place where you want the guard to sit. Then slide the guard tightly into place and clamp the tang such that the guard is supported from the back side (I use a couple pieces of 1x4 for this). Finally, using a small rounded punch, pein the face of the guard around the ricasso. You'll need to re-sand the face of the guard after to get rid of the pein marks... but this will close up minor gaps. Works like a charm.

It's a tricky process to explain in words, so I can try to shoot a photo of my setup if that would help.

Erin
 
Okay this thing is likely going to wind up being a Christmas present at this rate. Unfortunately I haven't been able to get much shop time in but I'm getting in what I can. I got the whole blade sanded to 400. (I opted to go with Nick's advice and sand it to 400 at least before fitting the guard). Now onto this guard situation. Per Stacy I tried hammering this thing to the point I took a mini sledge to it and whacked it pretty good (which it laughed at) and even tried putting it in my vice and squeezing it together (without trying to kill it) and it still did nothing. So I'm not sure if I should just use the thing as a template and cut a guard out of some 5/32 ATS-34 I have or attempt closing the gap on this.

In the meantime I bout myself a pair of calipers and the end of the tang is definitely wider than where it will sit. So I need some input on two things guys.

1. Do I go monkey with this thing or try making one out of the 5/32 stock?

2. How do I go about tapering the tang? It seems most folks like to make a little jig for it with a block of wood, put a small nail in it and drill a small hole in the tang to sit in and put it on the belt grinder. Is this the only way or are there other tricks I should know about on this.

I'm putting up a picture of the tang/guard so you guys can get an idea of what I'm working with here and mind you this is currently a bit thicker than near the ricasso. To me there seems like an awful lot of daylight already.


I don't think that gap will close very easily. I taper the tang on a belt sander, much like doing a distal taper.
 
That gap wont close much,and if it did there would be gaps at the corners .As far as tapering goes, you dont need anything radical,just a teensy,weensy bit.Often times there is a burr or mushrooming at the end of the tang from being worked on,and that is all that needs cleaning up. Here is what I have done when using brass and had a gap problem: Lay the guard down on your anvil with the blade side up and a peice of paper under it to protect the other side.Hammer it all over with a ball-peen hammer ,being carefull not to land a blow in the slot too much,but trying to mushroom the metal a little bit at the edges of the slot .This will give a hammertone finnish on the front of the guard and narrow the slot some.
 
The gap is certainly too big for a show piece, but if you use JB Weld to set the guard, it will be closed up. Since this is a shelf queen, I think that is a viable option. There are other ways of closing the gap, but I'll give them later.

The tangs will almost always end up thicker at the end than the middle if you don't taper them to start with. The best time is when doing the profiling and basic beveling. Just grind it backwards from the ricasso area toward the tang end. Taper it to about half as tick as the ricasso. By the time the blade is filed and sanded smooth and flat, that will still leave a slight taper.
If you need to do it after the blade is done, tape the blade up well to avoid accidents happening to the smooth bevels. Just go to the belt sander and grind a taper that is continuous and is at least 15-25% thinner at the end. It should also have a slight taper in the height. The last 1/2" at the ricasso shoulders is all that needs to be neat and pretty, so don't waste much time beyond a coarse belt.

Now for closing a guard gap that is just too big to live with:
1) Hammer it from the sides to close up the slot a bit and re-fit things. This often works, but will require a good bit of clean-up on the guard edges where the hammer was hitting.
2) Use a smoothly sanded (and preferably polished) ball peen hammer to peen all around the slot from both sides. This will displace the metal and close up the slot. You can either peen the whole guard and leave the hammer-tone finish, or file it smooth again. Most folks go for the hammer finish.
3) Make an escutcheon for the front of the guard. This is called a seppa in Japanese. It is nothing more than a thin decorative washer or shaped sub-guard to cover the actual slot. This is not all that uncommon on a bowie knife. I like to make them as an elongated diamond, or an fluted oval. Try and make the shape somewhat fit with the guard shape. Copper works well, or use the same color material as the guard for a less noticeable cover. I have also made them to be just slightly larger that the actual blade, where they look like a 45° bevel coming off the blade toward the guard. These only stuck out about 1/8" past the blade, and were rectangular in shape.
 
Back
Top