-
The BladeForums.com 2024 Traditional Knife is available! Price is $250 ea (shipped within CONUS).
Order here: https://www.bladeforums.com/help/2024-traditional/
You are using an out of date browser. It may not display this or other websites correctly.
You should upgrade or use an alternative browser.
You should upgrade or use an alternative browser.
Pics of customized production knives
- Thread starter tuffthumbz
- Start date

- Joined
- Dec 5, 2009
- Messages
- 1,528


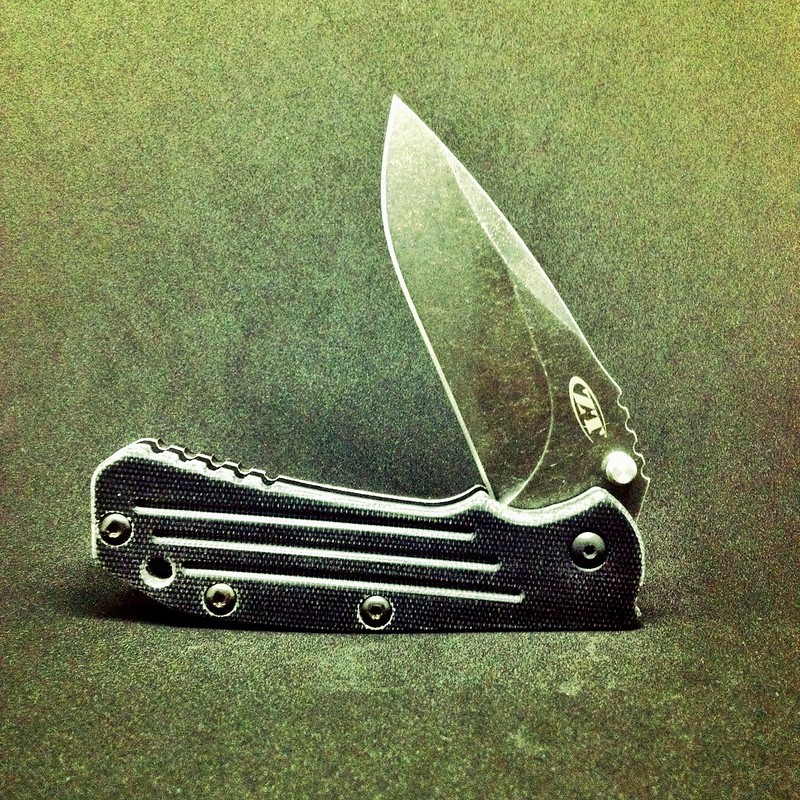
What is the top knife?
- Joined
- Mar 15, 2014
- Messages
- 184
What is the top knife?
It's a ZT 0560.
Acid-Etching Blades via the Professor Method (No Tumbling Involved):
Please note, I do this in stages, over three to four days usually to allow ample drying times. Results are a combination of bead-blasted-like and satin finishes.
1. Purchase PCB Etchant Solution at Radio Shack (about $13.00)
2. Pour solution into either a plastic or glass container, enough that the entire disassembled-from-chassis blade can be submerged
3. Degrease the loose blade twice or even three times using rubbing alcohol and a lint-free cloth, allowing ample dry time
4. Paint the surface areas of the blade with red fingernail polish (to be highly visible) that you DO NOT want affected by the solution (I paint the edge and any parts of the tang that contact the chassis internals lockfaces, pivot hole, etc.)
5. Allow polish to dry, paint areas again, allow to dry again (I allow drying overnight)
6. Make an S hook with a large paper clip, hook through pivot hole, completely submerge into solution, hooking the free end on the side of your plastic or glass container for ease of removing the blade
7. Leave submerged for EXACTLY 45 minutes
8. Remove and submerge blade immediately and fully into a container of water to neutralize the remaining acid
9. Scrub blade under running water with dishsoap and toothbrush to remove remnants of solution rinse clean
10. Use non-acetone fingernail polish remover with paper towels to removed painted-on polish, exposing un-etched areas
11. Use 600+ grit wet/dry sandpaper wrapped around a popsicle stick under running water (controls dust) to expose grind lines, blade holes, or any edges that you want to give the blade contrast from the polished edge/surfaces and etched surfaces
12. Etchant solution can be stored in container and re-used several times (Ive used the same solution up to 6 times) and/or disposed of safely per the instructions on the bottle
13. Have a gin and tonic or cocktail of choice while re-assembling your knife and enjoy it for the unique beauty it now is:


Thank you for sharing!
Would you need to sharpen the knife after?

- Joined
- Nov 2, 2012
- Messages
- 128
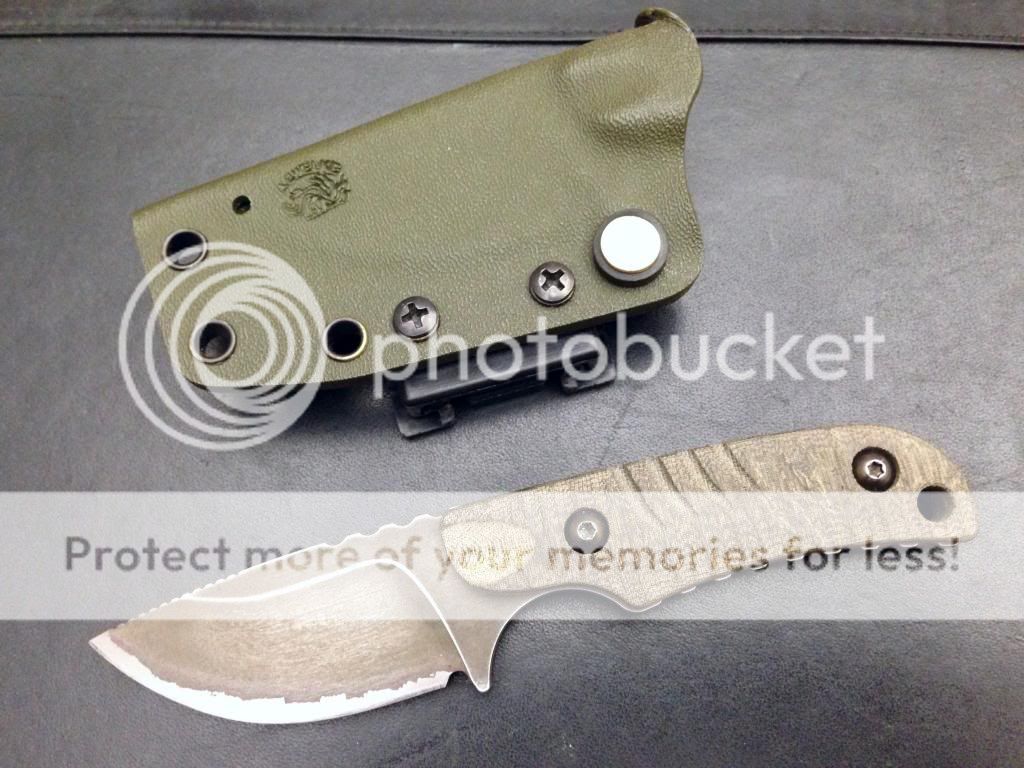
CRKT Summa with custom Guycarta handle scales


morgaj1
Gold Member
- Joined
- Jan 2, 2012
- Messages
- 214
Those are gorgeous. What model Benchmade are they?
- Joined
- Jun 26, 2012
- Messages
- 1,886
those are gorgeous. What model benchmade are they?
bm 710

")


- Joined
- Dec 5, 2009
- Messages
- 1,528
I have a question for you guys. I just started doing the pattern contouring on G10 scales and I'm curious do you guys use a fine or coarse dremmel drum to do your patters? And, once you set your pattern do you go back and do any finer sanding in the pattern you made? Do you usually buff afterwards or just leave it alone?
Thanks for your time.
Craig Collier
Grizzly Knives & Leather
Thanks for your time.
Craig Collier
Grizzly Knives & Leather
- Joined
- Nov 1, 2000
- Messages
- 28,365


- Joined
- Mar 12, 2009
- Messages
- 535
No way! CM waved a knife, I didn't see that one coming! lol, just kidding, CM, good work.
BTW, do you drill a hole that becomes the hook first, then grind away to it, or just go at it with grinding?
BTW, do you drill a hole that becomes the hook first, then grind away to it, or just go at it with grinding?
- Joined
- Nov 1, 2000
- Messages
- 28,365
No way! CM waved a knife, I didn't see that one coming! lol, just kidding, CM, good work.
BTW, do you drill a hole that becomes the hook first, then grind away to it, or just go at it with grinding?
On this one, I knocked out the thumb stud and used the hole as the basis for the hook.


- Joined
- Nov 1, 2000
- Messages
- 28,365
[video=youtube;U3ULxRwz9VU]https://www.youtube.com/watch?v=U3ULxRwz9VU[/video]
[video=youtube;U3ULxRwz9VU]https://www.youtube.com/watch?v=U3ULxRwz9VU[/video]
First good use of a ZT I have seen in a long time. Really nice job, CM. I like it better than stock.

