SAK Mods! Post your pics, questions and ideas

There was something about the shape of my package opener modification that I wasn't happy with, I couldn't leave well enough alone and ended up ruining it trying to correct that issue.

My best option now was a small awl, and the only way to do and be able to actually open it was a notch in the top sort of like the hook on top of leatherman implements.
20220805_180307.jpg

20220805_180319.jpg

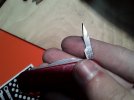
I think theres actually enough material in the 58mm blade to grind it into a small awl for making small holes or scribing lines in wood leather or plastic, it'll handle everything I'd want to use a little awl for.
This may be a modification I explore further and refine in future attempts.
 
Some tools are, backsprings not really.

The Vic 91mm are probably the easiest to be cross compatible as many of the tangs are similar and they both use 2.5mm end pins. Some Wenger parts fit Vic 84mm pretty easily. Lots can be made to fit otherwise, but take a bit more work to adapt/modify parts to fit.
About to start a thread pondering on something quite similar, looking to make my perfect SAK, hoping to see if possible to get the blades from a 100mm Grafter, onto an 81mm, but those blades have a 55mm cutting edge, so I hope the tang/hole can be moved up.
 
About to start a thread pondering on something quite similar, looking to make my perfect SAK, hoping to see if possible to get the blades from a 100mm Grafter, onto an 81mm, but those blades have a 55mm cutting edge, so I hope the tang/hole can be moved up.
84mm? I think there’s at least couple of ways to get it done. The 100mm tang has a lot of material so you could go as far as cutting the new round inside of the original pivot hole. I’ll look for the new thread. 👍
 
84mm? I think there’s at least couple of ways to get it done. The 100mm tang has a lot of material so you could go as far as cutting the new round inside of the original pivot hole. I’ll look for the new thread. 👍
Gah, always confusing the sizes, I meant 91mm, haha. 91mm is my favored. I was hoping as much, reshaping the tang! Awesome to hear, just posted the thread.
 
There was something about the shape of my package opener modification that I wasn't happy with, I couldn't leave well enough alone and ended up ruining it trying to correct that issue.
:(
My best option now was a small awl, and the only way to do and be able to actually open it was a notch in the top sort of like the hook on top of leatherman implements.
I think theres actually enough material in the 58mm blade to grind it into a small awl for making small holes or scribing lines in wood leather or plastic, it'll handle everything I'd want to use a little awl for.
This may be a modification I explore further and refine in future attempts.
🙃

It's good that you were able to redirect a setback into something positive and use it to explore a new avenue. I'm glad. 😁👍

An awl is often something that I find is missing from a compact tool set and I wish it wasn't so frequently overlooked because it can be very useful.

Also... I finished my custom Apprentice!!!! Yay! 🎉🥳
 
This should be my last post about this. Hopefully it will inform and encourage others who are interested in doing this modification, which is converting a Victorinox Waiter to an Apprentice by switching the corkscrew to a phillips driver.

This post is just detailing how the peening process went. There are some previous posts discussing the planning and execution of the pin removal and the preparation of the replacement pin.

I secured the pin in a bench vise sandwiched by cardboard to protect the pin from getting scratched or squished. I then spent around 15-20 minutes tapping the end of the pin with my ball peen hammer to form the first mushroom head.

The pin kept sliding down in the vise. This forced me to keep readjusting it. I was also having some trouble getting the lip of the pin head to form as level. It was sightly tilted horizontally, but I was eventually able to correct it.

It turns out that peening isn't terribly difficult if you use a small hammer, but it does require a lot of patience. I wish I had spent a little more time on the first head to make it bigger, but I was more focused on making sure that the head was level, and so I stopped as soon as the tilt was corrected. I was afraid that the head would become crooked again if I kept tapping it, and I was eager to move on to the next step.

With the first head formed, I inserted the back phillips into the SAK with the knife and combo tool open. With the tools open and out of the way, I was able to close the SAK in the bench vise to compress the spring, which forced the holes to align enough to allow me to insert the pin.

With the pin fully inserted, I released the SAK from the vise, notched the unpeened side of the pin around 1.5-2mm away from the sideplate, and then I cut it with a small hacksaw. I specifically chose to use a hacksaw to carefully preserve as much of the remaining pin as possible so that the leftover piece could potentially be used later for doing the same modification on another Waiter.

Finally, I filed and sanded the trimmed end of the pin to be smooth, and then I began peening it with the other side of the pin resting against a small piece of scrap wood. I probably spent at least an hour on this side. It ended up being much bigger and much thicker than the first head. This actually matches the way Victorinox makes the stock pivot.

Both heads actually ended up looking very nice, which was surprising. I was expecting them to wind up looking like mangled garbage, but I didn't care as long as they would be hidden by the scales. Instead they turned out looking rather good.

I did encounter one small problem. Because I was so paranoid about making the pivot too loose, I accidentally made it just a hair too tight by peening it a little too much. This made the phillips tool lose some of its snap, but this problem miraculously cleared up with a little drop of oil. I'm not even exhaggerating. It was so close to the borderline of over-tightening that it was fixed by one drop of oil. For a first time modification of this kind, this went way better than I expected.

The original scales had been softened with a hot water bath and were gently removed to preserve their fit. As a result, they were able to be reapplied to the knife once the modification was complete.
 
we need pictures! 😁
Pictures, pictures, pictures -- please, please,please :)

I hate taking and sharing pictures. You will never see me do this again. One time, one photo, and that's it.


Sorry if you were expecting more photos or better quality.

edit: also, I'm sorry for being so grumpy about this. 😑
 
Last edited:
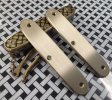
I later saw a 91mm knife for sale that had skeletonized scales. You can see the tools in the pics on the knife marked B. I thought it would be great to put the skeletonized scales on the Waiter so I did, but I lost the pocket clip and the 1/4” hex hole in the process. I could still add a pocket clip to the Waiter, but there is no place to put a hex hole.View attachment 1892817View attachment 1892818
 
They’re 1/8 hardened stainless steel pivot barrels and 2-56 Torx screws. The tools must be drilled out to use these pivots.
Hi, I'm new here and I admire the clean work you show! I search ∅3mm × ~25mm, threaded M2 pivot barrels, please do you have an idea where to find this? Thanks much for your help..
 
Hi, I'm new here and I admire the clean work you show! I search ∅3mm × ~25mm, threaded M2 pivot barrels, please do you have an idea where to find this? Thanks much for your help..
Thanks for the compliments! The only producer of metric pivots that I know of is Denis (decustomforge) he is based in Russia. I was buying his pivots on Etsy but his shop was shut down due to the conflict in the Ukraine. You may be able to reach him on Instagram to place an order.
 
I have seen a few mods with G-10 liners, is it comon to make mods without any liners when using thicker G-10? How is the w&t with G-10 in that case?
 
Back
Top