SAK Mods! Post your pics, questions and ideas

I'm not aware that Victorinox ever actually had washers there. None of the older SAKs that I've taken apart had any washers. Maybe at some point they did use them, but I haven't seen it.
That´s just it, they don´t use washers. Instead they make pressouts in the aluminum liners that makes an extra space just like a washer would. The pressout is shaped to only be behind the tool and not behind the spring wich is a tad thicker than the tools.
I was wondering if any one have tried to do pressouts in brass, or if they use washers or other spacers when using G-10? On older knives (of any origin) I have never seen washers being used eather
There's a guy on youtube who does custom SAK builds for hire, and he's done several videos about how he assembles his SAKs. He uses g10 a lot and I am pretty sure he doesn't use any washers either. His sideplates are just flat g10 cutouts.

I think the real important functional difference between new style and old style sideplates is that the new ones are made to bow out more at the top. I'm honestly not sure why this was ever necessary in the first place because the tolerances seem forgiving enough that I'm not sure if it would really matter in most cases.

The funny part about me saying this is that I'm in a situation right now where having the sideplate bow out just a little bit more would be really helpful.
 
Last edited:
That´s just it, they don´t use washers. Instead they make pressouts in the aluminum liners that makes an extra space just like a washer would. The pressout is shaped to only be behind the tool and not behind the spring wich is a tad thicker than the tools.
I was wondering if any one have tried to do pressouts in brass, or if they use washers or other spacers when using G-10? On older knives (of any origin) I have never seen washers being used eather
I use Phosphor bronze washers a lot on custom builds. In my opinion it provides a smoother and much more fluid movement against custom scales.
 
Built one for my own collection today with a special set of scales.
lLDIg3A.jpg
 
What I'm thinking now is that I could take the round end of my ball peen hammer and strike that area of the sideplate to intentionally deform it. This might be tricky, and there's no guarantee that it won't affect the fit of the scale on that side or just be cancelled out by it.
I did this a few hours ago, tested how it worked, fiddled with it some more, and then peened the SAK. It actually appears to have solved the problem! I can't be 100% sure until I put the scales on, but my test scales didn't have any issues, so... 🤞

Just to be clear, there's this part of the backspring of the inline Phillips layer that sticks out above the hole for the back tools pivot. What I did was to hammer a small indentation into the sideplate next to that part of the backspring. When the SAK is assembled, the backspring pushes against the indentation in the sideplate, which causes the sideplate to bow out farther. This extra bowing in the sideplate creates a small gap between the top of the sideplate and the resting position of the inline Phillips driver. This gap is just big enough so that the inline Phillips no longer hits the sideplate when it closes.

It's fiddly work but it's not too dissimilar from how an auto body mechanic would shape a dented panel by creating a bunch of smaller dents in a controlled manner. If you do this, then go slow, use gentle taps with the round part of your ball peen hammer, and be prepared to straighten the liner out as you go, paying special attention along the bottom edge.

Built one for my own collection today with a special set of scales.
Did you anodize them yourself? I've always wanted to do that. Either way, I love the color. What do they call that? "Electric Blue"? Very nice. 👍
 
Have anyone who did their own liners try to imitate the way Victorinox does the press-out on the liner to exclude washers?
Does everyone even use washers when changing from the original liners, and if so, in what material?
Yes, sometimes out of necessity or for cosmetic reasons to close unwanted gaps. I’ve done aluminum, brass and nickel silver.

I don’t like the washers they use in 84mm Alox and often cut a Wenger-style spacer instead. The detail is much more professional and intentional looking than washers.
What I'm thinking now is that I could take the round end of my ball peen hammer and strike that area of the sideplate to intentionally deform it. This might be tricky, and there's no guarantee that it won't affect the fit of the scale on that side or just be cancelled out by it.
I’ve already suggested doing something similar…earlier in this thread.
 
I’ve already suggested doing something similar…earlier in this thread.
Not really, no. You suggested that I deform a liner to make room for a back side awl on a completely different SAK... instead of just filing the awl down to fit.
Modifying the front liner might be another way to accommodate the extra thickness. Use the awl like an automotive dolly and go to town like a dented fender with your ball peen hammer.
I felt that this was not a very good idea, and rejected it. I ended up just filing the awl down.

BTW this was not too long after I had already mentioned the following in an earlier post:
Still, if you have a ball peen hammer, a bent liner can be a fun lesson in how to reshape metal. Ask me how I know. :rolleyes: It's similar to how I've seen my uncle fix damaged auto body panels. You might be amazed what you can accomplish just by hitting something.
Kamakiri, I like you and I respect you, and your input has been valuable to me and is very much appreciated. But this feels a bit like you're trying give yourself credit where it isn't due. If that's not what you're doing then I apologize and I hope that I have not offended you.

You don't need the clout. Your knowledge and extensive experience already speak for themselves.
 
But this feels a bit like you're trying give yourself credit where it isn't due. If that's not what you're doing then I apologize and I hope that I have not offended you.
I see how that could come across that way. My apologies for that. Perhaps saying, “we already discussed similar solutions…”would have been more accurate? I hardly take offense at much..so no worries there. 👍

You don't need the clout. Your knowledge and extensive experience already speak for themselves.
Thanks for the kind comments, but I promise I wasn’t fishing for credit or compliments! I think my written ’tone’ is often or easily misunderstood. 🫤
 
I still cannot wait until my Wharnie Dfly is created, but until then have been satiating myself with other minor modifications.

Don't have a pic, but all the small 58mm white SAKs I have are all Escorts, great SAK, very slim, unnoticeable in pocket but I asked my girlfriend if she'd prefer a different toolset. She also likes the white Moomin scales, must get a pic, because she has a Moomnimama Recruit and Little My Escort - anyhow she prefers the nail-cleaner tip of the Princess to the SD tip, I then showed her a nail-tip Rambler and we were gonna go with that but we realzied she values scissors over the Rambler's main tool, so we made her an Emergency Classic with the Little My Moomin scales.

Decided to do the same with my Moominpapa - changed it from an Escort to Emergency Classic. Put maroon Terotuf scales on my Tinker Deluxe and burgundy micarta on my Ranger. Also put a lanyard and mini-driver on my Explorer, changed my Pharmacy Knife's back scale to Lortab instead of Cardizem (and made a flower/Cardizem Princess, will prob change that soon). The blue G10 Executive was nt made by me, but t'is a mod, and a very c ne at that, glad to have an extra Exec without such sentmental value as my fiance's grandfather's, which made me fall in love with 74mm.

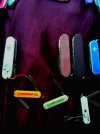
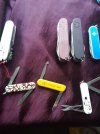
I'd like a Minichamp to do a scaleswap on! 20220926_123955.jpg


20220926_123101.jpg

Extra pic of some of my faves.
20220926_122638.jpg
 
spoon-01a.jpg

I built my own copy of the rare 2 layer Scientist. It's the smallest 91mm knife with a corkscrew and a Phillips. Factory made versions of this SAK sell for hundreds of dollars. I ordered some brand new scales to put on it and they just recently arrived.

spoon-01b.jpg

Here's a close-up shot of the small gap that I created in order to solve the common problem of the inline Phillips driver striking the sideplate.
there's this part of the backspring of the inline Phillips layer that sticks out above the hole for the back tools pivot. What I did was to hammer a small indentation into the sideplate next to that part of the backspring. When the SAK is assembled, the backspring pushes against the indentation in the sideplate, which causes the sideplate to bow out farther. This extra bowing in the sideplate creates a small gap between the top of the sideplate and the resting position of the inline Phillips driver. This gap is just big enough so that the inline Phillips no longer hits the sideplate when it closes.

spoon-02.jpg

I made this alox Rambler from an alox Classic SD and a celidor Jetsetter. The liner in the middle was a leftover piece from an old Minichamp that I disassembled a while ago. The pivots were cut from fresh stock of USA made K&S #9862 1.5mm brass rod. Check out those lovely rivets. I think I'm getting pretty decent at peening and I've even discovered a few neat little tricks.

spoon-03a.jpg

The autofocus would not cooperate when I was taking this picture. This is a knifeless build. It has two different versions of the metal file/saw. The first layer has an older style hardened fine file/saw with a combo can/bottle opener tool, and the second layer has a newer style coarse file/saw. The back tools are a Phillips head screwdriver and a small flat head "dolphin" screwdriver.

I named it the Urbanite because I think it sounds cool. :cool: You should theoretically be able to take it anywhere because it has no sharp edges.

spoon-03b.jpg

Here is a close-up of the layers. The SAK is temporarily fitted with test scales, so please ignore the spaces between the scales and the sideplates. The test scales are worn out from being added and removed from different SAKs too many times. Now they won't remain flush anymore unless you hold them down with your fingers.

The tolerances on this build are super tight. The liner and the spacer next to the combo tool both had to be filed down to allow the metal file to close all the way down where it should be. The file sits right on top of them. The metal file is also longer than the main blade that it is replacing, so the tip almost pokes over into the layer next to it. A small washer also had to be added between the file and the sideplate, since the file is thinner than the main blade.

When I tested this configuration, everything seemed to be working fine, so I cut the brass rods and began peening them. After both of the side pivots were peened, the file stopped closing properly. The file kept trying to close down on top of the combo tool. At this point I thought maybe the build was a failure, but I kept going anyway on a hunch. Sure enough, after the back tools pivot was fully peened, the problem resolved itself and the file began closing properly again. These custom SAK builds can sometimes be extremely fiddly. I think what happened was that the back pivot being tightened down pulled the sideplates tighter on the bottom, which made them open up a little on the top, which in turn took just the right amount of pressure off of the combo tool to keep it out of the path of the file. That's my theory and I'm sticking to it. :p


Also 🎉🥳.
 
OOPS! :oops: Forgot to post this one:
spoon-04a.jpg

https://www.sakwiki.com/tiki-index.php?page=GAK
It's literally the same tools, but in a smaller overall size. Oh, and that thing next to the key ring is a safety pin. I forgot it was there. 😅


I really like the two layer SAKs and I've enjoyed building these two layer customs, especially the Scientist. I think two layers is ideal for EDC. Three layers is pushing it, but can still be good. The Camper or the Super Tinker are great examples of decent 3 layer EDC SAKs. :cool:


spoon-03c.jpg

This is a hopefully better close-up shot of the layers of the Urbanite from my previous post. The actual final scales are installed in this image instead of the worn out test scales from the previous image. From top to bottom: combo tool, fine file, coarse file. Notice the gap between the base of the fine file and the sideplate? That's because of the small washer that I put there. Also take note of the difference in thickness between the fine file and the coarse file. That's important. The newer style coarse file is thicker than the old style fine file.

spoon-03d.jpg

I think this should be a better shot of all the tools opened. Left to right: fine file, "dolphin" small flat screwdriver, Phillips, screwdriver, combo tool, coarse file.

Something that I neglected to mention before was that because the space for the main blade is occupied by a tool that was never meant to be there (the fine file), the spring tension on the back Phillips is little low when it is fully opened. To solve this, the fine file needs to be opened to between 80-95 degrees, which will firmly lock the Phillips in place. I really mean it. Once that file is open, the Phillips driver will not budge at all. Aside from that one issue, all the tools have a good snappy feel to them. Even the Phillips has a nice opening and closing snap. :)


edit: I love the Urbanite and I have used it the most out of all the customs I've built, but I couldn't stop obsessing about the Phillips driver, so I finally gave in and took apart the back side pivot. My goal was to see if the Phillips issue could be fixed by making the pivot thicker, but what I discovered was that the backspring was actually causing the problem somehow. o_O Having the back pivot removed allowed me to also remove the backspring, and so I pulled that spring out and tested the Phillips with a different spring. I wasn't expecting anything to change, but the different spring made the Phillips driver issue go away. I don't know why. There doesn't appear to be any visual difference between the two springs. I really do not understand this, but the problem is fixed now. The new backspring is inserted and I peened a new back tools pivot in place of the old one, so the Urbanite is now fully reassembled and is working 100% like it should.

🤷‍♂️
 
Last edited:
spoon-01a.jpg

I built my own copy of the rare 2 layer Scientist. It's the smallest 91mm knife with a corkscrew and a Phillips. Factory made versions of this SAK sell for hundreds of dollars. I ordered some brand new scales to put on it and they just recently arrived.

spoon-01b.jpg

Here's a close-up shot of the small gap that I created in order to solve the common problem of the inline Phillips driver striking the sideplate.


spoon-02.jpg

I made this alox Rambler from an alox Classic SD and a celidor Jetsetter. The liner in the middle was a leftover piece from an old Minichamp that I disassembled a while ago. The pivots were cut from fresh stock of USA made K&S #9862 1.5mm brass rod. Check out those lovely rivets. I think I'm getting pretty decent at peening and I've even discovered a few neat little tricks.

spoon-03a.jpg

The autofocus would not cooperate when I was taking this picture. This is a knifeless build. It has two different versions of the metal file/saw. The first layer has an older style hardened fine file/saw with a combo can/bottle opener tool, and the second layer has a newer style coarse file/saw. The back tools are a Phillips head screwdriver and a small flat head "dolphin" screwdriver.

I named it the Urbanite because I think it sounds cool. :cool: You should theoretically be able to take it anywhere because it has no sharp edges.

spoon-03b.jpg

Here is a close-up of the layers. The SAK is temporarily fitted with test scales, so please ignore the spaces between the scales and the sideplates. The test scales are worn out from being added and removed from different SAKs too many times. Now they won't remain flush anymore unless you hold them down with your fingers.

The tolerances on this build are super tight. The liner and the spacer next to the combo tool both had to be filed down to allow the metal file to close all the way down where it should be. The file sits right on top of them. The metal file is also longer than the main blade that it is replacing, so the tip almost pokes over into the layer next to it. A small washer also had to be added between the file and the sideplate, since the file is thinner than the main blade.

When I tested this configuration, everything seemed to be working fine, so I cut the brass rods and began peening them. After both of the side pivots were peened, the file stopped closing properly. The file kept trying to close down on top of the combo tool. At this point I thought maybe the build was a failure, but I kept going anyway on a hunch. Sure enough, after the back tools pivot was fully peened, the problem resolved itself and the file began closing properly again. These custom SAK builds can sometimes be extremely fiddly. I think what happened was that the back pivot being tightened down pulled the sideplates tighter on the bottom, which made them open up a little on the top, which in turn took just the right amount of pressure off of the combo tool to keep it out of the path of the file. That's my theory and I'm sticking to it. :p


Also 🎉🥳.

OOPS! :oops: Forgot to post this one:
spoon-04a.jpg

It's literally the same tools, but in a smaller overall size. Oh, and that thing next to the key ring is a safety pin. I forgot it was there. 😅


spoon-03c.jpg

This is a hopefully better close-up shot of the layers of the Urbanite from my previous post. The actual final scales are installed in this image instead of the worn out test scales from the previous image. From top to bottom: combo tool, fine file, coarse file. Notice the gap between the base of the fine file and the sideplate? That's because of the small washer that I put there. Also take note of the difference in thickness between the fine file and the coarse file. That's important. The newer style coarse file is thicker than the old style fine file.

spoon-03d.jpg

I think this should be a better shot of all the tools opened. Left to right: fine file, "dolphin" small flat screwdriver, Phillips, screwdriver, combo tool, coarse file.

Something that I neglected to mention before was that because the space for the main blade is occupied by a tool that was never meant to be there (the fine file), the spring tension on the back Phillips is little low when it is fully opened. To solve this, the fine file needs to be opened to between 80-95 degrees, which will firmly lock the Phillips in place. I really mean it. Once that file is open, the Phillips driver will not budge at all. Aside from that one issue, all the tools have a good snappy feel to them. Even the Phillips has a nice opening and closing snap. :)


I really like the two layer SAKs and I've enjoyed building these two layer customs, especially the Scientist. I think two layers is ideal for EDC. Three layers is pushing it, but can still be good. The Camper or the Super Tinker are great examples of decent 3 layer EDC SAKs. :cool:
Awesome work! 👏 You’ve made some very cool pieces! I enjoy two layer SAKs the most as well. Thanks for sharing!
 
Almost forgot, I used some of the nylatron washers I got. I only put them against the outside brass liner and needed to cut them down a little so they wasn’t under the back springs
 
When I started making mods/build from SAK´s it was from Alox models. I liked that the tools was a little bit thicker, and the 92mm felt like a perfect size in hand. Lately I have made a few 85mm two layers with back tools. Sportsman and Tourist... I actually think the 85mm is a better pocket carry than the 91-92mm´s. The one I am currently working on is a Spartan, 91mm. If it turnes out well I will keep it, otherwise I will pass it on ;) Anyway, I have been experimenting with wood in different ways during my builds. I quite enjoy that part to. Colouring and doing different surface treatments and so on. My favorite so far is Smoked Oak. I just put a fresh piece of Oak in a air sealed bag with a cup of ammonia next to it over night, and it will turn in to a beautiful dark chocolate colour. And it will be dyed inside to, so no worries when sanding it down :) When I was moding Opinels I saw a guy who "fried" his knife in oil to make it water proof and not lock up when wet. Of course I had to try that ;) My Opinel handle twisted and broke... But the funny thing is that the wood turned black. Black like coal.
I have been experimenting with this a few times after that failure, and now I have found a good recepie :)
Boil in rapeseed oil until desired darkness, then drop the wood in a jar of Tung Oil until it is coled off (5 min). Then I put it in a vice to dry under some light pressure between two straight boards so it wont turn/bend. After it´s dried for a few hours it is super sealed and very nice to the touch. And it will take a great shine when polished.
On this Spartan buid I have boiled/fried some Pear-Wood. Since black stained Pear-Wood is often used to imitate Ebony I thought it would make for a good test to see if it would look like Ebony when fried black. I will post a pic of the final result, but so far it is looking fantastic :)
*I am thinking that this frying method could be applied to different woods with different result. Maybe I can make Olive wood look like Desert Ironwood?
 
Last edited:
Back
Top