Sheath WIP

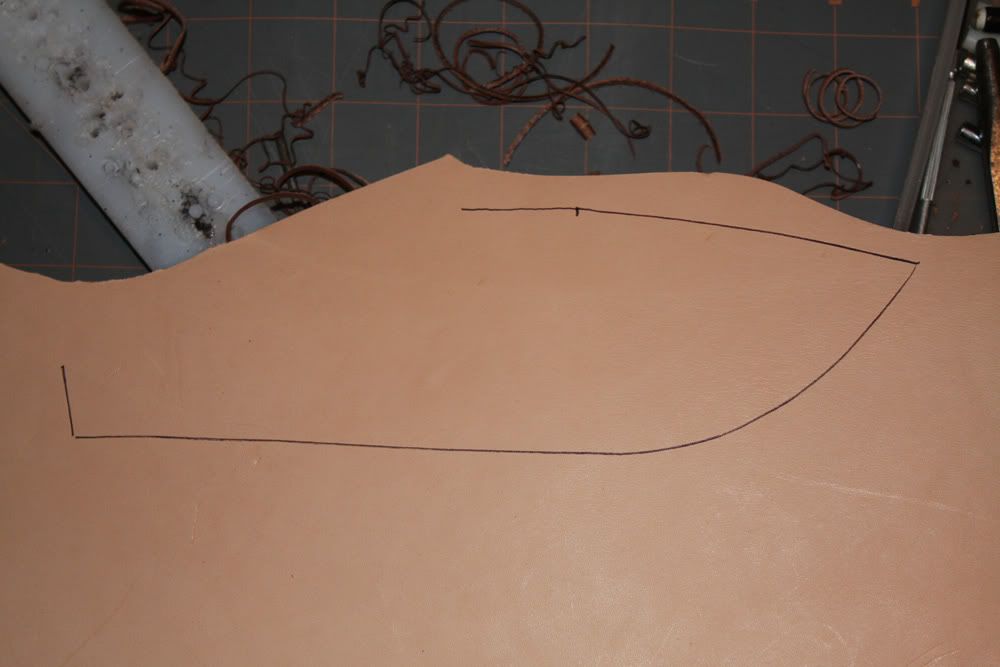
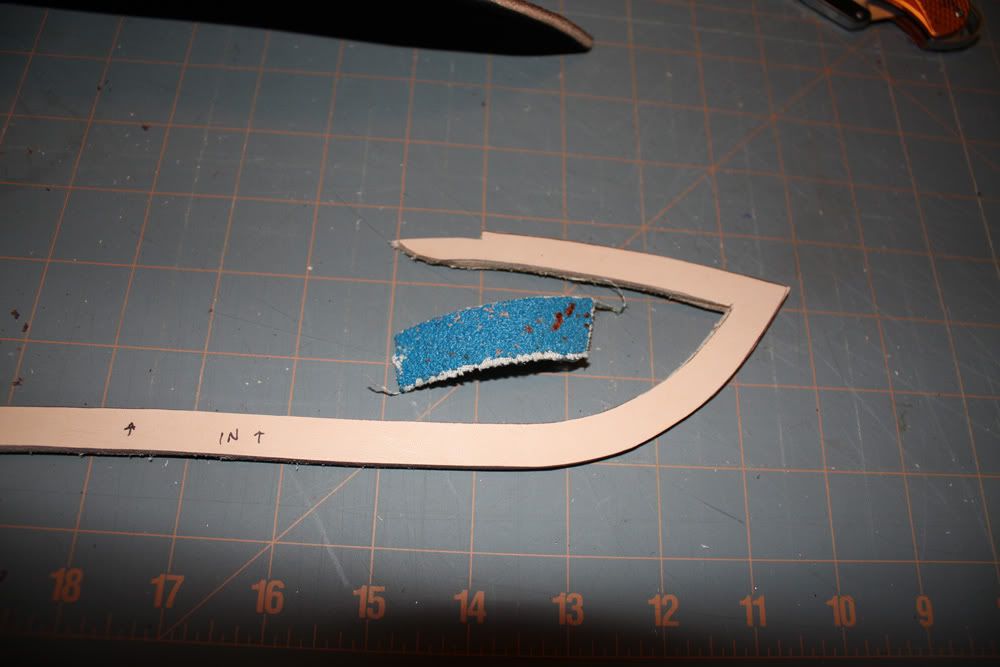
OK, here goes for the next section. It is time to make a welt. I have an old piece of leather that is not quite up to grade for a sheath, but is perfect for a welt. First I trace the sheath on the leather.
IMG_0546.jpg


Then I cut the outer line
IMG_0547.jpg


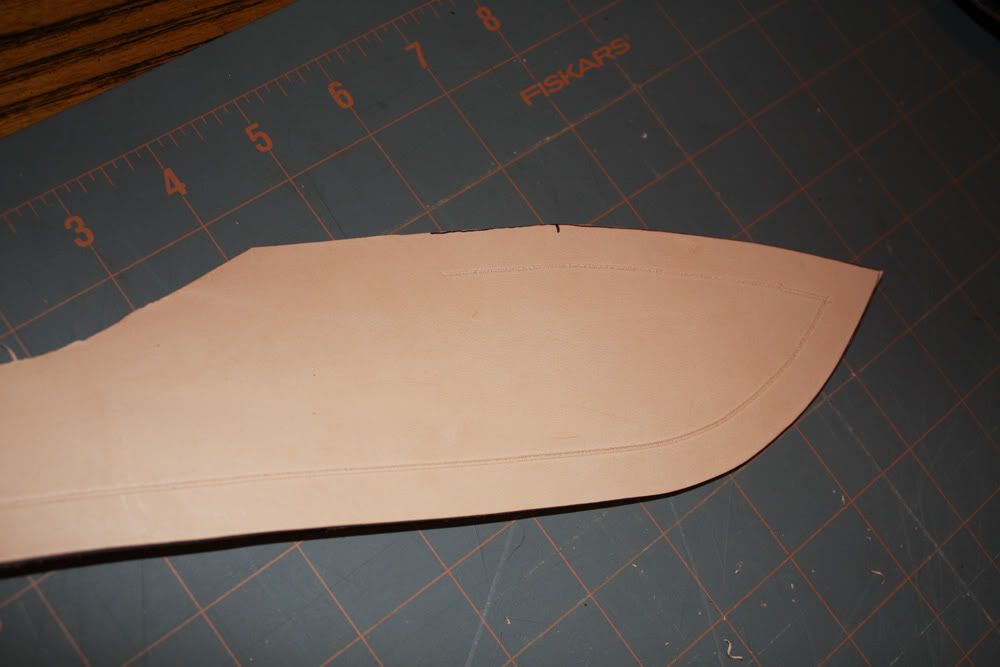
and highlight it with a thin sharpie so I can see the line
IMG_0548.jpg


Here it is all cut out
IMG_0549.jpg


and laid on the inside of the sheath for the first time.
IMG_0550.jpg


I noticed that on the inside of the top of the sheath, the leather never really matched up, and when I went to sand down the outside of the edge, I had to take a lot of leather off the sheath in order to meet up with the welt. I am not sure if this makes sense, but in order to counteract this, I cut a small piece of the leather out so that it sits tightly against the inside top of the sheath, and still meets up with the outer portion of the sheath...ok I just confused myself by that statement, but here is a pic, maybe that will help.
IMG_0551.jpg


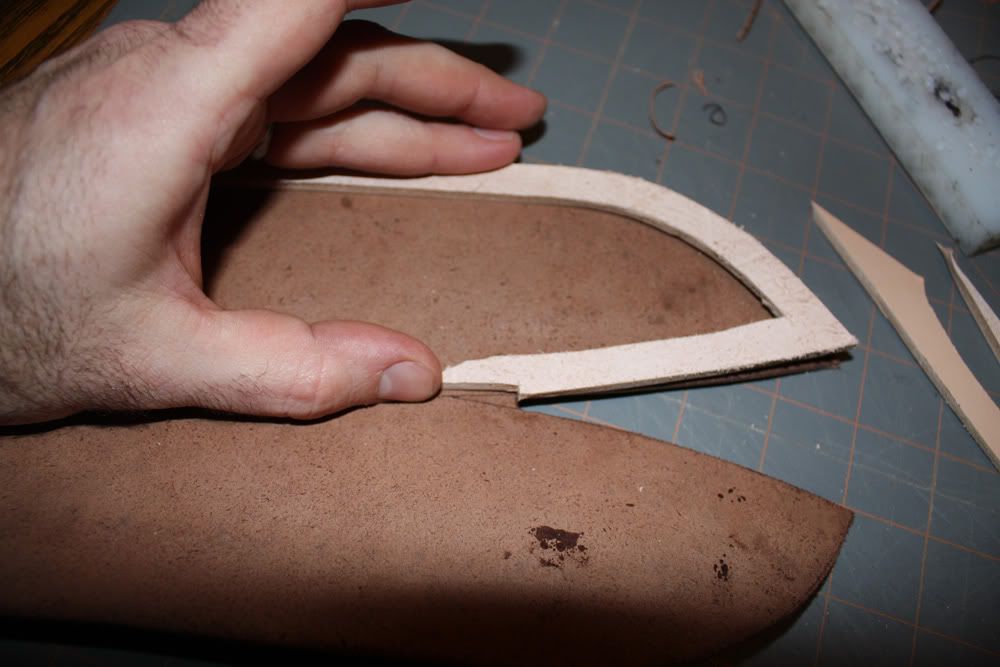
When I did it, the welt stuck out of the sheath a little, and I had to move the notch up a little to make it fit.
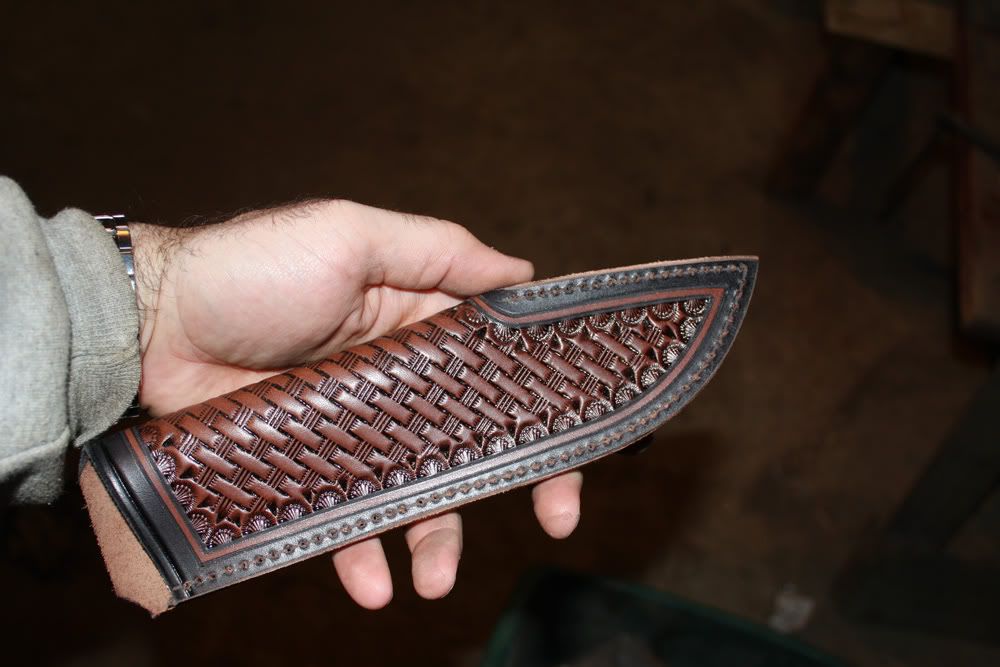
IMG_0556.jpg

IMG_0557.jpg


This looks better
IMG_0558.jpg


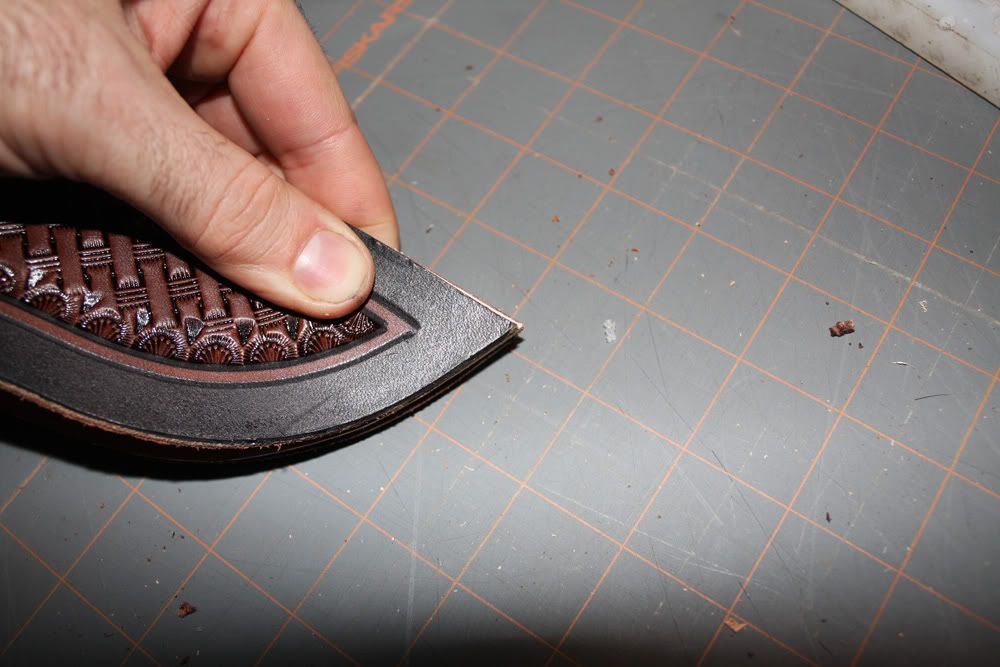
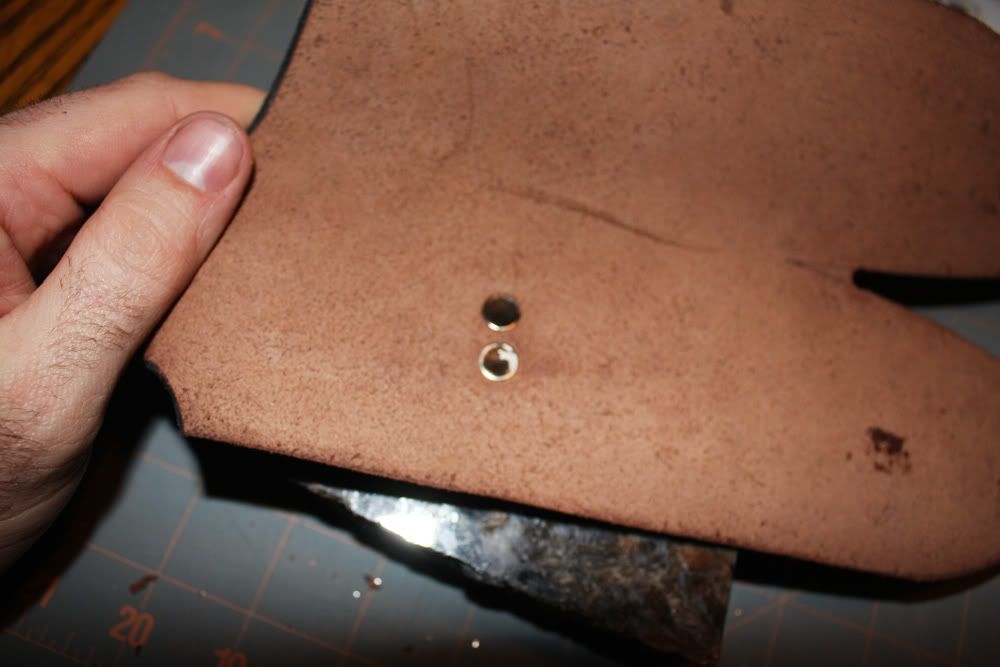
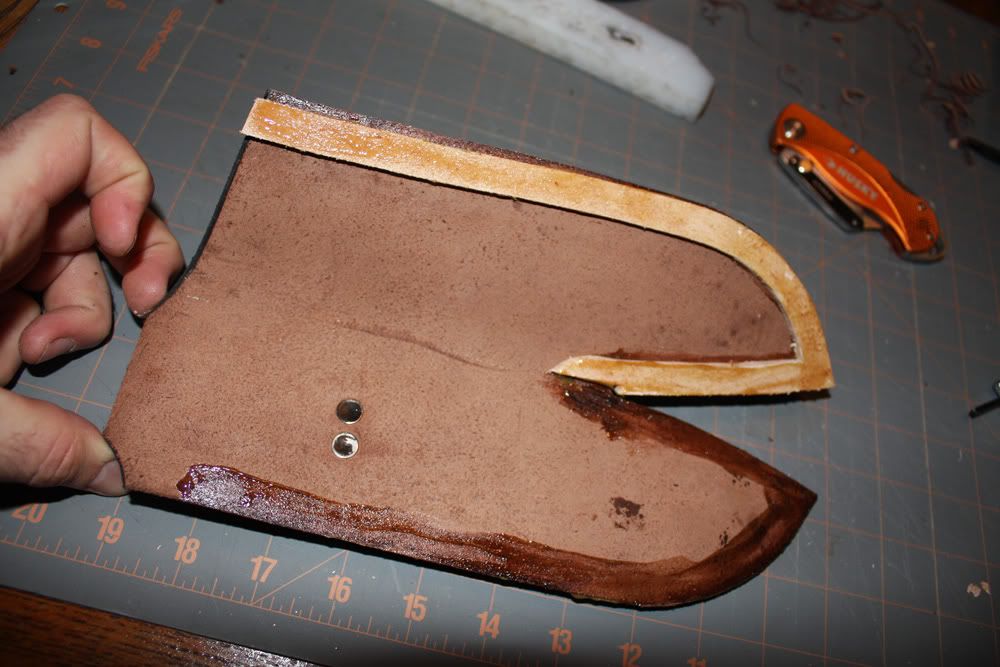
Here is where I am sure I will have the most eyebrows raised. I use rivets to hold the belt loop down. I know, I know...metal against the blade.
IMG_0553.jpg


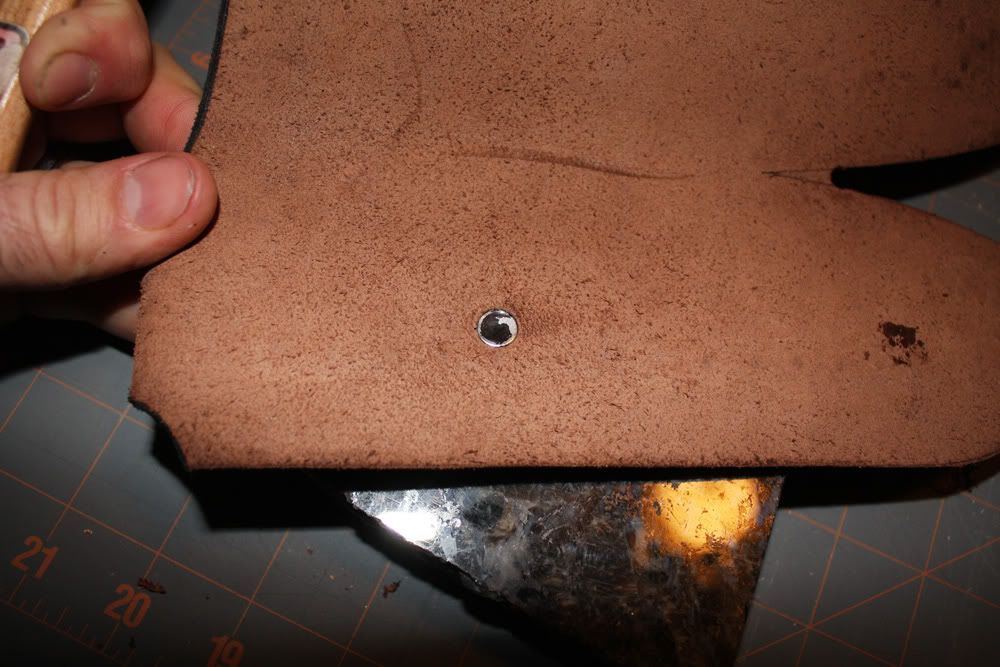
However, the hammer that I use has a convex face and when I pound the rivets from the inside, I put them a little recessed area just from pounding. I have never had a sheath returned to me or a knife for that matter because the rivets were marring the handle. Here is what I mean.
IMG_0552.jpg

IMG_0553.jpg

IMG_0554.jpg

IMG_0555.jpg


More in a bit...
 
Last edited:
Now is a good time to test fit it all. I use some small spring clamps and put the knife in. I am looking for it to fit in a little snug. It will stretch out a bit when the knife is shoved in it about a hundred times. It is actually a bit loose, so I just will move the welt in toward the back of the sheath a bit.
IMG_0559.jpg


I actually write it on the welt so I don't forget when I am getting ready to glue it up. I am not that old (only 37) but I still need these little reminders. I hope I am not losing it.
IMG_0563.jpg


I scrape it up a bit with a piece of belt that snapped on the first use. It works great for this and I have like 70 more inches to use.
IMG_0561.jpg


I have used barge cement in the past, and it works great...better than this stuff actually. However, I ran out of barge cement and had this waiting to be used, so I used it. It just takes a bit longer to get tacky, but holds like the dickens. The barge cement is just a bit faster.

IMG_0564.jpg


Here is the first side done. Notice I remembered to move the welt in a bit.
IMG_0566.jpg


I give it a few raps with my tooling mallet to set the bond. Paul Long uses a very nice smooth faced hammer, but I don't have one of those yet.
IMG_0567-1.jpg


As I wait for it to get tacky, I was attacked by a little sith lord.
IMG_0572-1.jpg

IMG_0571-1.jpg

(check out my bald left arm)
more in a bit.
 
Last edited:
Hey Matt,

That piece that is sticking out that you're having a problem with, would it help to skive the end of the welt? Can't tell from the pics if it has been done or not.
 
Ok, here is what it looks like so far. It is glued up and ready for a trip to the grinder to smooth it all out a bit.
IMG_0568.jpg


Here it is at the KMG
IMG_0573.jpg


After a bit of quick work, the edges are all smoothed up and ready to go. the black line is a decent guide for me and helps me keep my edges even.
IMG_0574.jpg


Once I get the edge all nice and smooth (use a high grit to burnish it a bit) I set the gouge to fit within the black, where I know the welt is.
IMG_0576.jpg


I use a stitching wheel... I think that is what it is called to set the spaces for the stitching holes.
IMG_0577.jpg


I am actually pretty proud of this. I noticed on good stitchers, that there is a guide that keeps the stitches the same distance from the edge. I made one for my drill press out of a piece of nylon.

Here it is
IMG_0578.jpg


and here is how it works.

IMG_0580.jpg


and here is the sheath after a few minutes of drilling.
IMG_0581.jpg


Now it is back inside for hand stitching...I can do it in front of the TV, so that makes it ok. If I had to do it in a quiet room, I would want to step in front of a bus.

Here are the tools. I made the stitching pony and have some artificial sinew. That stuff is incredibly strong, it will cut into your fingers before you can break it. I use a double needle saddle stitch. I also give the thread a single wrap between each stitch so there is a twist inside the hole of the sheath. I have had to remove stitches on a sheath in the past, and I had to individually cut each stitch.
IMG_0582.jpg

IMG_0583.jpg


Here it is all stitched up
IMG_0585.jpg
 
Thanks for the thread. Very informative.

My 6 year old son was looking over my shoulder as I read the thread and asked me what it was. I explained that it was a guy showing how he makes leather sheaths. His comment was, "A guy? His hands look like a girl." Wow, not sure where he got that because trust me, my wife's hands don't look like that. It gave me a good laugh as I had just read the comment about your hairy hands.

-Mike
 
Ok, time to dye the edge. Same black oil dye. I had used edge kote before, but it tended to bleed out if it became wet, even after it was treated.
IMG_0586.jpg


Then I trim and dye the inside of the welt, as far as I can see down there easily.
IMG_0587.jpg


Here is another area where I stray from the norm. I had a knife one time that would rust after just a few hours in a sheath. I don't really know why, but it did. I, at that point, started soaking the entire sheath in the sheen coating. It would coat all the leather, inside and out. This really stiffened it up and for some reason kept the knife from rusting. I have been doing it ever since.
IMG_0588.jpg


The bottle says satin sheen, but the actual satin sheen was too satin for me, and the super sheen was too shiny, so I mixed them about half and half and I really like the outcome.
I put them in a cheap home depot plastic shoe box and swish it around to coat all the surfaces.
IMG_0589.jpg


I then put it up on a piece of paper towel and lean it against the wall until it is dry enough to move to the dehydrator again.
IMG_0590.jpg


It is actually in there right now... I am going to take a few pics of my slicking the edges right now, and may try to get them uploaded later tonight, but it will probably happen tomorrow. The sheath is nearly done. All the rest is touch up.
 
Excellent! I never thought about soaking in the sheen finish. How well does the finish hold up? Is it prone to cracking?
 
It holds up well. The leather remains fairly stiff, but I have not had any problems with it cracking.

Here it is getting ready to slick the edge. It is a plastic slicker and a piece of brass rod. It works well, I make sure I round the edges as much as I can.
IMG_0591.jpg

IMG_0592.jpg


Now I am done... Here it is.

IMG_0593.jpg

IMG_0596.jpg


What do you think?

Hope it was helpful.

Matt
 
Way cool looking sheath, and an awesome knife. You've definitely given me some ideas, I normally detest leather work, but an going to have to try some of the things you did here.

Thanks
 
That is gorgeous.. The knife as well! It doesn't look like you need any more tips, but Chuck Burrows' DVD is also good.
 
Have you tried burnishing your edges before the application of the sheen dip? I think you could possibly get smoother, glassier edges before hand.

Either way, top notch work! :)
 
Nice work Matt, I do the same thing with my belt loops, recessing the rivet keeps it well away from the blade or handle. :thumbup:
 
Matt well done. I think I can actualy make a sheath now. Your a credit to your profesion Sir thank you. Now if you can do a tutorial on up loading pictures...
 
I realized that the picture I took of the edge was one I took before burnishing, I actually do a bit before the sheen dip, I put a real high grit belt on the grinder and allow it to burn the edges a bit, then the dip and then the hand burnishing. I didn't actually take any pictures of the finished edge.
 
Very cool WIP, Mr Bailey....

I am definately stealing that stitch guide block idea.

A few comments/questions.....

1. Do you stitchgroove the backside of the sheath before you drill the holes?

2. Do you run the stitching spacer wheel along the drilled holes to seat the channel for the thread?

3. I don't use a drill bit for the holes anymore. I use an oversized needle and run it at high rpm with a sharp tip. It "pushes" the hole open and the leather closes up on itself after time (quicker with your sheen soak). Give it a try. I think you will like it better.

Now you've got me thinking about that sheen soak. I wonder if I can use a warmed crockpot of the Eco-Flo Carnuba paste instead of beesxax.... hmmmmmm.... much less labour intensive.

Rick
 
I'm also curious about the feel of the sheath after the sheen dip...I like leather to feel like leather, some of those coatings when used excessively can feel like plastic.
 
Grizzly, it does make it quite stiff, although there is still some flex. If I happen to make it a bit too tight, I use the handle of my tooling hammer to shove down inside the sheath to loosen in up a bit. It will still bend and move if needed, but it is much more stiff than untreated leather. I had been concerned about that in the past also, but that one knife rusting every time I put it in the sheath changed my mind. I think the leather was pressed up against the steel and where ever the leather touched it rusted. (it was mid summer and quite humid) After treating in this way, the inside of the sheath was coated and it was not a problem.

Rick,
I cut a good groove on the front of the sheath, and lightly score it on the back, just to make sure that my holes are hitting where they should. After it is all drilled, I run the groover over the holes to clean up all the little leather burrs.
I have not run the stitching wheel over the holes to seat it...although it seems like a good idea. When I pull on the thread, I tug pretty hard and everything seats pretty well. I have callouses on the outsides of my pinky fingers from pulling on the thread. (cant wait to get that artisan)

Give the sheen a try. I used to use beeswax also, but I deep fried a couple sheaths once. Also, my wife got sick of beeswax drippings on the linoleum. The sheen is much easier and designed for leather.

When you use the oversized needle, how difficult is it to pull the stitching through? I am able to do the entire sheath without using a pair of pliers until I do my 4 backstitches at the end. I used a smaller bit once and had to use the pliers for every single stitch, which took forever.

Thanks for the comments everyone.
 
Back
Top