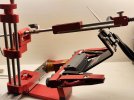
Happy Holidays everyone.
Between life, family, Holidays etc this post has been delayed a bit. I received a package from 777 Edge
with some upgrades/parts for the Toohr. I also ordered a few things to use with those parts, did some testing and reviewing.
In the interest of openness these things were provided to me free of charge with no requirements for a review etc. My thoughts on these items are my own and I will be giving both the good and bad that I found with these items.
The items he sent for the TooHR:

From left to right: Magnetic platform, 6" and 4" stone spacers, raising spacer for the clamp bar unit. Adapter for Hapstone Modules. Leading Edge magnetic platform with scissor attachment and the long/large knife attachment. Adapters for the Haptsone clamps.
Lets start off with the upgrades.
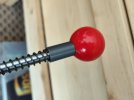
To install the stone spacers you unthread the handle, there is a nice brass threaded insert in there instead of just a thread in the plastic. Remove the nut and one of the springs. Use the long spacer and a short spring for the 4" stones or the long spring with short spacer for 6" stones.

I left the nut a few threads back and tightened the handle up to it

And how it looks with a stone in. The 6" spacer is slightly longer than the short spring it replaced. I noticed that it seems to need quite a bit of force to pull back the abrasive holder now. I have asked about it, perhaps my spring is different than his.

Next we install the spacer for the clamp bar unit. This allows you to rotate the bar without it hanging over the edge, or lifting it up, or having something under the feet.
Begin by turning the unit over so you can access the bottom. The screws you need are under the rubber foot. There are 3 of them. You can use the 4mm hex key to poke a hole over the screws and unscrew them, or use a knife to cut out the rubber over the hole. I personally just poked holes, removed the screws, and then cleaned up the holes after removing the screws.

Holes with 1 screw partially removed.

The cleaned up holes after I removed the screws. I just took a knife and ran it around the hole to cut the rubber away.

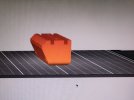
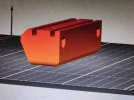
The spacer and where it sits. There are a few lips here so you need to make sure it is in the right orientation

The original removed screws and the longer screws that were sent with the spacer. You need to use the longer ones to install the spacer.

I did notice that there was a small gap when I test fit the spacer. Given that it was getting bigger towards the lip I sanded just a hair off of it and it sat flat. Not sure if there some slight differences between our units or maybe it was just sitting funny, or there was a tiny blob somewhere from printing.

Install and tighten the screws

And now it can rotate with lots of room

Next up is the magnetic platform. This one is actually magnetic unlike the one that comes with the unit. It is a bit narrower but longer. It just fits without going over the screw.

To remove the old one you just need to slip a utility blade under it and twist a bit and it should pop right off. It is some kind of glue that did not want to dissolve so I had to scrape mine off.

The new one has some adhesive on the black, just remove the paper label and stick it on. It is very sticky so make sure it is in the right place because you won't get a 2nd chance

Now an angle cube will actually stick

And that is enough for this post, I will get to the rest of the items in the following post(s)
Between life, family, Holidays etc this post has been delayed a bit. I received a package from
In the interest of openness these things were provided to me free of charge with no requirements for a review etc. My thoughts on these items are my own and I will be giving both the good and bad that I found with these items.
The items he sent for the TooHR:

From left to right: Magnetic platform, 6" and 4" stone spacers, raising spacer for the clamp bar unit. Adapter for Hapstone Modules. Leading Edge magnetic platform with scissor attachment and the long/large knife attachment. Adapters for the Haptsone clamps.
Lets start off with the upgrades.
To install the stone spacers you unthread the handle, there is a nice brass threaded insert in there instead of just a thread in the plastic. Remove the nut and one of the springs. Use the long spacer and a short spring for the 4" stones or the long spring with short spacer for 6" stones.

I left the nut a few threads back and tightened the handle up to it

And how it looks with a stone in. The 6" spacer is slightly longer than the short spring it replaced. I noticed that it seems to need quite a bit of force to pull back the abrasive holder now. I have asked about it, perhaps my spring is different than his.

Next we install the spacer for the clamp bar unit. This allows you to rotate the bar without it hanging over the edge, or lifting it up, or having something under the feet.
Begin by turning the unit over so you can access the bottom. The screws you need are under the rubber foot. There are 3 of them. You can use the 4mm hex key to poke a hole over the screws and unscrew them, or use a knife to cut out the rubber over the hole. I personally just poked holes, removed the screws, and then cleaned up the holes after removing the screws.

Holes with 1 screw partially removed.

The cleaned up holes after I removed the screws. I just took a knife and ran it around the hole to cut the rubber away.

The spacer and where it sits. There are a few lips here so you need to make sure it is in the right orientation

The original removed screws and the longer screws that were sent with the spacer. You need to use the longer ones to install the spacer.

I did notice that there was a small gap when I test fit the spacer. Given that it was getting bigger towards the lip I sanded just a hair off of it and it sat flat. Not sure if there some slight differences between our units or maybe it was just sitting funny, or there was a tiny blob somewhere from printing.

Install and tighten the screws

And now it can rotate with lots of room

Next up is the magnetic platform. This one is actually magnetic unlike the one that comes with the unit. It is a bit narrower but longer. It just fits without going over the screw.

To remove the old one you just need to slip a utility blade under it and twist a bit and it should pop right off. It is some kind of glue that did not want to dissolve so I had to scrape mine off.

The new one has some adhesive on the black, just remove the paper label and stick it on. It is very sticky so make sure it is in the right place because you won't get a 2nd chance

Now an angle cube will actually stick

And that is enough for this post, I will get to the rest of the items in the following post(s)
Last edited:


