Whacha Been Up To......

Thought I’d share a few holster pics that I’ve put together over the last couple years. All for my personal pistols..

uW2YPloh.jpg


cTULN3Ph.jpg

32fn2rbh.jpg


Todd
 
Those are really NICE holsters, and I do have a question that shows just how ignorant I am on making holsters. Is the piece of leather on the back side of holster smaller than the front side so all the shape forming is on the front allowing the back side to lay flat? It just seems the holster would wear better if back side laid flat with all shaping on front side. BUT - my lack of knowledge requires me to check on how and best way this is done. Thank ya'll for any comments and guidance.
Ken H>
Thanks for the kind words and a good question Ken.

Some folks do make them that way and fit the top to the bottom to give excess on the top for the gun. In fact some of the guys may have a holster foot for their Cobras, (I don't). This foot is designed basically to do that kind of sewing where they are sewing a pre molded top to the bottom which is flat. Unless you are working with premade parts I find this to be iffy.

I actually make the bottom a little bigger than the top (on Pancake style holsters), except at the top where the gun is and the bottom near the muzzle. These are the same size but the tabs and basically anywhere I'm sewing on the outside perimeter the bottom is larger than the top. It sews better that way. So when done you have basically a flat envelope. I finish the edges of the top and bottom where the gun is prior to sewing. So I wet mold the holster to the gun or to a Bluegun holster mold. After dunking I trim the excess off the bottom, sand the sewn edges and bevel them and punch the belt slots. I power rub the edges while damp to get a rounded shape and then I mold the gun. I do just a s much shaping and molding on the back as I do on the front and if its a tooled front, more. I also kind of shape the wings where the slots are down and to the rear. This helps with break in later. I'm basically pre curving those to the body. I do finish a molded holster in the oven, like I do a sheath. Hope this helps some.

We had a pretty good snow storm last night and so had a fire in the fireplace going. I've had numerous requests for a chest holster in the past and had always resisted that but lately I've been thinking on it. I've never actually seen one in person. So I put You Tube up on the big screen and was watching reviews on chest holsters. It was kind of funny cause a reason for a chest holster that many reviewers gave was a belt holster poking them or sticking them. Nichole wasn't really paying attention she was dinking around on her phone sitting in her slider in front of the fireplace. But she was paying enough attention that every time someone would say that, she'd say "They haven't worn one of yours", or "not yours", or "yours don't" Finally a guy said, ya know it doesn't interfere with a back pack and she was getting up at the moment and said "Thats the first thing somebody has said that made sense cause a belt holster doesn't have to bite ya if done right."

Thought I’d share a few holster pics that I’ve put together over the last couple years. All for my personal pistols..

uW2YPloh.jpg


cTULN3Ph.jpg

32fn2rbh.jpg


Todd
Very nice Todd! Whats the reason for the rivets by the belt loops on the bottom pic?
 
D Dave , Thanks for your detailed response. That method makes a LOT more sense for my equip. Seems like it really takes specialize equip to do the flat back properly. I've done that on a couple of pistol holsters where I used leather for back, and molded kydex for front.

I mounted a servo motor on the ShoePatcher sewing machine I've mentioned before. Turning the handcrank got old - I need both hands for sewing :) While it does sew with 207 thread, it seems more stable with 138 thread & #22 leather needle. Needs a bit more tweaking to get 207 thead stable.
 
Very nice Todd! Whats the reason for the rivets by the belt loops on the bottom pic?

Thanks Dave. The above holster is for an XDM 10mm. I have an XDM 9 and have used the same style of holster since 2017 for it and even carried it everyday for over a year. Those pistols are heavy enough that I have had some separation in that area of the holster. Seems after a fair bit of use the Barge wore out or broke free and the leather has a gap in it. It is 100% cosmetic and doesn't effect the function or integrity of the holster. I added the rivets on the 10mm holster just because of this small issue. I thought I'd like the looks of the rivets better than another stitch line. I don't mind the rivets but do think a tactfully places stitch line would look a bit better.

Here is the original XDM9 holster. It is still going strong after heavy use.

cT3Mu3Ah.jpg


Todd
 
D Dave , Thanks for your detailed response. That method makes a LOT more sense for my equip. Seems like it really takes specialize equip to do the flat back properly. I've done that on a couple of pistol holsters where I used leather for back, and molded kydex for front.

I mounted a servo motor on the ShoePatcher sewing machine I've mentioned before. Turning the handcrank got old - I need both hands for sewing :) While it does sew with 207 thread, it seems more stable with 138 thread & #22 leather needle. Needs a bit more tweaking to get 207 thead stable.
Good Ken glad that helped. Keep on keeping on with that stitcher!

Thanks Dave. The above holster is for an XDM 10mm. I have an XDM 9 and have used the same style of holster since 2017 for it and even carried it everyday for over a year. Those pistols are heavy enough that I have had some separation in that area of the holster. Seems after a fair bit of use the Barge wore out or broke free and the leather has a gap in it. It is 100% cosmetic and doesn't effect the function or integrity of the holster. I added the rivets on the 10mm holster just because of this small issue. I thought I'd like the looks of the rivets better than another stitch line. I don't mind the rivets but do think a tactfully places stitch line would look a bit better.

Here is the original XDM9 holster. It is still going strong after heavy use.

cT3Mu3Ah.jpg


Todd
Good deal Todd. That was my guess but I didn’t know if ya didn’t have something going on on the backside like a belt tunnel or something.
 
Some recents finished off this week:

I made another batch of Boot Sheaths. Last week I'd made four, put em on Instagram and sold six so I made seven more:

sx2Mhfr.jpg


When ya buy one of my In Stock knives it will come with a sheath. The customer always has the option of buying an additional sheath. This Cowboy Toothpick came with a Slotted sheath. The customer choose to have an additional Horizontal sheath made.

nw0J9y5.jpg


fPfXN2g.jpg


When they choose an additional sheath they get both sheaths sent to them with the knife:

NcYdVA9.jpg


9b6xtor.jpg


Built a Slotted Sheath for this Helle knife:

oUAS2mb.jpg


yr73Mou.jpg


A personalized Leatherman sheath, for a Curl:

dNajN6m.jpg


And a plain one for a Curl too:

epf3d6V.jpg


A Pancake for this damascus knife:

VSZg5zB.jpg


DtFdaSg.jpg


Our new neighbor talked me into my first ever dropper sheath:

HW2pMDU.jpg


He uses an industrial size safety pin to clip a sheath to the hammer loop of his Carhartt jeans:

LhiOLNb.jpg


Nichole has been tied up getting everything ready for our appointment with our accountant for our taxes, but she did do this IWB for a J frame:

gxG8t9P.jpg


We were out at the ranch last weekend before a big snow storm and she took this pic of her holster. She's worn this water buffalo overlay holster almnost daily for 2.5 years. She's pretty happy with how its aging:

SObg4Z6.jpg


While there we needed to shoot a few squirrels, her Henry .22:

yRQgeU6.jpg


Then the storm came Tuesday:

K6Y5dpC.jpg


And we've been out fixing broken pipes to water troughs etc yesterday and today from the freeze. Nights have been getting down into the teens. Whacha been up to?
 
Dave, I feel confident I can speak for all of us when I say every maker in the history of ever really admires how clean your work is man… dang….

Todd
Thank you Todd for the kind words.

got this Nathan the Machinist Nathan the Machinist dagger sheath design just about squared away. This'll by the final prototype so next step is production I guess

the DEK1 and dagger sheath here are going to the same place
2maF1to.jpg


D4Ldn3O.jpg


MoRJUDS.jpg


Xfevy9N.jpg


couple more DEK1 sheaths
Vul3c3b.jpg

Just better and better.
 
Not sure if anyone has had the same experience but for me learning to make knives was a gradual, and consistent learning process. For leatherwork it was a battle until that A'HAH! moment and then everything starts to improve almost immediately.

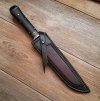
On another note I made my first inlay sheath recently, lessons learned and many improvements to be made on the next one but overall pleased with how this one came out.
IMG_20220222_140027_443-01.jpeg
 
Not sure if anyone has had the same experience but for me learning to make knives was a gradual, and consistent learning process. For leatherwork it was a battle until that A'HAH! moment and then everything starts to improve almost immediately.

On another note I made my first inlay sheath recently, lessons learned and many improvements to be made on the next one but overall pleased with how this one came out.
View attachment 1754283

John, that looks fantastic!

That “ah-ha!” Moment is the best. Haha. I’m sure there will be more for me. 😂
 
Not sure if anyone has had the same experience but for me learning to make knives was a gradual, and consistent learning process. For leatherwork it was a battle until that A'HAH! moment and then everything starts to improve almost immediately.

On another note I made my first inlay sheath recently, lessons learned and many improvements to be made on the next one but overall pleased with how this one came out.
View attachment 1754283
Maybe there are lessons but I believe it is a really nice first try at a difficult design to do well.
Randy
 
Thanks Randy I appreciate that. I had bought Paul Long's sheathmaker sheathmaker video years ago but never applied it, I re-watched it a few times. It helped me get the sequence of events down. There's a lot going on with that type of sheath isn't there. Challenging, enjoyable, and a learning experience, can't ask for more than that!
 
Back
Top