What's going on in your shop? Show us whats going on, and talk a bit about your work!

There's some really fancy stuff here, which makes me kind of embarrassed to even consider adding what's going on in my "shop"... but I will anyway.

I've had a slow year with having another kid and balancing family and work with garage time (which also entails maintenance of my dirt bikes, but their numbers are dwindling).

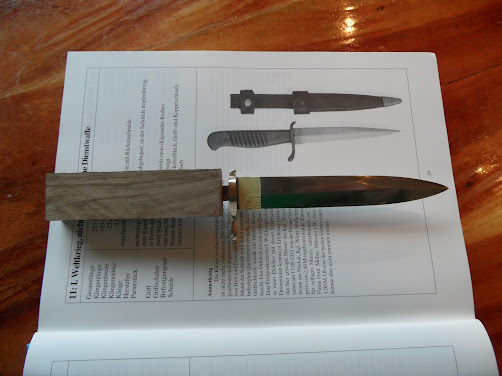
Anyway, I've just finished these out of O1 and G-10...

hatchets%20grinding-L.jpg


hatchetspresharpen-L.jpg


1381708_10202268082807449_1121755085_n.jpg


They're all sold (which are the first things I've ever sold), which is kind of awesome. I didn't make much, if anything off of them. At this point, that isn't as important as making enough money to make more and learn.

I have these back from heat treat now also. There are 27 of them. So that should give me some time on the grinder to practice. Well, that is after I replace the bearings in the idler wheel on my Coote grinder since one of them is bad.

1236536_10201945207495768_1126399604_n.jpg


Other than family and work, one of my biggest issues is finishing knives I've got in line to be made. I work midnights and spend a lot of time drawing designs between calls and get super excited about the new designs when I have a pile of older designs that need to be ground and finished. I spend more time making mock ups and testing new handle designs than actually building knives it seems.

Anyway, that's an unimportant and meager shop update from a new guy that still has a ton to learn.
 
I'll play. I don't post enough pics of my work here.


Canned W's with scalloped Micarta scales (totally different style than I usually do):

IMG_1029%255B1%255D.JPG


My usual style, 200 layer random "lattice" pattern, with fossil walrus artifact handle and wrought iron guard (needs to be shaped, obviously):

IMG_1011%255B1%255D.JPG


Ultralight Titanium Self Sharpening, Industrially(Electro Arc Spark Depositor $$$$) Carbidized "Field Scapels", these weigh ~12g with a kydex sheath, I'm big in the UL scene:

IMG_0993%255B2%255D.JPG
 
Last edited:
That is sweet! What steel is that?

Looks like it would be an awesome "pencil" hold carver for detail work. Especially with a more acute tip. I *suppose* it would work for utility too. :D

That is exactly the use I have in mind. The shape is a bit experimental since I´ve never done anything like that.
The steel is Niolox, a stuborn stainless with Niobium(Germanium?) It takes a fine edge.
The wood is a blackwood pen blank I had laying ariound. I love the contrast and wouldn´t mind larger blocks with spint like that
 
Ultralight Titanium Self Sharpening, Industrially(Electro Arc Spark Depositor $$$$) Carbidized "Field Scapels", these weigh ~12g with a kydex sheath, I'm big in the UL scene:

IMG_0993%255B2%255D.JPG
Love the handle wrap.
Can you show us how you do that?
 
Working on a WW1 trench knife. Not a true replica, bronce guard and hidden tang opposed to steel and full tang.
Firt time making such a 3D shaped guard and it was a lot more work then I imagined.
Also ordered some brass black for the guard wich will also be a first.

SAM_1257.JPG

SAM_1258.JPG

SAM_1261.JPG
 
That is exactly the use I have in mind. The shape is a bit experimental since I´ve never done anything like that.
The steel is Niolox, a stuborn stainless with Niobium(Germanium?) It takes a fine edge.
The wood is a blackwood pen blank I had laying ariound. I love the contrast and wouldn´t mind larger blocks with spint like that

Also has wear resistance similar to d2. I wonder how easy it is to maintain with a strop.

I have knives (carvers) with sheepsfoot style blades, and some with blades shaped more like an x-acto. For a pencil grip held knife I'd much prefer the latter. Make a bigger handled knife with a sheepsfoot for hogging wood and you'd have a nice set. The wood looks really nice.

Let me know if you ever decide to make some carving knives to sell.
 
Nothing as fine and fancy as the rest of you are showing, but here goes a very brief WIP of the knife I just finished for the kith entry-

7l7ddrn.jpg


UlfyluM.jpg


RZrIVNR.jpg


g3BrsYt.jpg


70pbGHb.jpg


...and my meager set up-

F97Zebz.jpg


Thanks for looking,
Chris
 

7 and 3 1/4 inch chopper after three quenches


new work bench. all i had before was the metal bench lol. built in bevel guide.


a steel masonry bucket that i bought to use for quenching so i could heat the oil in it but i now use it for a heat buffer in my paragon kiln


how it sits in the kiln


it doubles as a kiln stand and triples as a decarber, i grab the handle using pliers and with another set of pliers i hold the masonry bucket in place and pull the knife out quickly this removes about 90 percent of the decarb.
 
Vacuum forming a leather sheath. I used to work leather as a hobby when I was a teenager, wish I would have had this back then. Beats sitting there and poking at it with a stick for a half hour. :D

(should have just cut the stupid zipper off, would have sealed up better. I usually keep roll plastic on hand)
nVv8vlN.jpg


GYhsqjW.jpg

Ian, I think we need to see some more photos of your shop! Your aerospace background in combo with the photos you just posted makes me think it's going to be pretty awesome to see!
 
Thats what I do when I can to form leather. Its so much easier. Ive only got a cheesy setup with the handheld guy and the bags but it still works pretty good. Like you said a ton easier. Plus you can do a quick forming of it while its under vacuum just to add anything.
 
Vacuum forming a leather sheath. I used to work leather as a hobby when I was a teenager, wish I would have had this back then. Beats sitting there and poking at it with a stick for a half hour. :D

(should have just cut the stupid zipper off, would have sealed up better. I usually keep roll plastic on hand)
nVv8vlN.jpg


GYhsqjW.jpg

I would have never thought of that. I have a vacuum pump. I will have to dig it out and try this!!!!
 
Vacuum forming a leather sheath. I used to work leather as a hobby when I was a teenager, wish I would have had this back then. Beats sitting there and poking at it with a stick for a half hour. :D

(should have just cut the stupid zipper off, would have sealed up better. I usually keep roll plastic on hand)
nVv8vlN.jpg


GYhsqjW.jpg

What in the world? Is that kydex over a piece of leather? Man that's a good idea.
Wet the leather, cover it with kydex, seal in bag, and turn on the compressor?
Where is that tube taped off to? The leather?
 
Vacuum forming a leather sheath. I used to work leather as a hobby when I was a teenager, wish I would have had this back then. Beats sitting there and poking at it with a stick for a half hour. :D

(should have just cut the stupid zipper off, would have sealed up better. I usually keep roll plastic on hand)
nVv8vlN.jpg


GYhsqjW.jpg

I think I just found a new use for my Foodsaver!
 
I got a vacuum pump from my days wanting to try to stabilize my own handle material that is collecting dust. I might give this a try. Thanks.
 
Aaron, I'll see if I can snap a few shots next time I have it picked up. ;)


The black stuff isn't kydex, does kinda look like that though. It is a thin sheet of soft closed cell foam. It isn't the only thing that will work, just what I have on hand. It does work fairly well though. It helps to distribute the force and keeps the leather from being marked by any creasing in the plastic.

The stack is a few sheets of cardboard, the knife, the leather, the foam. I don't get the leather quite as soft as you would for regular molding, tto help prevent creasing. I use hot water, but not boiling, until after the leather feels a bit slimy, but before the edges start to curl (like with hand molding). It is still fairly pliable though. I pat dry just to keep from drenching the cardboard.

The tube is just stuck next to the handle so it doesn't suck up the bag. Normally it is good to use something like fleece or a piece of rope to help distribute the vacuum, but the cardboard will do that job as long as you place the tube so it can't grab the bag. Normally you use plastic sheeting and a little pop-in fitting for the hose.

After molding I gently dried it with a heat gun on low, to harden the leather and help keep it from collapsing later.


aDq2YCV.jpg
 
Last edited:
Back
Top