What's going on in your shop? Show us whats going on, and talk a bit about your work!

I'm working on a frame handled hunter. CM154 blade, blued mild steel guard and fileworked frame. Stainless liners for contrast. Sambar. Gonna be sweet :) I'm taking pictures as I go for a WIP, but I'm not going to stop and process most of the pics until I'm done with the whole sequence, so y'all have to wait. Sorry :) Here's a teaser pic. Blade is ground and ready for hand sanding. Frame is roughed in fairly close with holes drilled for guide pins. Some pins are 1/16 mostly for alignment, while a few others are 1/8, mostly for hidden pin strength in the stag. I left the tips of the frame a little long until final fitup. There will be a guard in there like the drawing.

photo-1-e1387598551324.jpg


One legitimate tip that you can see from this pic. If you are into drawing good scale plans, or even if you're not, make a few copies on a copy machine. That way you can cut out parts and superglue them to your flat stock as a template.

What I have also figured out tonight is that variable speed with fine grit belts is frickin awesome. Take a 220 then 400 AO belt down to a crawl and you can get a ricasso that looks hand sanded but stays square.
 
Last edited:
I got the blower from Kayne and Son. They really push the air. The forge is running good had no problem getting up to 2300 degrees and would have went more. I have a thermocouple and pid hooked up and it is nice to be able to watch the temps. Anyhow here are a couple of pics of it running today. I welded a billet in it. It is nice to be back making steel. Thanks again Don and all who provided advise. -Burton

forge-burning.jpg
forge-burning-2.jpg
 
Last edited:
Not a whole lot has been going on in my shop for quite some time... but I'm working diligently on changing that. I've been spending a lot of time cleaning the shop and getting ready to get it set back up for some actual work. For the last 2 years my garage has been dedicated completely to the restoration of an old british roadster, but I'm at the point now where I can finally reclaim my garage for work space.... well, most of it anyways. I need to have a car in the other half =D

My main goal right now is to make room for everything that needs to go down there. I've been working on getting some real tools, so that I can actually do work on the car and on knives and other projects. No actual finished projects have come out of my shop in years ! I really need to change that...

This morning I took a sledge hammer to my piece of @#%@% harbor freight metal cutting bandsaw before hauling it to the scrap yard. It was very satisfying =) I've replaced it with this Miller Falls power hacksaw, and it's way better and way faster at cutting bar stock

millerfallssaw.jpg


I just picked up this cute little bench top surface grinder, an old Builder's Iron Foundry surface grinder. I need to re-make the motor mount because the current one is jurryrigged, and the motor is actually on the wrong side of the upright. I plan on using this to get stuff 'flat' and taking off fire scale for damascus but not for anything precise, so it suits my purpose well.

buildersironfoundry.jpg


I recently picked up this drill press and got it all running and setup, a big old Prentice Bros. camelback drill with auto-feed, this thing can punch holes in some serious metal, it's awesome!

prenticedrill.jpg


I still need to make a whole bunch more space however, because I've got a few more machines that should be coming over this winter. First up is the brother to my drill press, a Prentice Bros. metal working lathe, which will need a dedicated 6'x3' space. Along with the lathe, from the same fellow, I plan on picking up this Garvin mill, with vertical head. We're waiting until the new mill he's got coming in arrives , then I'll pay him and we'll move both the lathe and mill to my shop at the same time. It's not very far to move them, quite literally about 300 yards or less, but they're big and heavy, and my driveway is a steep hill !

prenticelathe.jpg

mill.jpg


And last but not least... to really get me back into the swing of things, I'm looking at a 50# Little Giant power hammer this weekend. I'm hoping that will be the 'umph' that I need to start making my own damascus and start making the blades that I really want to make... Namely, my next big project is going to be re-creating as they were new all of the viking axes and seaxes in my collection of ancient artifacts. Starting with a gorgeous pattern welded viking seax from the 8th or 9th century.
 
Thats alot of very nice machinery. I really like that baby surface grinder. Its a neat little guy and useful I imagine.

You wouldnt happen to have pics of your collection would you.
 
Thats alot of very nice machinery. I really like that baby surface grinder. Its a neat little guy and useful I imagine.

You wouldnt happen to have pics of your collection would you.

Speaking of the Little giant, this doesn't look like much yet, but it's what's going to be my hammer, I've decided that I will be buying it after looking at it today and talking with the owner We're going to do the rebuilding and assembly up at his shop though later this winter =) He's already got the tooling and jigs to do most of the work that needs to be done, and to make new top and bottom dies, etc.

DSCN1750.JPG


My collection of viking artifacts can be found at the link below

http://www.tharkis.com/images/viking/thumbs.py
 
image.jpgimage.jpg
Here is a small EDC that I just got the handle glued up on. Also a hunter I'm building with curly maple that I dyed and stabilized myself. Just put the 2nd coat of true oil on it this evening.
Jim
 
Thanks Justin. Just be careful, once he sees it all redone may not wanna let you pick it up :D

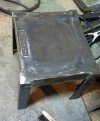
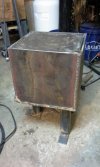
Well gotta put some time in on the anvil stand I am making. The top plate is a 2" thick piece of steel from somewhere. Made a box below it that is filled with sand. The legs are as well.

Made a error with the direction of angle of the two back feet. They were suppose to be angled at a diagonal to the front but screwed up and did them straight out at a 90. So gotta add some support brackets probably some triangles coming off of them to even up the support. Total it probably weighs around 200lbs. Still got to grind up the corners to make them nice, weld on the top trim to seal in the sand once its topped off, weld on the hold down bracket for the anvil. Oh and some tool holders as well. Then silicone bed the anvil on top. Cant wait to give it a try.

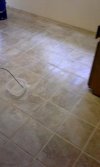
Oh and a shot of the kitchen floor, pulled the lenolium and laid tile down. Turned out pretty good considering.

019.jpg023.jpg009.jpg
 
Just recieved these from Aldo (The Baron) he's got his water jet running!

Filets in Aeb-l and CPM 154 CM

 
no, that's my template my design, I make a lot of filets and this will help speed things up for me. This are just cut, now i'll need to put the bevels in and send off to heat treat before finishing.
 
no, that's my template my design, I make a lot of filets and this will help speed things up for me. This are just cut, now i'll need to put the bevels in and send off to heat treat before finishing.

Very cool! Those look great!

I've built a few filet knives from crappyish Chinese blanks, and would like to make some better quality ones, but haven't found a good source.
 
Nice blade Jim.

Well got my stand done today. Pain in the butt however this is the most solid thing that I have ever put a anvil on. No vibration or ring or bouncing at all. Tomorrow I will get to put it to the real test hopefully. The rebound was good on my sodofors before, now its pretty amazing.

anvil stand 001.jpganvil stand 004.jpg
 
I just finished up some last minute Christmas gifts for the people that need to try harder to make the list next year. You know, the "knife" list. :D

I had purchased the key rings and eye screws at the hobby shop. I capped the tines(left over from antler handles) with mycarta and corion.

RSVs3zh.jpg


Chris
 
Those are pretty cool, good idea. Ive gotta make some of those. My dog usually gets the left over antlers or they get used for edge retention testing.
 
Super last minute Xmas delivery, gonna drop this one off in the morning. A good friend wanted something with his dad's initials inlaid into the handle. I thought it would be fun to try a wire inlay in sterling silver.

1XWerOD.jpg
 
Super last minute Xmas delivery, gonna drop this one off in the morning. A good friend wanted something with his dad's initials inlaid into the handle. I thought it would be fun to try a wire inlay in sterling silver.

1XWerOD.jpg

Nice work Ian.

I am sure he will be thrilled!
 
Salolan, I love the key rings. This kitchen utility went to it new home for christmas. That leaves two santoku style knives to finish today. And some key rings. ;)
kitchenutility2.jpg
 
Back
Top