What's going on in your shop? Show us whats going on, and talk a bit about your work!

I tried the China wheel (14") on my KMG ... I can not complain. This is just an initial grinding, but the almost total absence of vibration makes me very hopeful!

Nice I'm hoping to get a 10in next month or in Jan.

Stark that razor is beauty man. Killer work


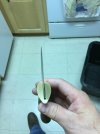
20171030_200322.jpg
 
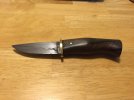
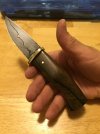
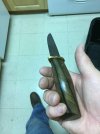
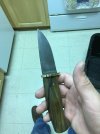
This is a knife with faults to be sure, but I'm pretty proud of how it turned out...

It started as part of a 1084/15n20 billet of Damascus I was trying to forge but the first weld only partially took, so I decided to try to make something from it! The handle is a wood from Belize that I can't remember the name of. Brass guard and pin.

IMG_0235.JPG

IMG_0236.JPG

IMG_0237.JPG

IMG_0238.JPG

IMG_0239.JPG


So firsts on this one:
Forge welding, stick tang, partial tang, sculpted handle. (I thought it was my first fitted guard, but I did one before.)

Critiques please!
Here's what I notice: spine near the guard dips towards the blade, back of the handle seems to rise from the guard, flow isn't the best. Pin is too far forward, handle is too fat. grind lines aren't matching, grind lines touch the spine. Delamination on the blade. Blade layers are asymmetrical.

I'm sure there is more... please tell me what you think I need to work on the most!
 
On knives like that I would typically have the guard flush with the sides and top of the handle. Personally I find a washer guard to look a bit out of place on something like that.
 
On knives like that I would typically have the guard flush with the sides and top of the handle. Personally I find a washer guard to look a bit out of place on something like that.

I can see that, I wasn't really quite sure what I was going for with the whole thing. I think maybe planning things out a bit more would be good! Lol!
 
Josh those are gorgeous Man!
Well this is the furthest I've gotten with a knife. Never been happy enough to send them to HT. Idk how well this one will turn out. But it's hand sanded up to 400grit. Now I'm gonna send it off to JT for HT.
ahwYgBQ.jpg

ahwYgBQ.jpg
 
I finally received my mini mill. This will definitely come in handy!

XUdATp8.jpg
Did that Mill come with a cover for the Hole on the "Y" axis you don't want any SWARF chewing up the Lead Screw or damaging the ways. You can always make one or order one but keep that hole covered.
 
If the blank is ready glue it on and back together. I'd use g systems for the scales and liners but try to keep it out of the break, then use super glue there.
 
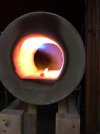
I have been working on an epic forge build... Basically two, nearly-identical forges that can be ran separately or be butted together to make a fiver burner monster forge. I spent a lot of time considering designs, and choose a pipe style propane forge. The Forge One (the first part of the forge) has two burners that are orientated so that they create a swirl of flame inside the chamber. My previous home built forge had the burners pointed directly at the work and caused uneven heating. The new design addresses this, and now I have a gradient heat range in the chamber with diffused heat (not more hot/cool spots yay!). My only gripe is that with venturi burners, it is hard to get down to a low enough temperature. I guess that's a better problem than losing too much heat!

Here it is on the first firing. Right now I am blocking off the orifices with soft bricks, but I am currently working on some legitimate doors.

Let me know if you have any questions about this build!

forgeone.jpg
 
If the blank is ready glue it on and back together. I'd use g systems for the scales and liners but try to keep it out of the break, then use super glue there.
The thought crossed my mind, but I won't ship a knife with a broken scale. Also, this knife will have removable scales that are only sealed with silicon, not epoxied. I'll just make another set of scales.
 
Back
Top